The MITe App Job Aid


Go to: MiTE App video
Summary
This Job Aid covers:
This Job Aid supports all Technician audiences.
MITe Overview

The Maintenance and Installation Tool for Viasat (MITe) app was developed to improve the quality of our Modem and gateway installs and service calls by improving the point and peak process, and reducing the time it takes to install or troubleshoot a customer’s service.
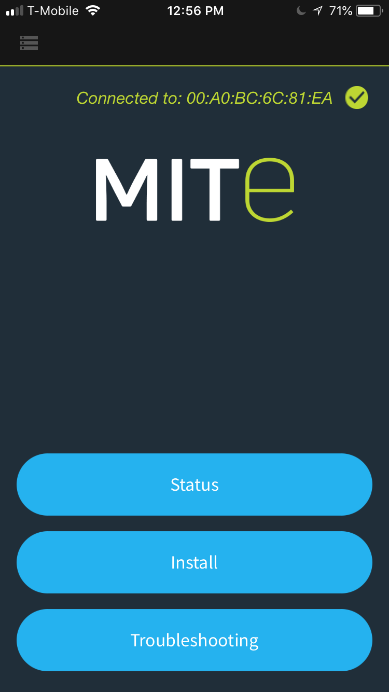
The App has three modes:
- Status Mode
- Install Mode
- Troubleshooting Mode
Downloading MITe
MITe is available from three locations: the Apple Store, Google Play, and the Apps page of the eGuide. Access these sites from your Apple or Android device, and search for “Viasat MITe”.
Installing MITe
Apple devices must use iOS 7.x or greater, and may be used on an iPhone, iPad, or iTouch. Android devices must use Jelly Bean (4.x) or greater.
Follow the download and installation steps required for your device. As with any app, some data usage occurs.
Selecting a Portable Wireless Router
For the Status and Install modes, as well as the Diagnose option of the Troubleshooting mode, MITe requires a wireless connection to the SurfBeam 2 modem, via a portable wireless router that you must supply. The Technician is not allowed to connect to the SurfBeam 2 modem via the Customer’s wireless network, so the Technician must ask the Customer to power down and disconnect any routers from the modem before proceeding.
While any portable wireless router should connect to the modem, we have worked with these routers during our field-testing:
- NETGEAR N600 WNDR3400
- Trendnet TEW-654TR
Connecting to the Modem
Before using MITe in the field, we strongly recommend that the Technician practice connecting their router to a SurfBeam 2 modem, and then connecting MITe to the modem.
Follow the router’s instructions for setting up a wireless network, and connecting to the SurfBeam 2 modem. After configuring the wireless network correctly, connect the device to the network as you would any other network (For example, use the Settings app on iOS, and choose WiFi).
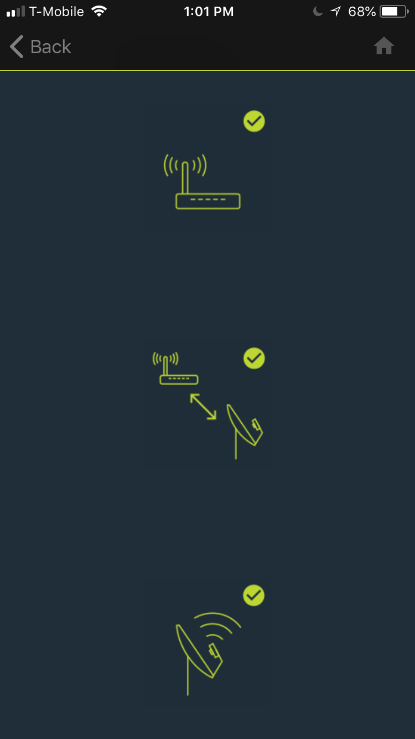
This is how you know whether MITe is connected to the modem.

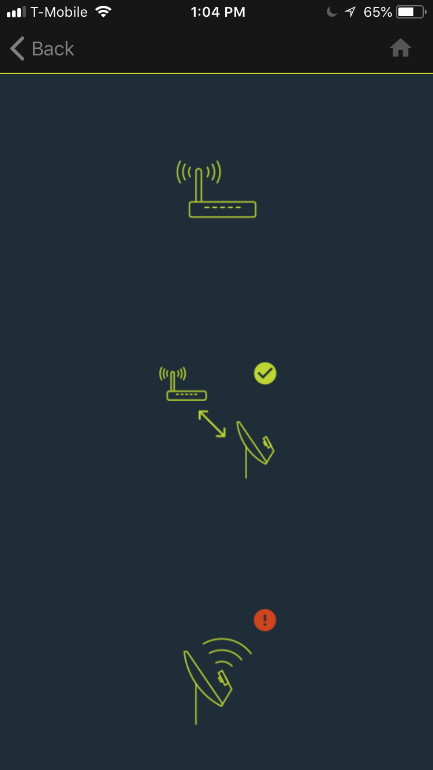
Green Check = Connected to Modem
Red Exclamation = Not connected to Modem
MITe Menu
The Menu button (top right corner, 3 parallel lines) provides three sub-menus.

Help – Provides a brief description of how the app’s primary modes perform.
About – Provides the copyright information and version number of the app.
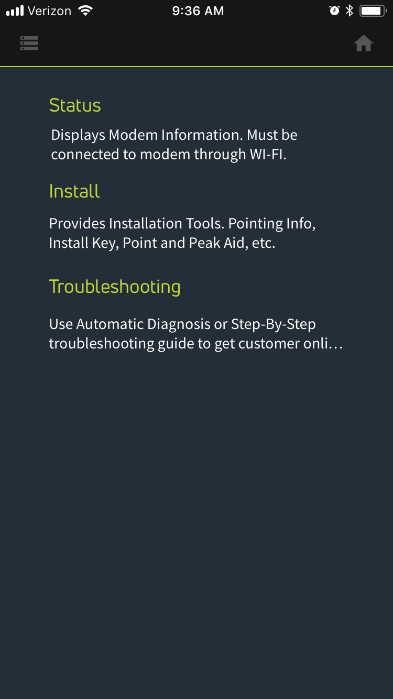

Status Mode
The Status Mode provides information about the connection status for both the modem/gateway and TRIAs.
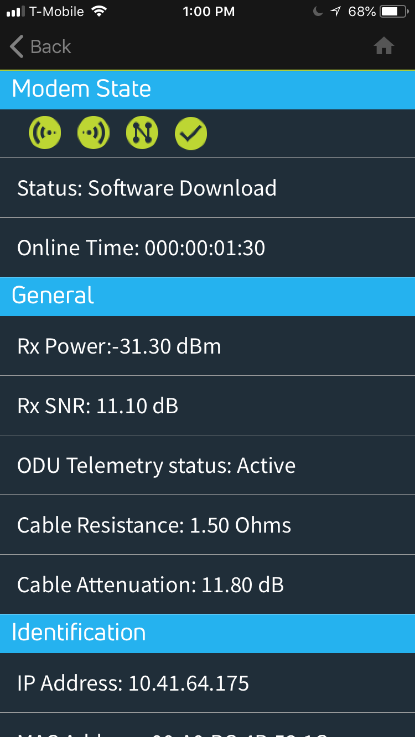
Tapping the Modem icon changes to the Modem/IFL Status page, and provides similar information as the Modem Browser Interface (MBI).
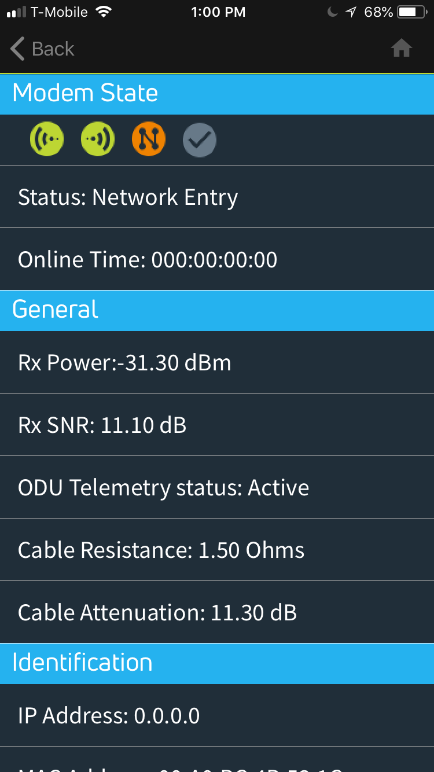
As with the MBI, the Modem icon in MITe shows the progression from Scanning, Syncing, Ranging, Ranged, Network Entry, DHCP, and Online in the Status line during Modem Lock.
As with the MBI, the Status Mode can show error status. For example, if TRIA icon shows an exclamation mark, or the progression of the Modem Lock indicators stops at any status, use MITe’s Troubleshooting Mode to begin resolving the issues.
Install Mode
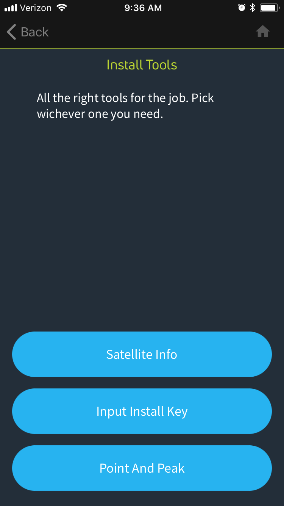
MITe improves the Point and Peak process with its Install Mode, which assists the Technician at the antenna site, so no more running into the building to check the MBI at the computer! The Install Mode has three tools:
- Pointing Info
- Inputting the Modem Key
- Point and Peak
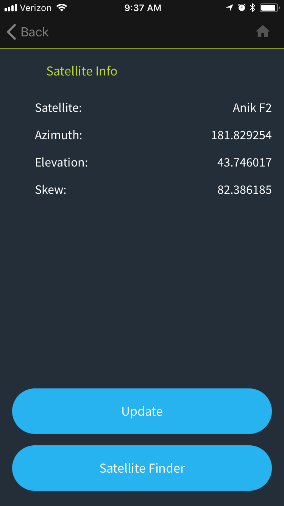
Pointing Info
The app uses the device’s GPS coordinates to find these settings; however, it uses True North, rather than Magnetic North. Typically, the Azimuth values that are given are +/- 10°, so confirm all values with what is offered on the work order.
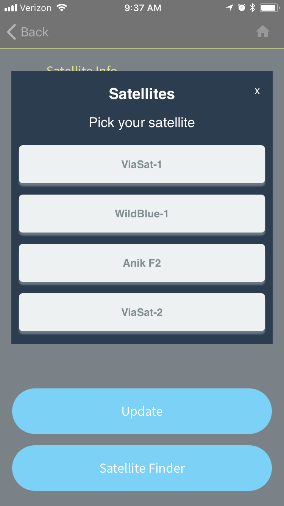
Follow these steps to retrieve the Pointing Info
Confirm that your device’s GPS or Location Services are enabled.
From the Install Home page in the MITe app, tap Pointing Info.
Tap the satellite listed on the work order.
Wait for the values to appear.
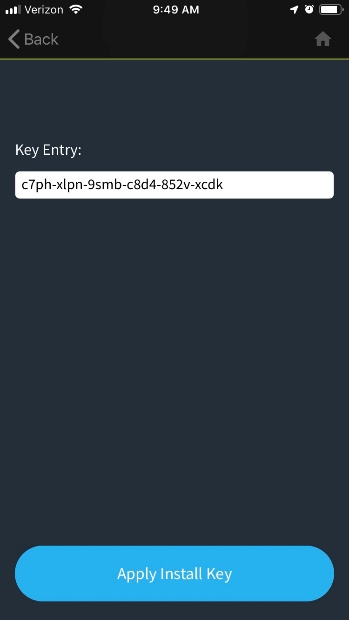
Inputting the Install Key
The Install Key is also known as the Modem Key and is used to put the modem into its Install Mode.
Tap the Input Install Key button from the Install Home page.
On the Modem Key page, use the device’s keyboard to tap the modem key as found on the work order.
Tap Apply Install Key to enter Install Mode.

Point and Peak
The SNR Gauge provides a real time, visual indication of signal quality during Point and Peak. This is similar to the RxSNR blue bar/black line gauge that appears in the MBI.
If using this screen during an installation, the modem must be in Install Mode before this screen can provide feedback; however, it may be used to check the SNR of an online modem at any time, such as during a service call.
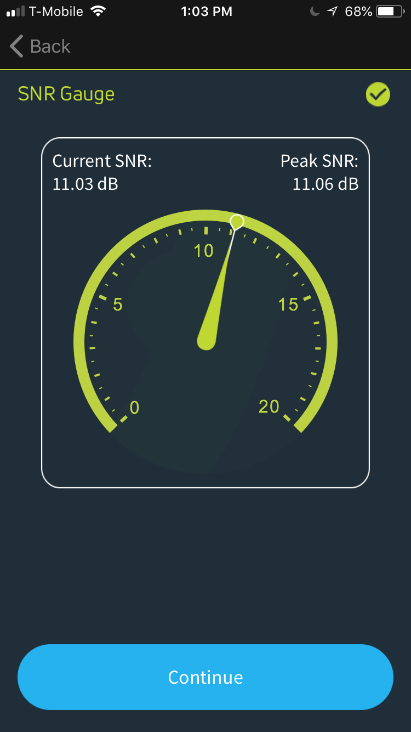
Follow these steps to use this gauge during Point and Peak.
With the modem in Install mode, confirm that the Point Elevation step is complete.
Point the Azimuth using the 3-sweep Point and Peak process, point the Azimuth.
Peak the Azimuth and Elevation using the 3-sweep Point and Peak process. Observe the SNR Gauge during these steps, and adjust the sweeps to maximize the readings at the bottom of the gauge.
After obtaining the final peak, tap the back arrow at the top left corner to return to the Install Home page.
Tap the Exit Install button to move the process to Modem Lock.
Troubleshooting Mode
MITe reduces the time spent, as well as the complexity of, troubleshooting both an online or offline modem.
The Troubleshooting mode provides two options for troubleshooting, Diagnose and Step-by-Step.

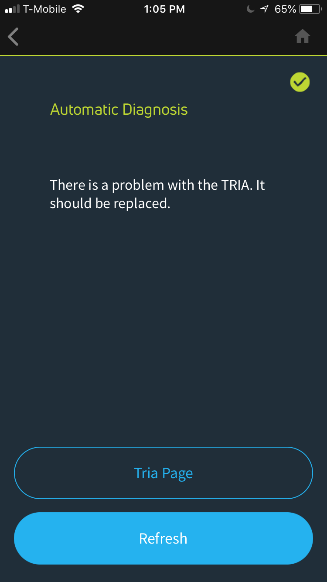
Diagnose
Diagnose is an automatic option that follows the standard troubleshooting process. This mode requires that your wireless router be connected to the modem (and MITe connected to the wireless network). This mode may be used with both an online and an offline modem. The app presents you with the next actionable step.
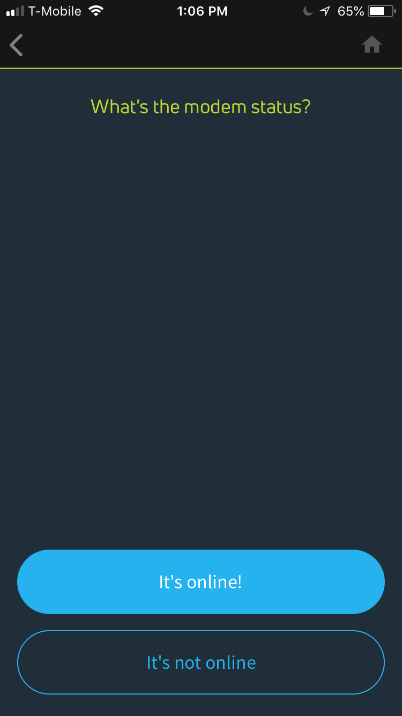
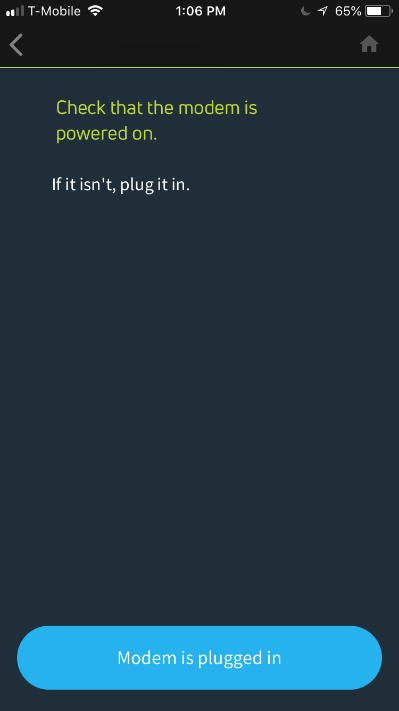
Step-by-Step – Step
Step-by-Step is a manual option that is like having the SurfBeam 2 Trouble Isolation Check Sheet in your device. MITe asks a series of questions, and then presents actionable steps, depending on answers for each question. Since this is a manual option, MITe does not require a connection to the modem to use this mode.
Complete each step until the problem is resolved, or all steps are completed and the issue requires escalation.