Identifying Unassigned Orders in FSM Job Aid
Unassigned Orders Button
Unassigned Orders is a quick link that dispatchers can use to pull up all work orders currently with no technician assigned.
This link will allow dispatchers to quickly identify what work orders need to be assigned.
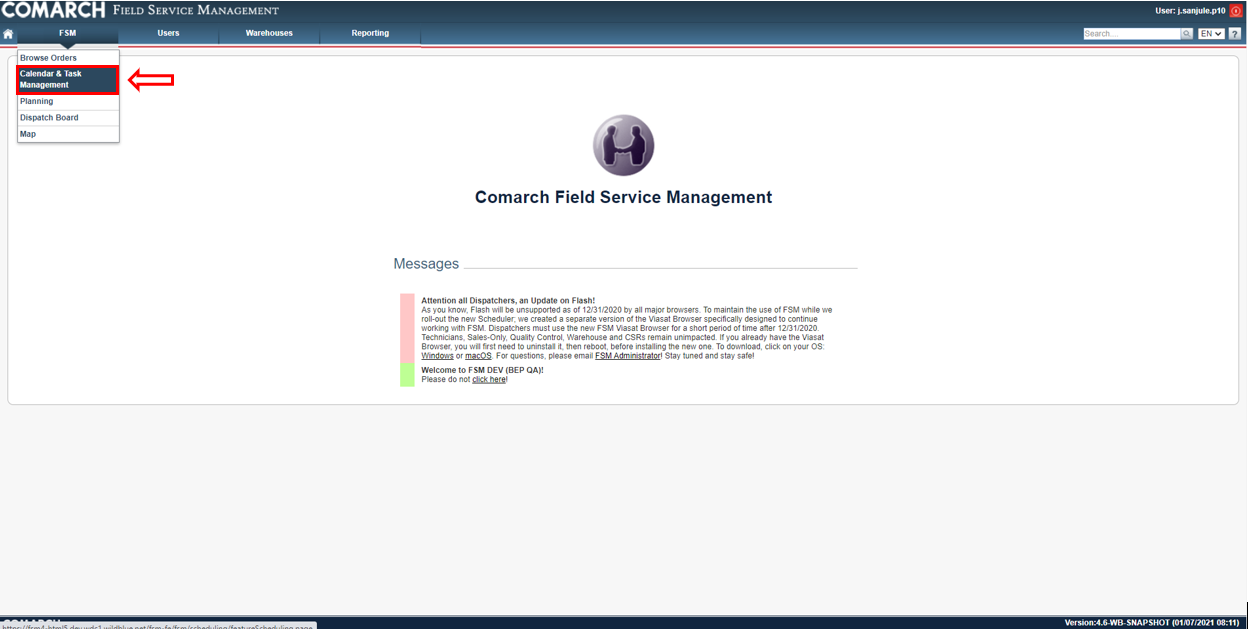
Hover over the FSM Button
Highlight Calendar & Task Management and click select:
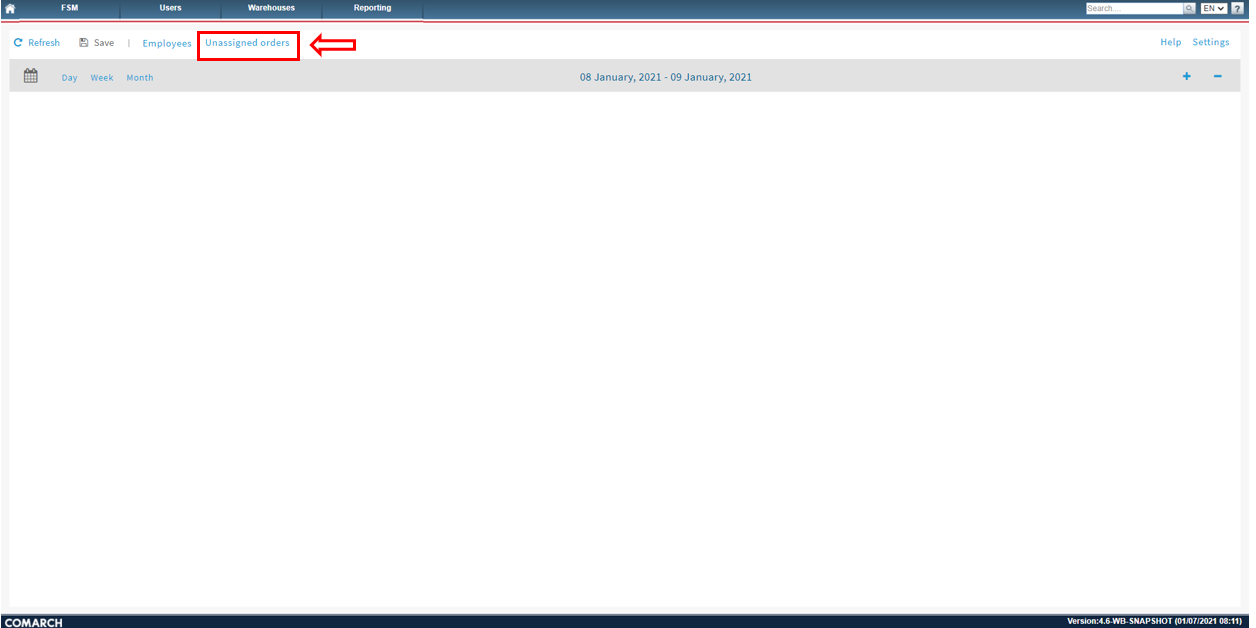
Click Unassigned Orders:
The Unassigned orders pop-up will appear on the right. This list will default to display oldest work orders to newest work orders:
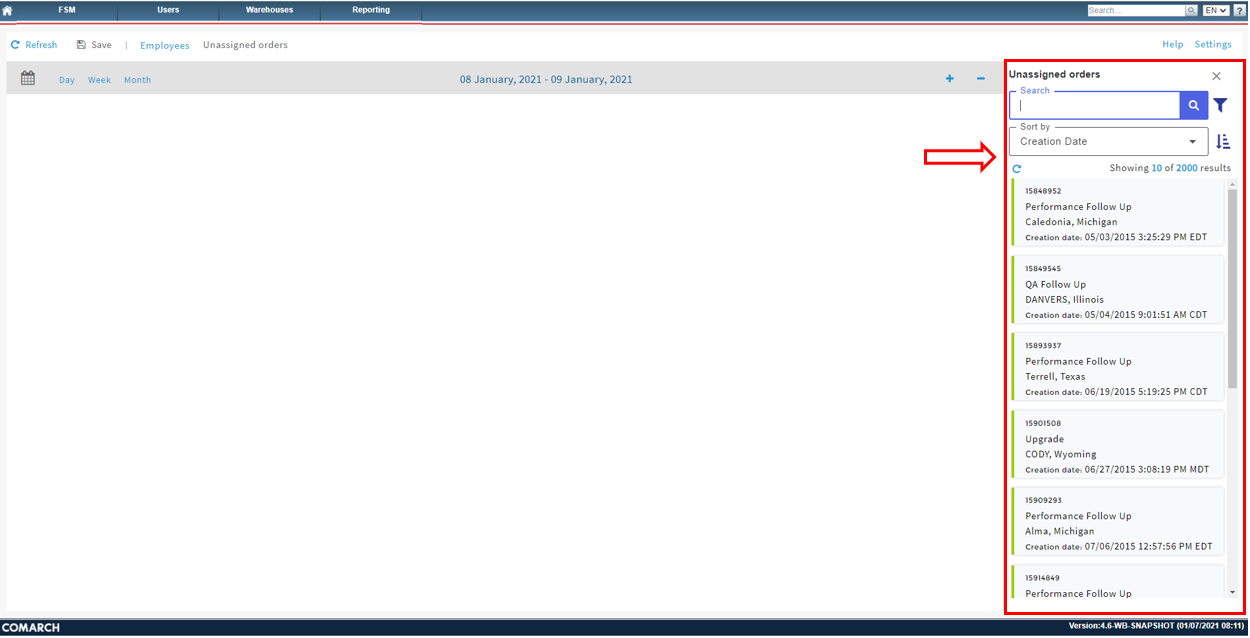
The Search feature can be used to manually search by FSM ID.
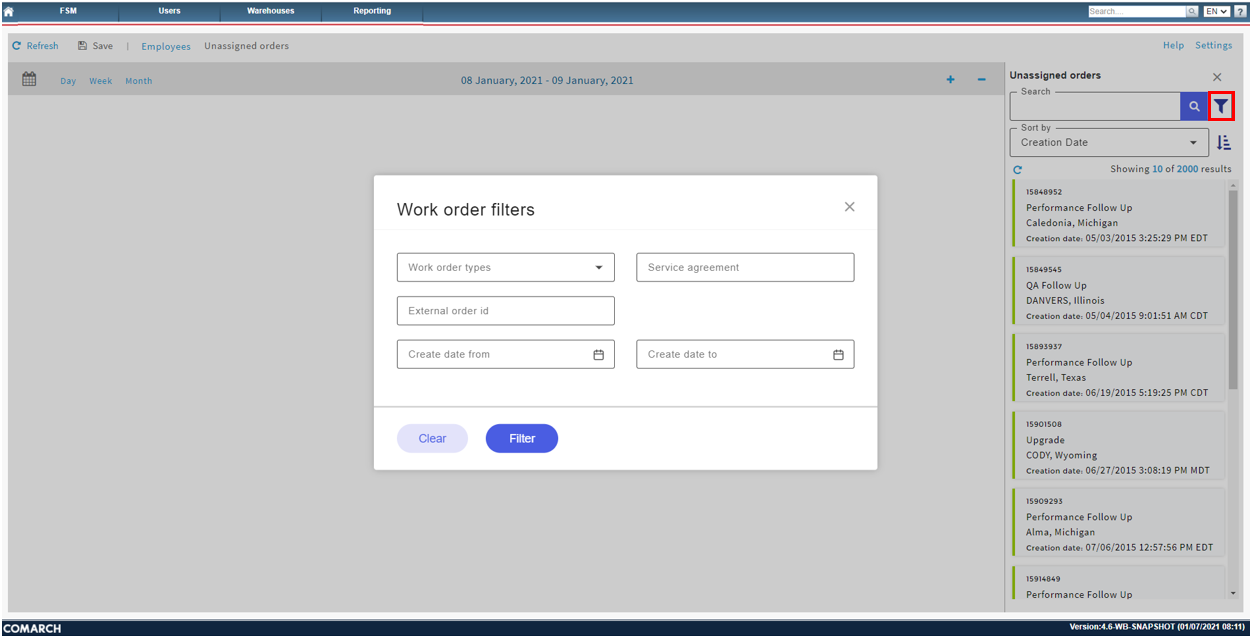
Next to the search button there is the Work order filters button. This filter will allow the user to customize the search results for Unassigned orders.
Work order type filter can be used to search for specific work order types.
The Create date from/Create date to fields can allow the search to only display work orders within the given time range.
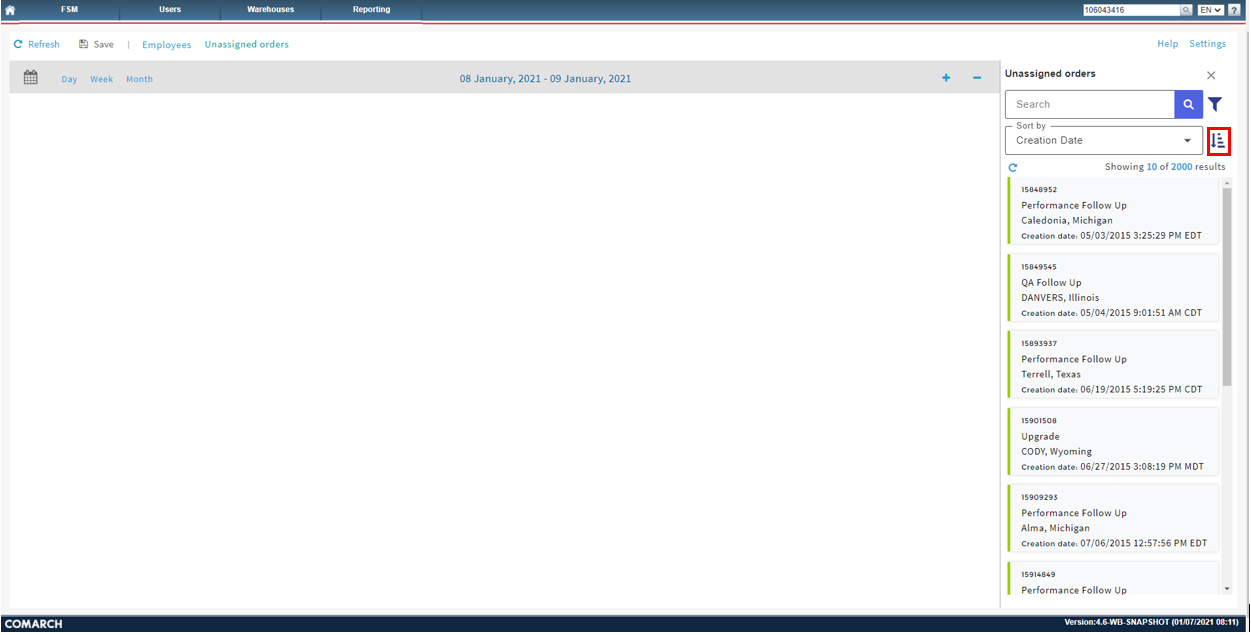
The Sort by drop down will allow the user to sort by Creation Date or FSM ID. The Default setting will display Oldest work orders to newest. This can be switched to display Newest Work orders to oldest using the icon next to the Sort by dropdown:
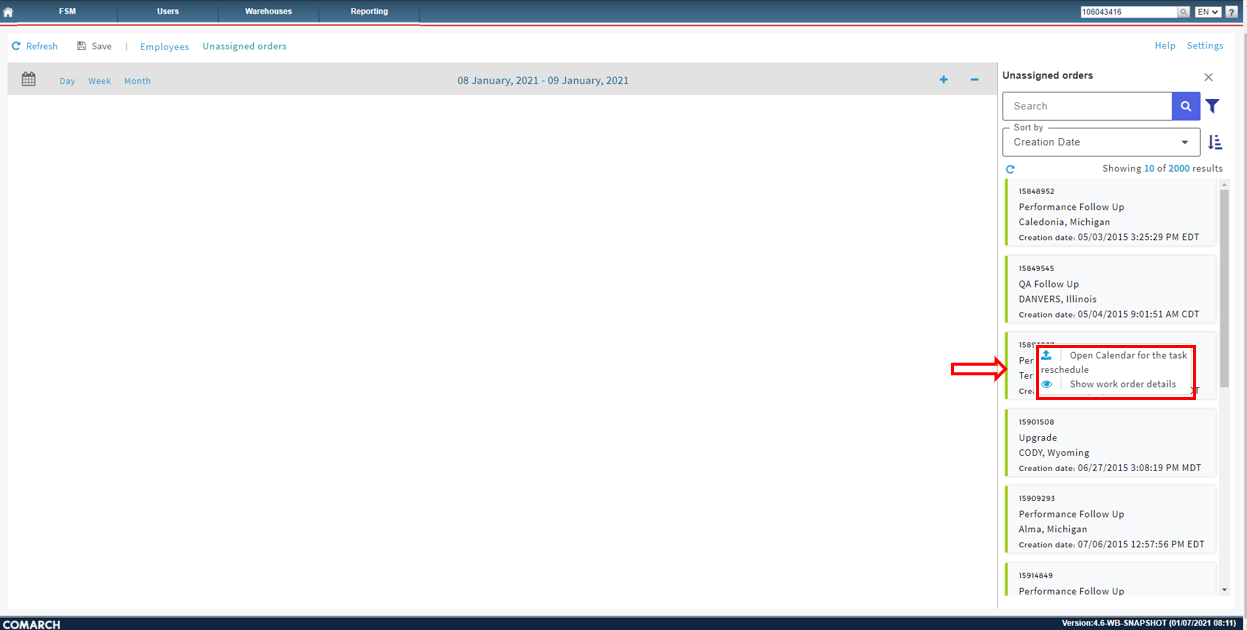
If you right click on an order it will display two options: Open Calendar for task reschedule and Show work order details:
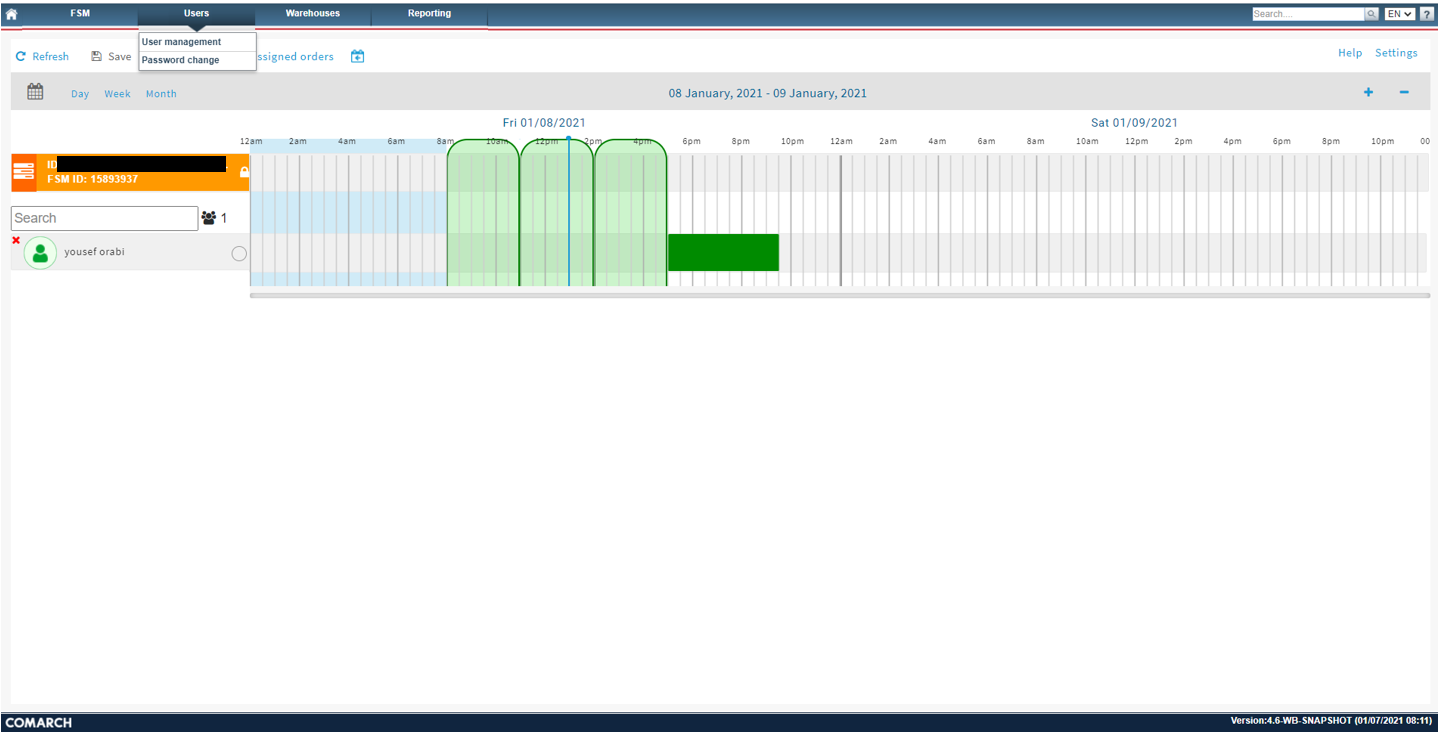
If you select Open Calendar for the task reschedule, then the specific work order will pull up in scheduling. The dispatcher can now manually schedule this work order.
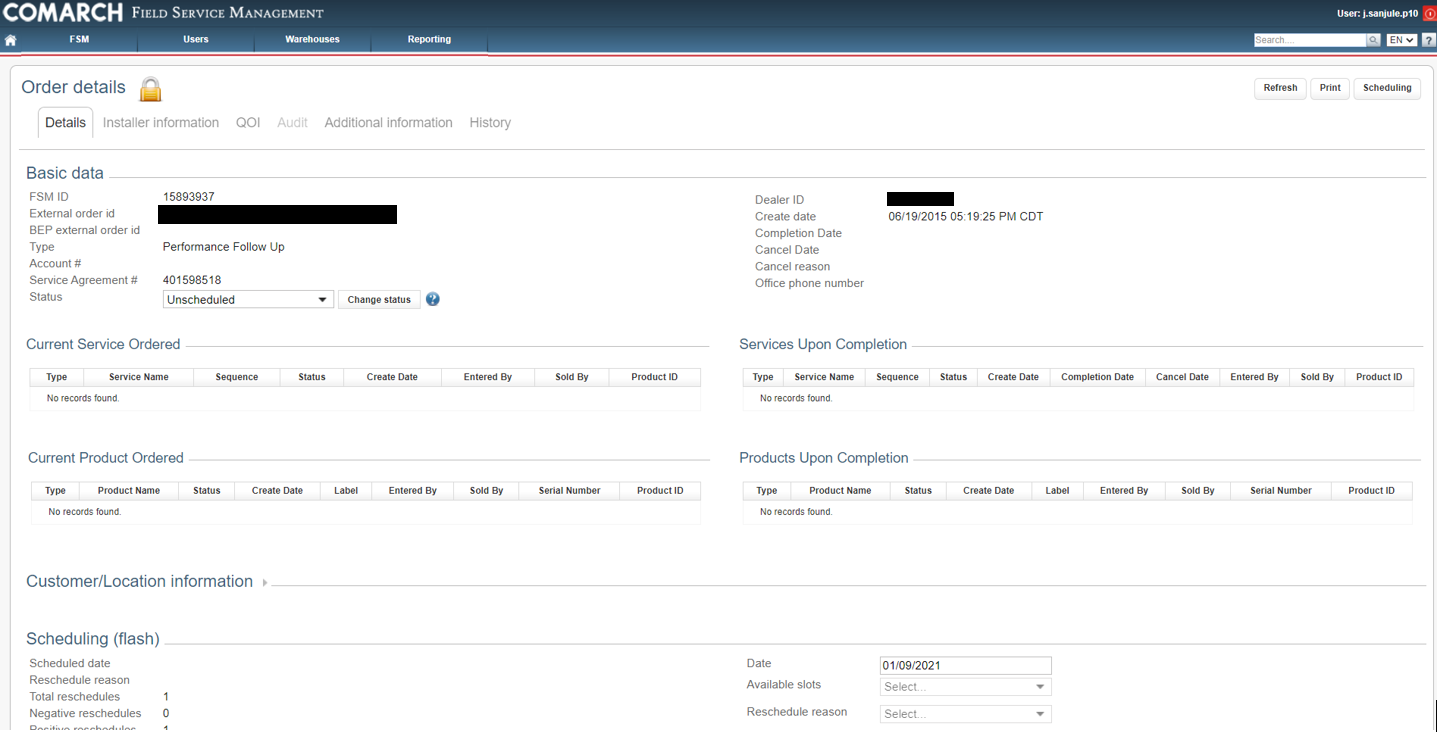
If you select Show work order details, then a new tab will open showing the work order details page:
Unassigned Orders – Assign orders using the Drag and drop feature.
This feature will only work under the Calendar & Task Management dropdown.
Select the Employees Button and Unassigned Orders:
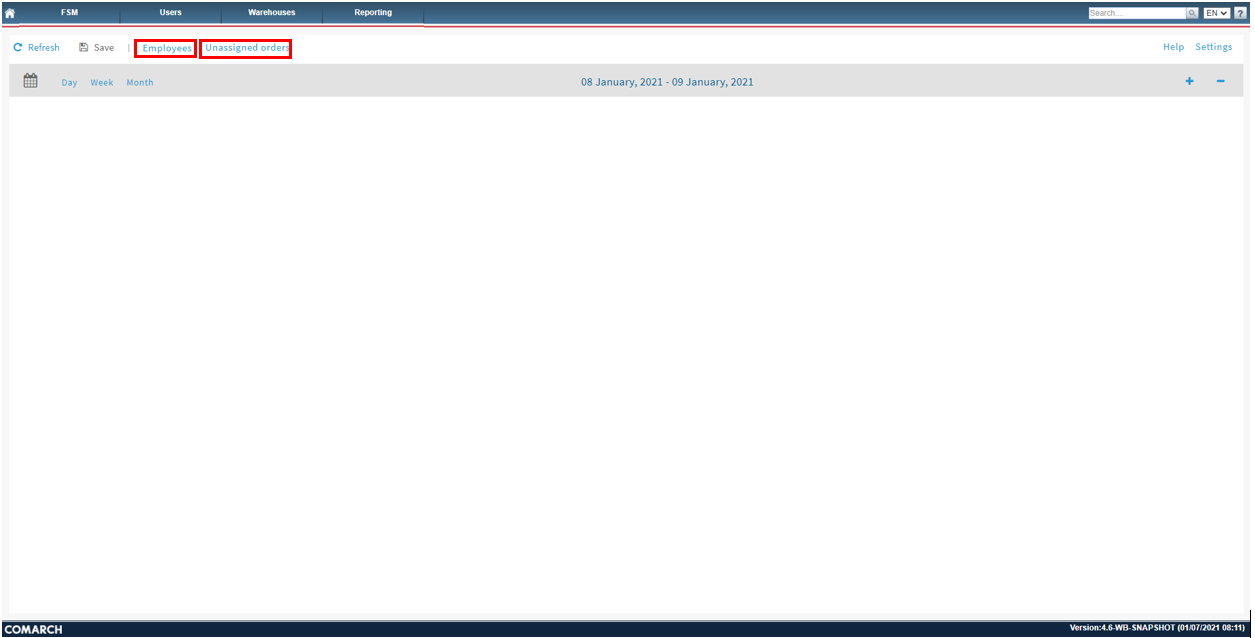
Select the desired employees that you wish to display.
The employees selected will display in the scheduling screen:
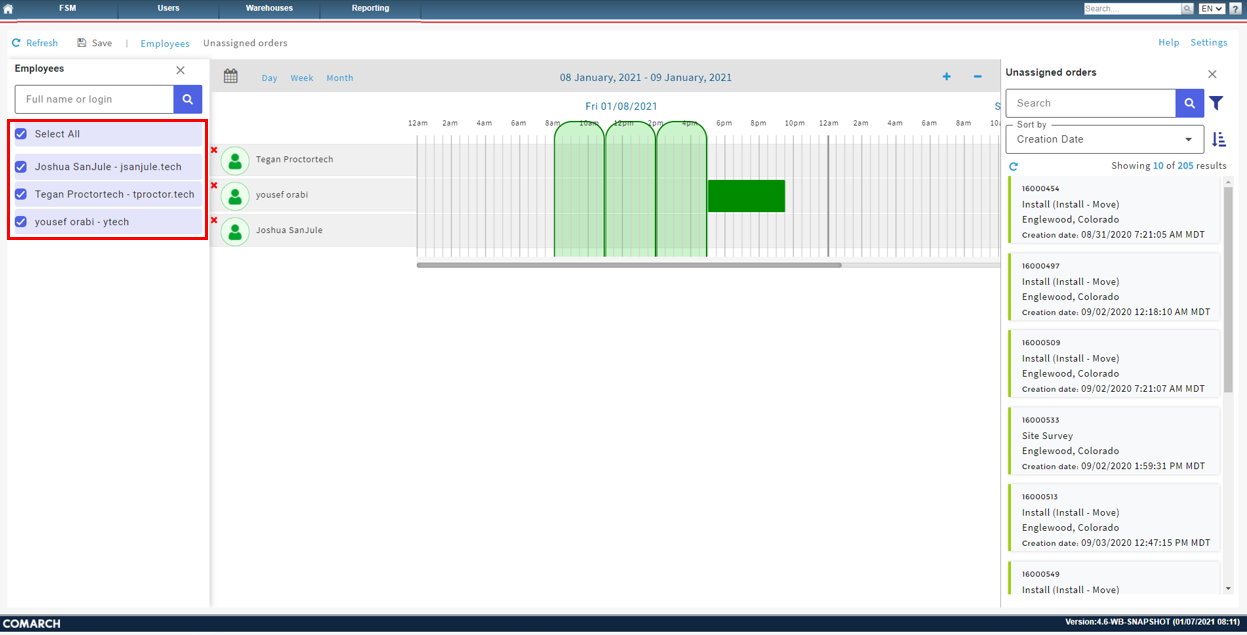
The Drag and Drop feature will allow the user to click on a work order from the Unassigned orders list and then drag the order to the technician’s available work time (Dark green bar).
To Add work time to the desired technician:
- Right click in the same row as the technician’s name under the desired date & time
- Hove over Add availability
- Select work time.
- Drag the Dark Green Bar in either direction to extend available work times.
The technician’s work time inserted:
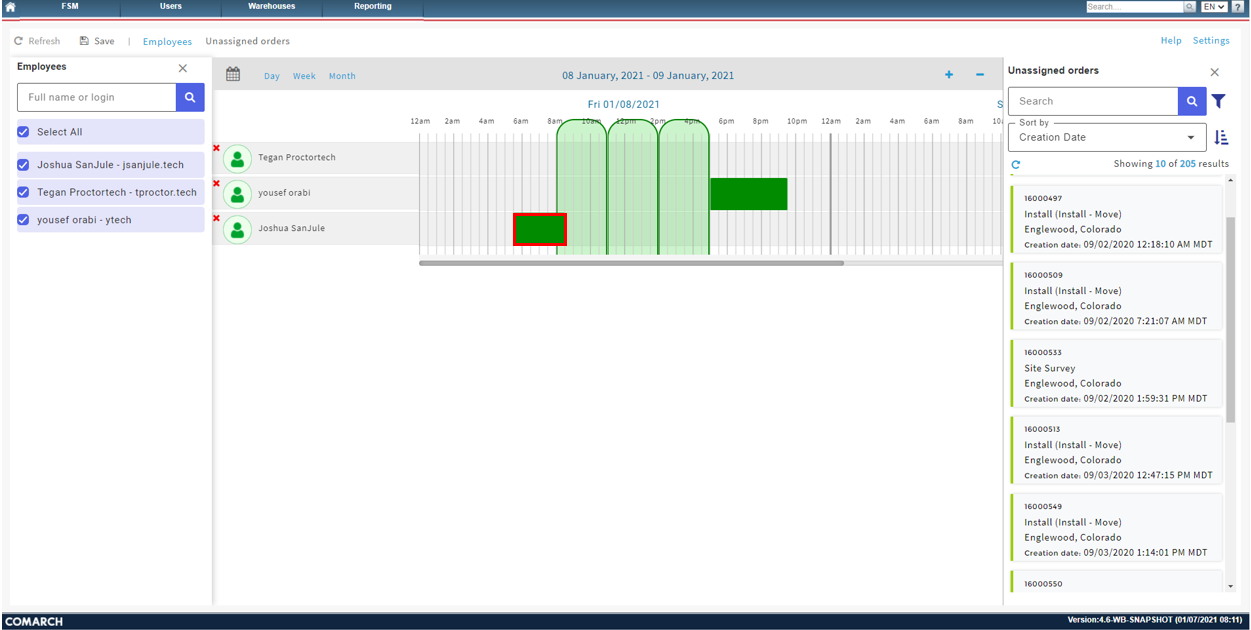
Left click on the work order and hold down the left click button. While holding the left click button down you will see a Light Green Bar:
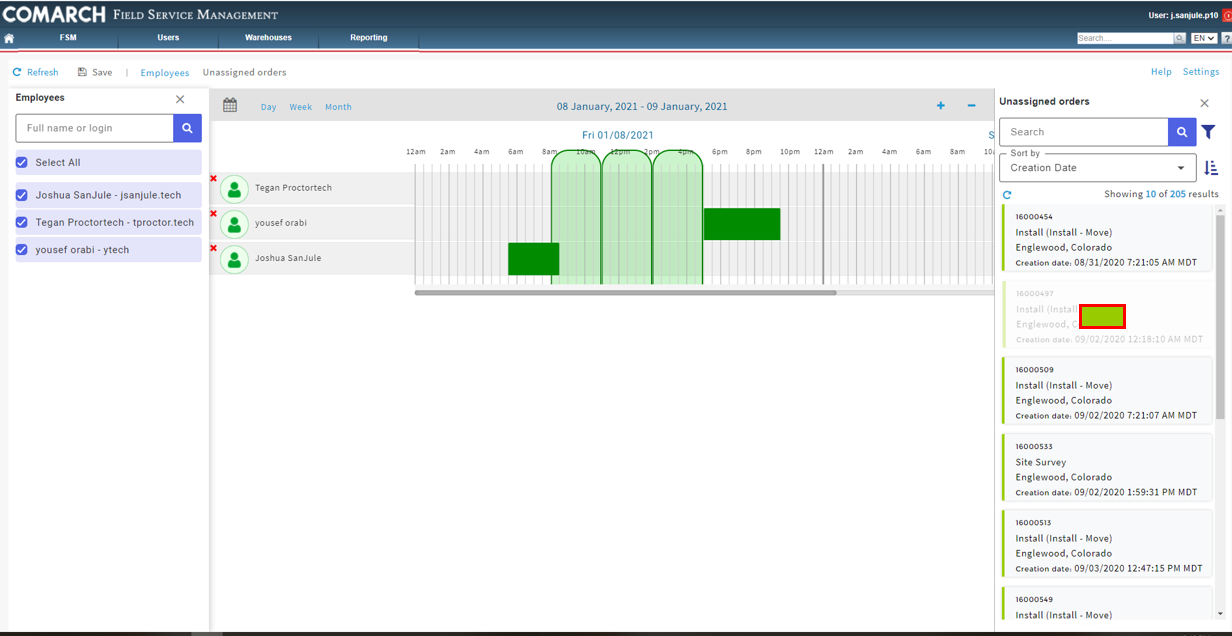
Drag the Light Green Bar over to inside the Dark Green Bar:
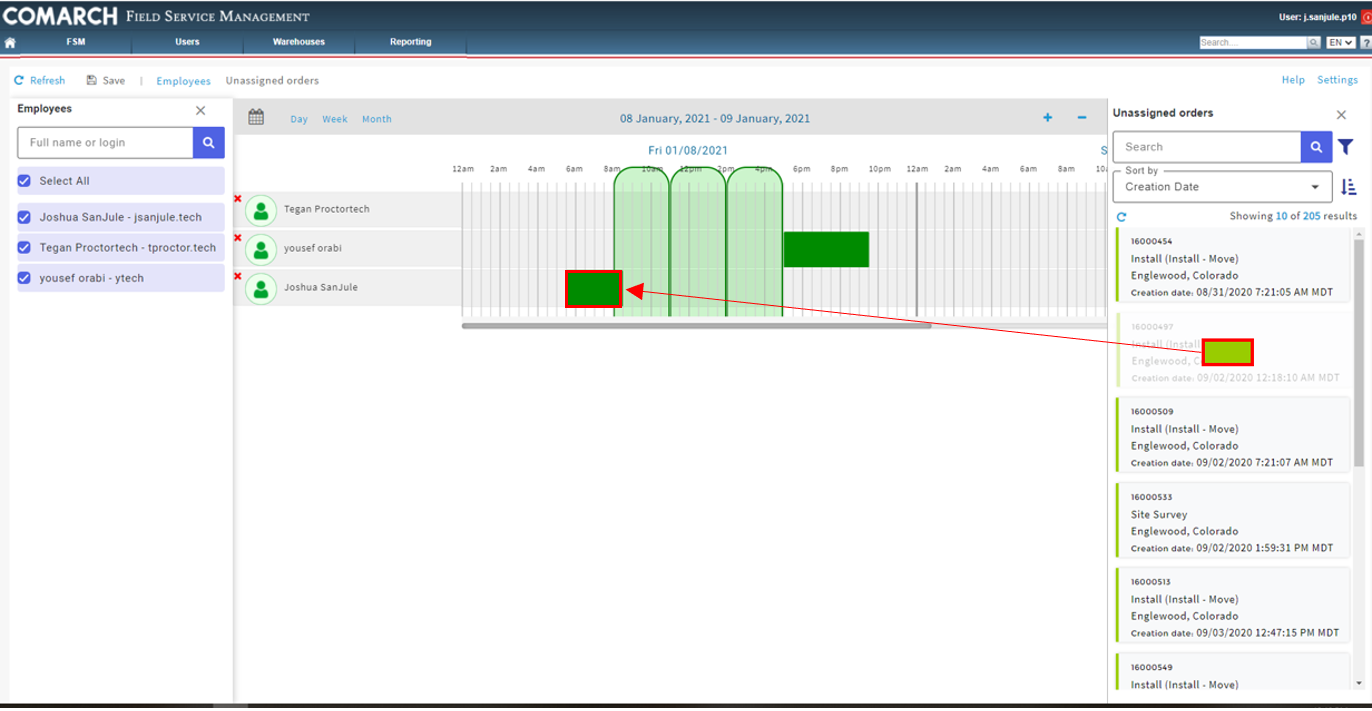
The Light Green Bar will need to be inside the Dark Green Bar. When lined up correctly a hand icon will appear ![]() . If not lined up correctly the no symbol
. If not lined up correctly the no symbol  will appear.
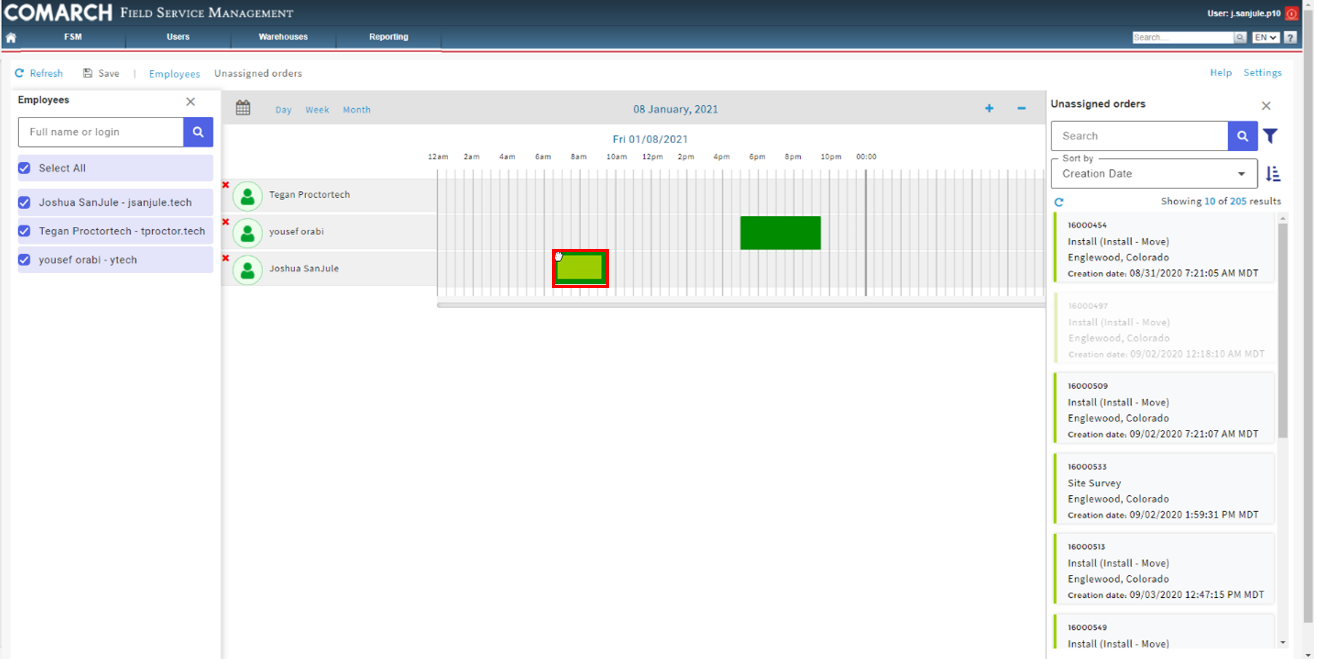
Once lined up correctly let go of the left click button. The work order will now be assigned and will auto save. If you hover over the Light Green Bar it will show assigned and will no longer be in the Unassigned orders list. Also note that if you let go of the left click button while seeing the no symbol no changes will be made.
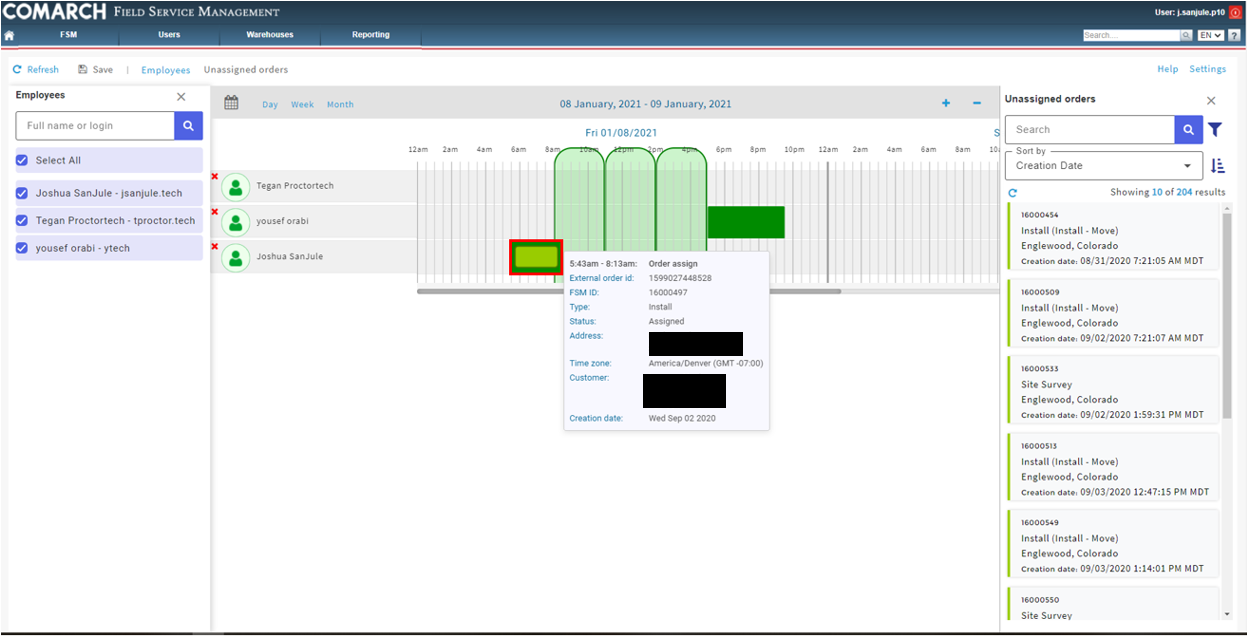
To Unassign a tech while under the Calendar & Task Management dropdown
Right click Light Green Bar and Select Open Calendar for the task reschedule:
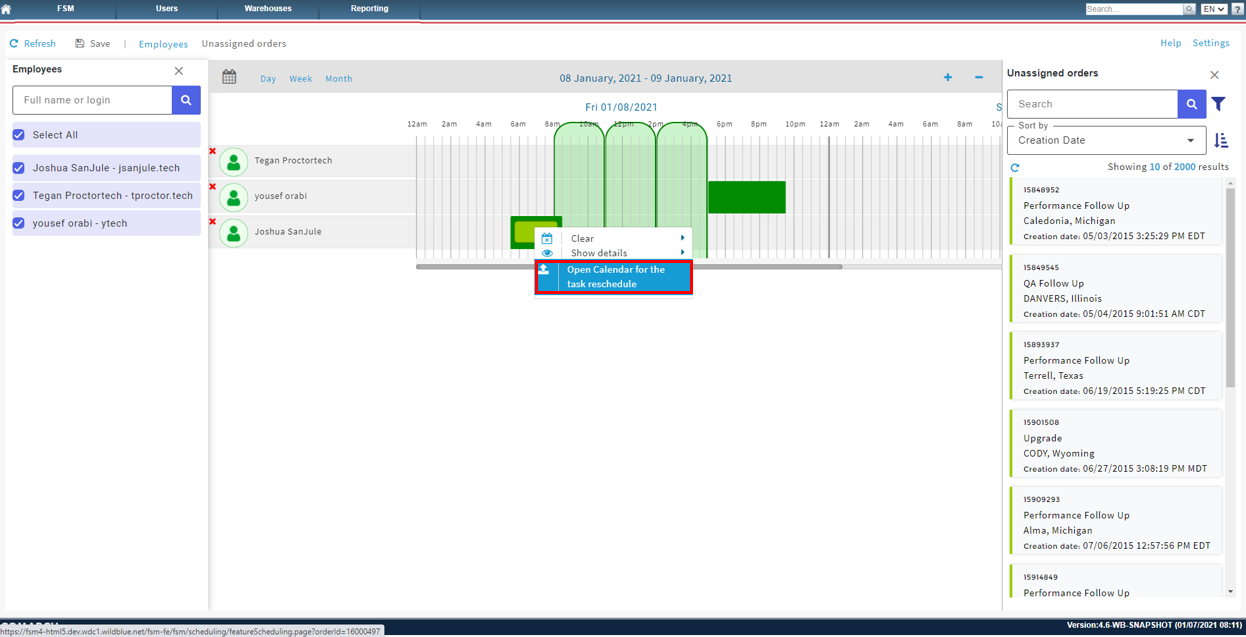
This will pull up that specific work order.
To Unassign the technician, uncheck the checkbox next to the technician’s name:
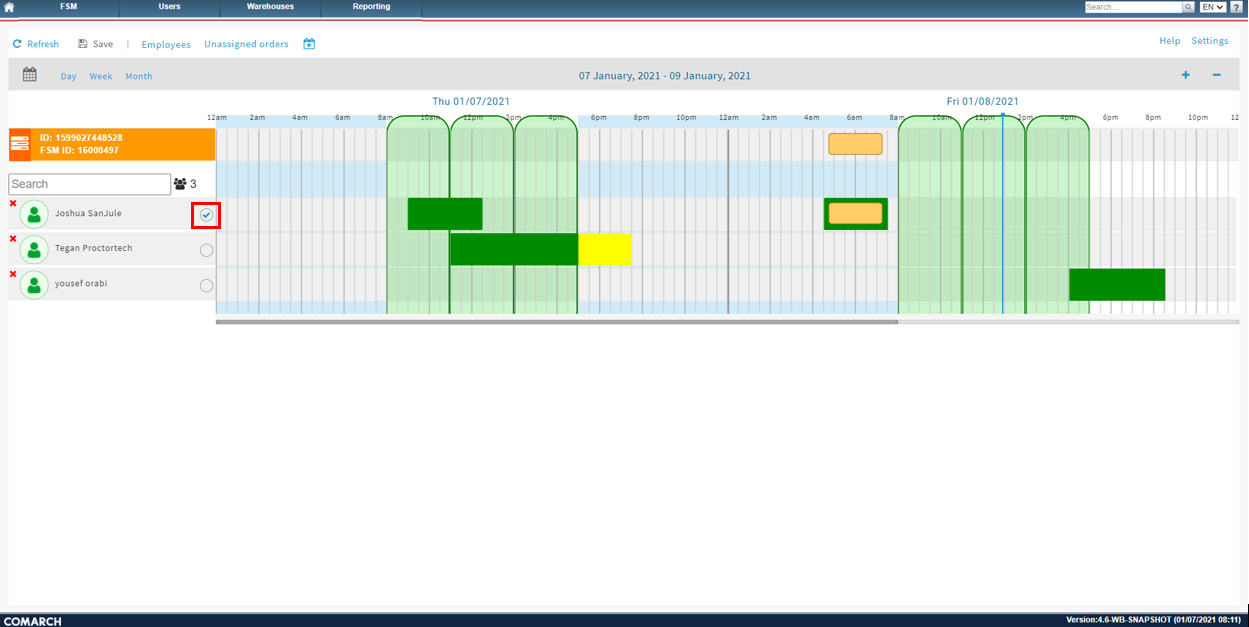
This will unassign the work order and auto save:
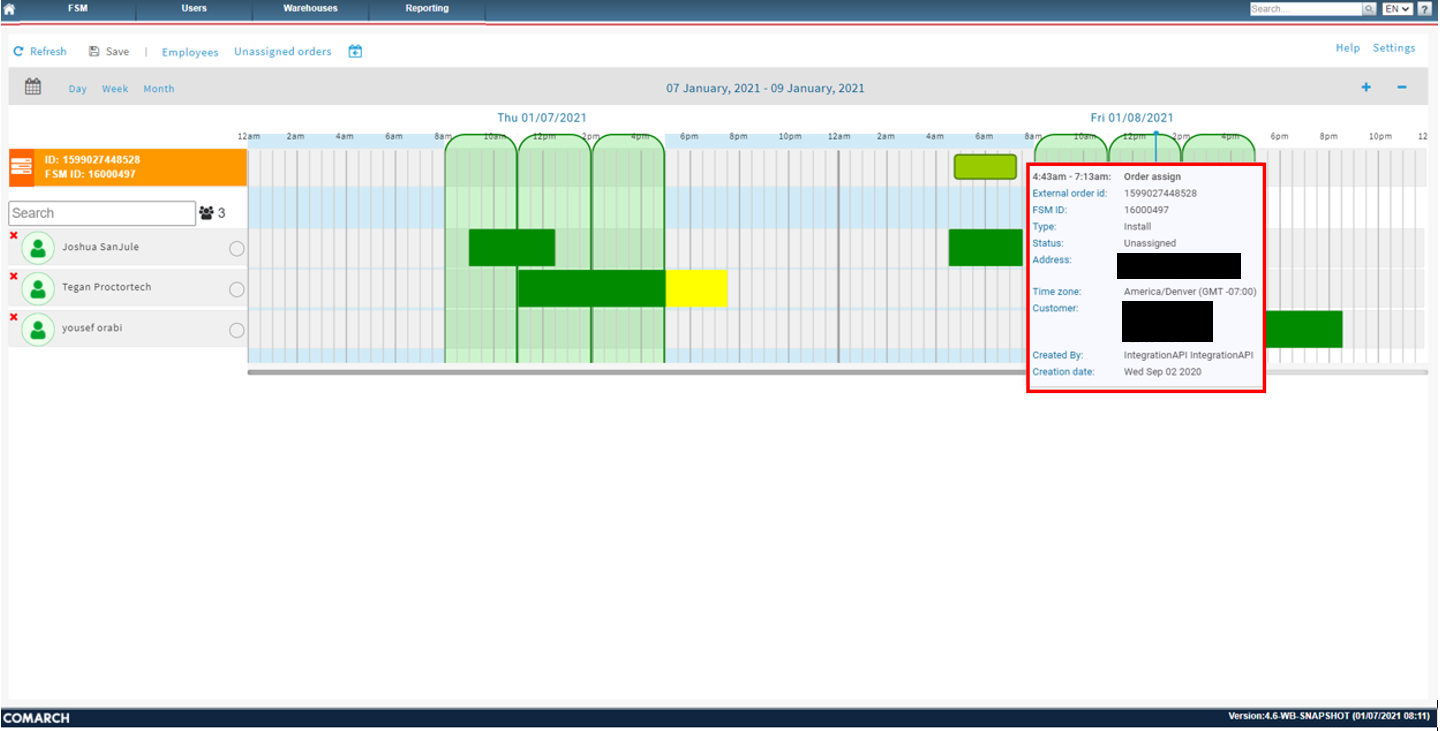
Unassigned Orders via the Scheduling Button
Using the schedule button will pull up that specific order. When on a specific order the FSM ID will be displayed:
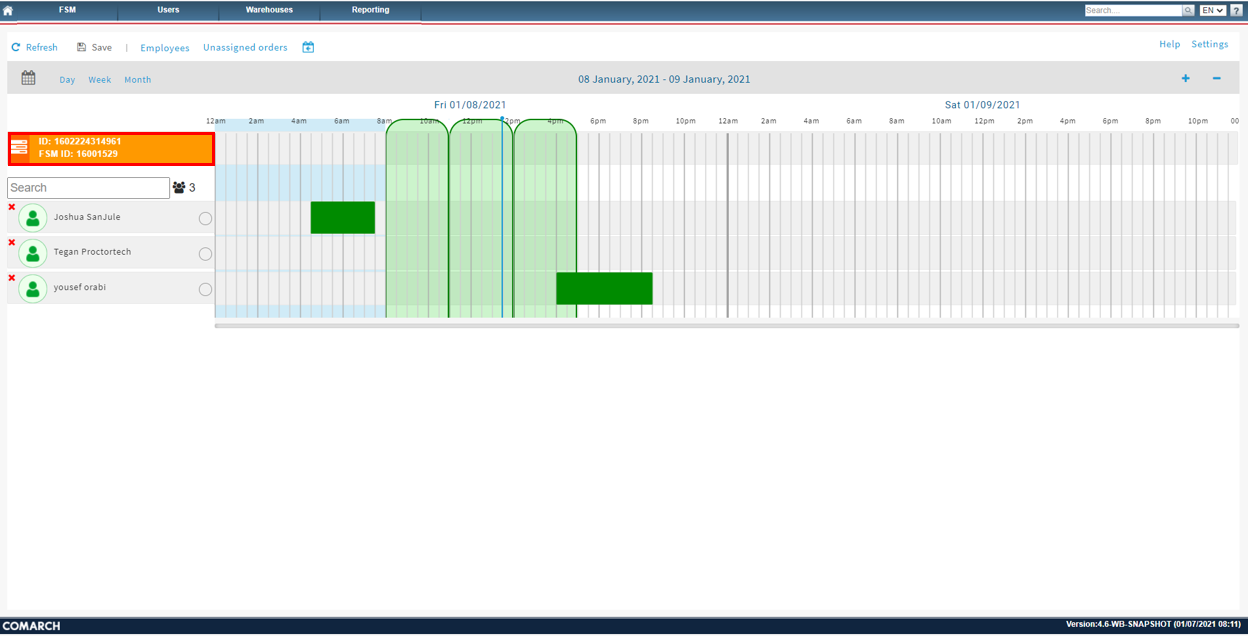
When on a specific order, the user will still have access to the unassigned order button:
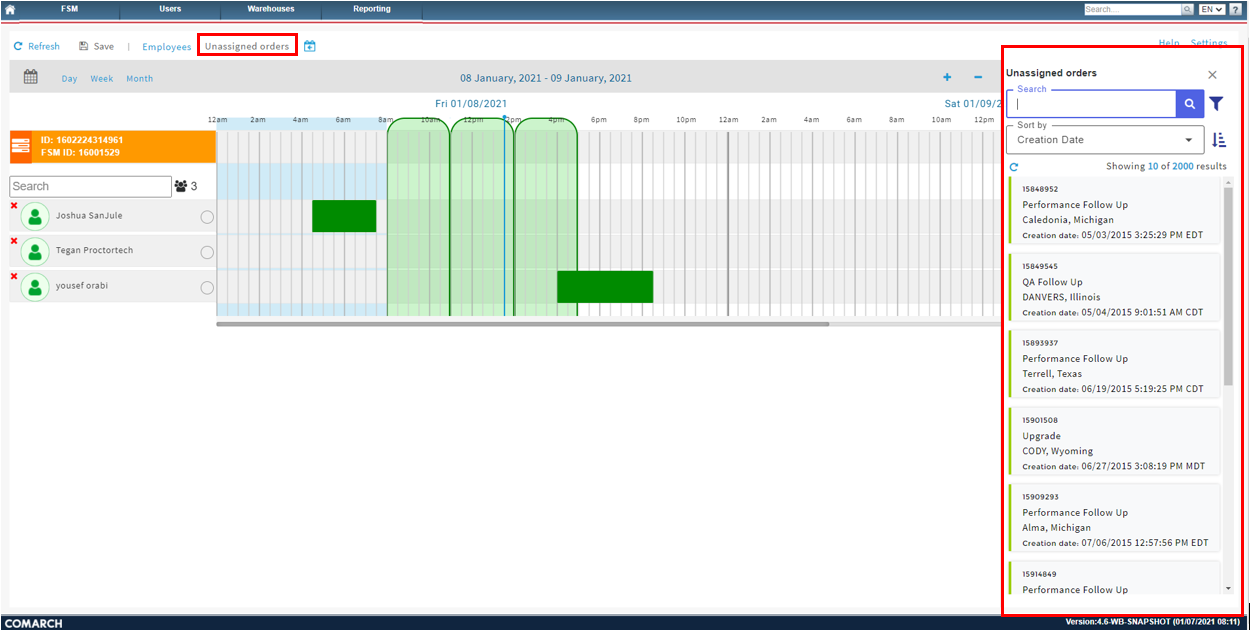
When viewing a specific order, the Drag and Drop feature will not work. That feature will only work under the Calendar & Task Management.
When under a specific order, the unassigned order button can be used as a quick way to view Unassigned Orders. Right clicking on an order under the Unassigned orders list will give the option to Open Calendar for the task reschedule. The dispatcher can quickly move to another work order to manual schedule.
