Configure Email Client Job Aid
Summary
This Job Aid covers:
Setting up Email Outlook 2007 Example
This Job Aid supports the NRTC Technician audience.
Note: ViaSat Retail and Fulfillment Technicians are not expected to configure email clients; however, this job aid may assist a customer who requests help doing so.
Setting up Email
There are several different Email clients on the market these days. The appearance and process for each may vary; however, the steps to follow in setting up a Subscriber’s email account are generally the same.
To set up email, the Install must complete the following steps:
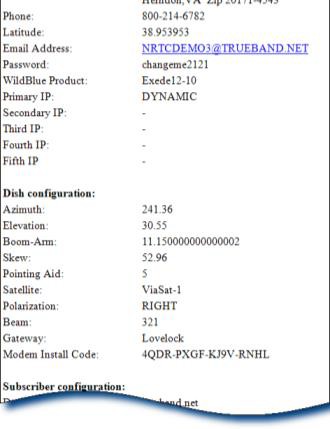
- Assign the incoming email server (POP3)
- Assign the outgoing e-mail server (SMTP)
- Assign the subscriber information
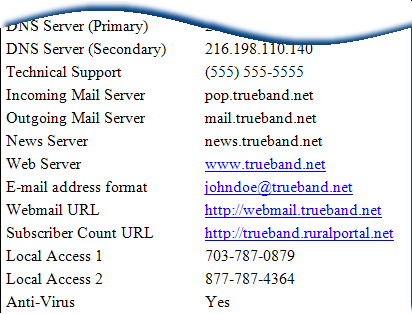
All of this information is included in the work order sent to the Technician via Email or in the WildBlue sub-tab in the AdminTool.
Outlook 2007 Example
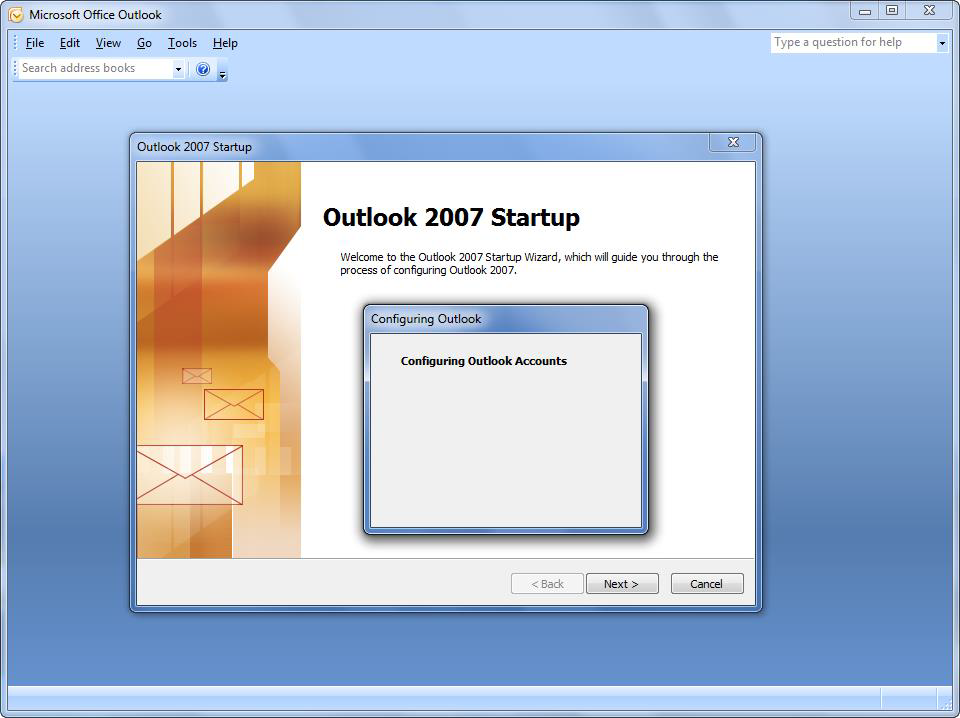
Follow these steps to configure Outlook 2007 as the Subscriber’s email client.
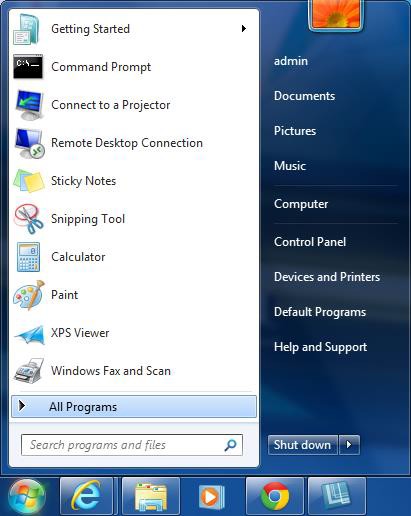
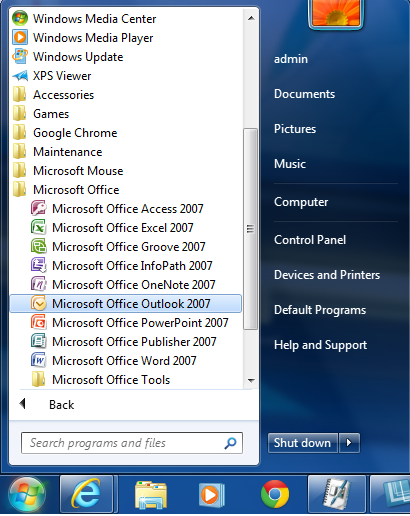
- From the Windows Start button, click All Programs, and then Microsoft Office Outlook 2007.
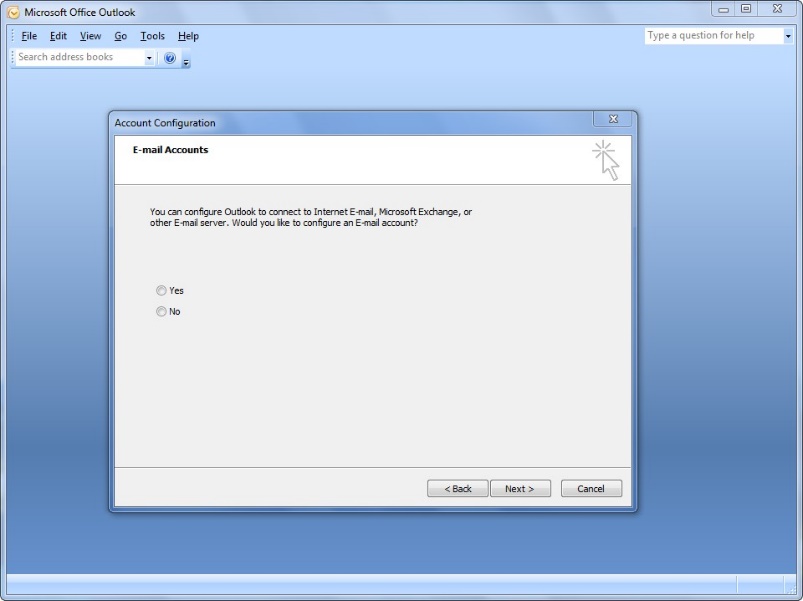
- 2. Click Next.
- 3.Select Yes, and then click Next.
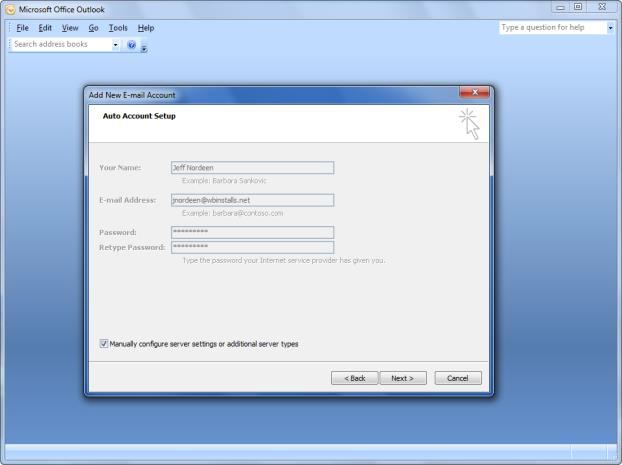
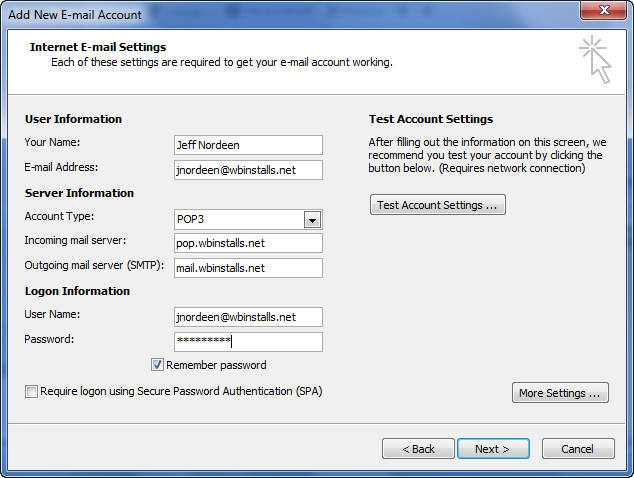
4. In the Your Name field, type the Subscriber’s Name
- In the Email Address field, type the Email Address shown on the work order.
- In the Password fields, ask the Subscriber to type their password twice. This password is the Subscriber’s password given to the sales agent when the service was ordered.
- Check Manually Configure Server Settings
- Click Next.
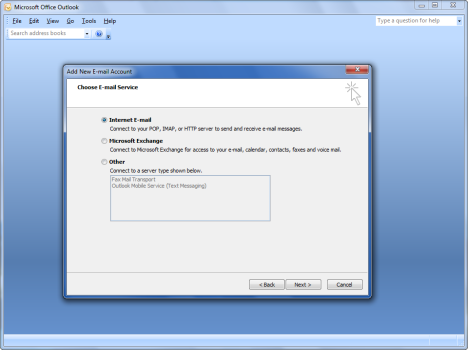
5. Select Internet E-mail, and then click Next.
6.In the User Information fields, type the Subscriber’s name and the Email address from the work order.
- In the Server Information fields,
- Select Account Type POP3
- From the work order, type the Incoming Server Address and Outgoing Server Address
- In the Logon Information fields, type the Email address from the work order, and the Subscriber’s password given to the sales agent when the service was ordered.
- Select Remember Password.
- Click More Settings.
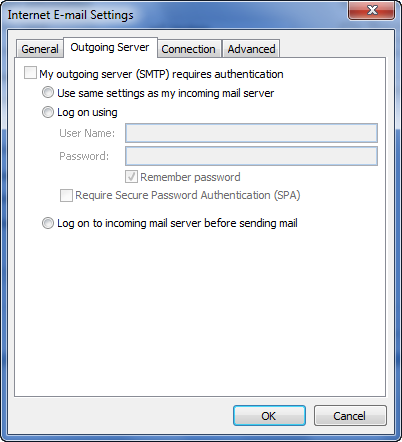
7. Select My Outgoing Server (SMTP) Requires Authentication
- Select Use Same Settings as my Incoming Mail Server
- Click OK
8. Click Finish

9.Send a test email to their email address.