Viasat TechTools (VTT) App [Americas]
OVERVIEW
INSTALLATION
SERVICE CALL (Equipment Swap)
VS360 SOLUTIONS
PHOTO UPLOADER
This Job Aid covers the following:
This Job Aid supports the technician audience.
![]()
Registration and Login
The Viasat TechTools app is compatible with ViaSat-3 (VS-3), ViaSat-2 (VS-2), and ViaSat-1 (VS-1) installations.
The Viasat TechTools app is available for download on both iOS and Android devices by clicking the appropriate link below.

![]()
![]()
Registration and Setup
Step 1
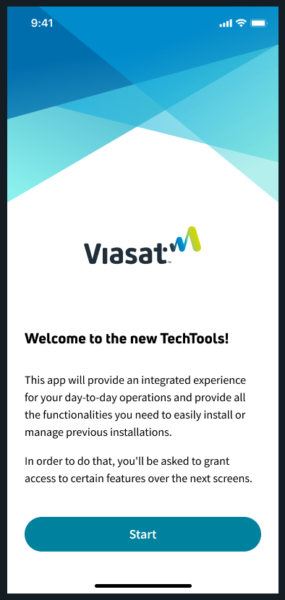
Open the Tech App and press Start.
Step 2
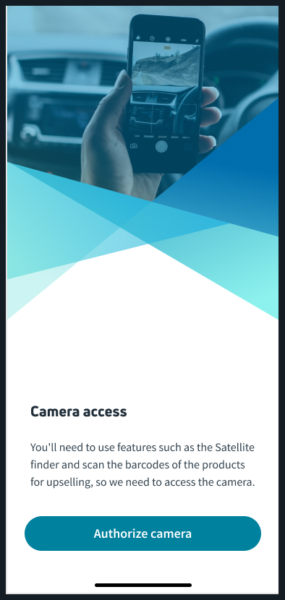
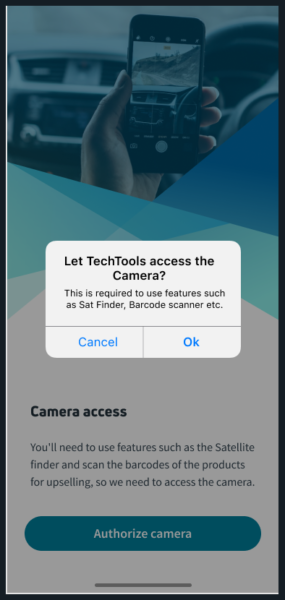
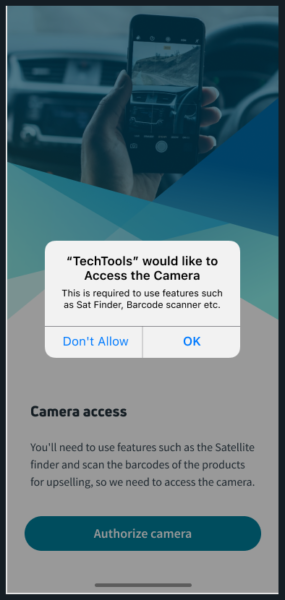
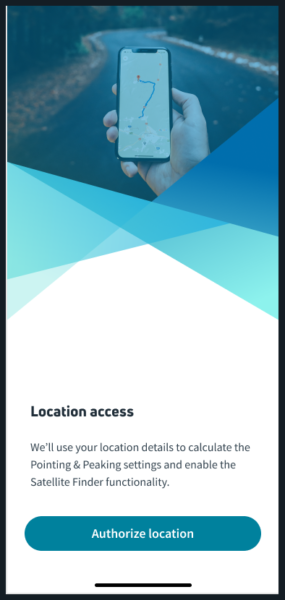
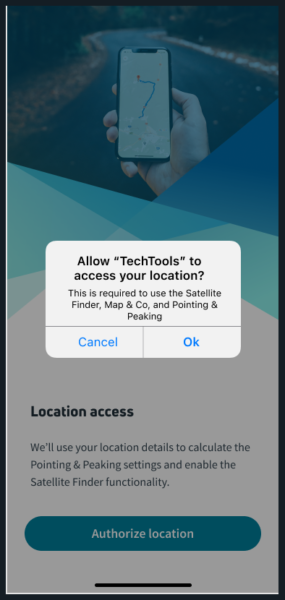
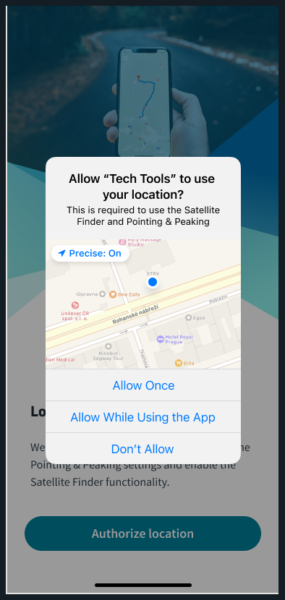
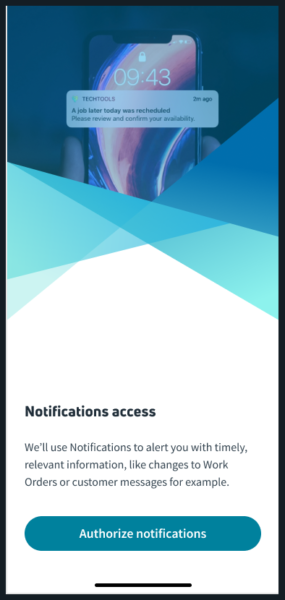
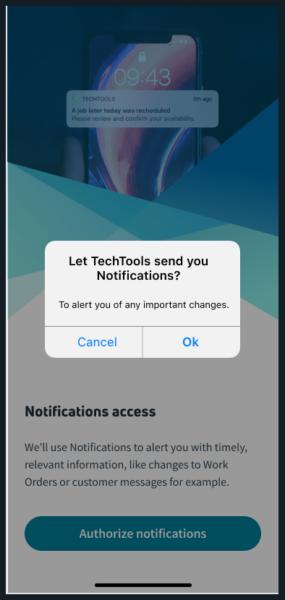
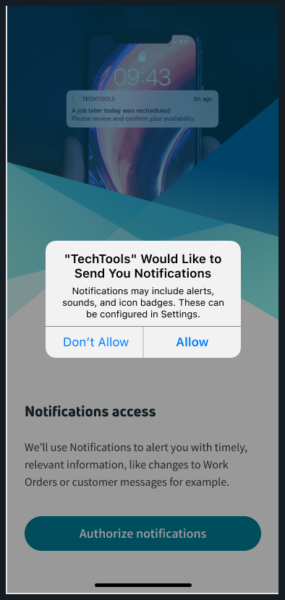
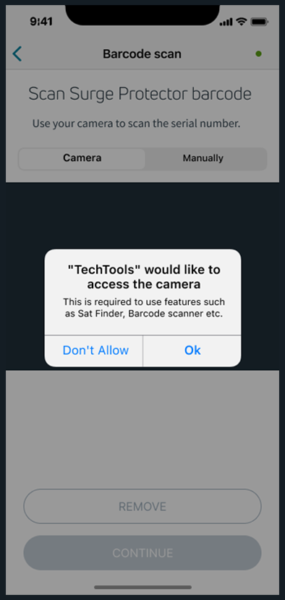
Allow access to the Camera, Location, and Notifications.
Camera
Location
Notifications
Step 3
Setup the Authentication Pin: Enter a 4-digit pin and reenter it when prompted to confirm.
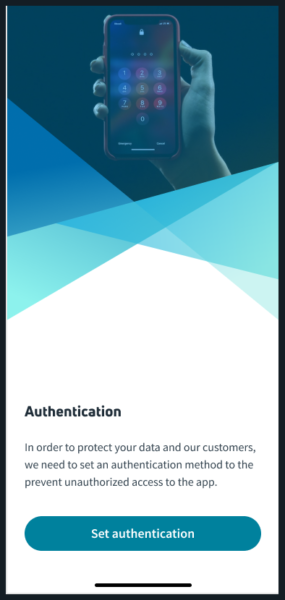
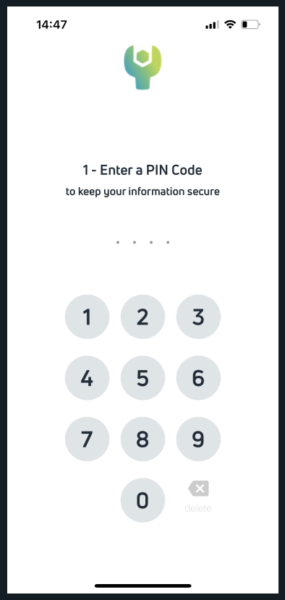
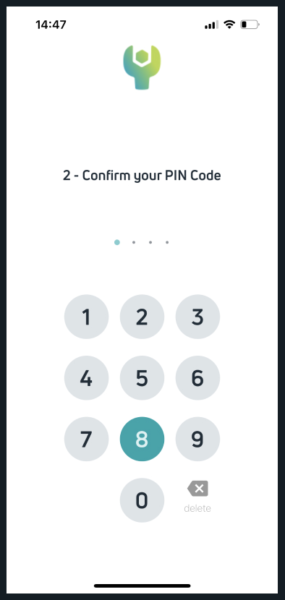
Depending on the device, you may enable biometric authentication, like fingerprint or Face ID.
Step 4
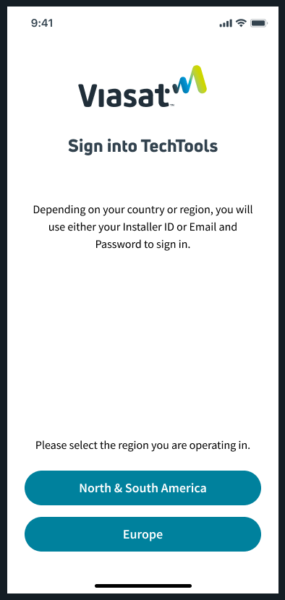
You will now be prompted to choose your login type.

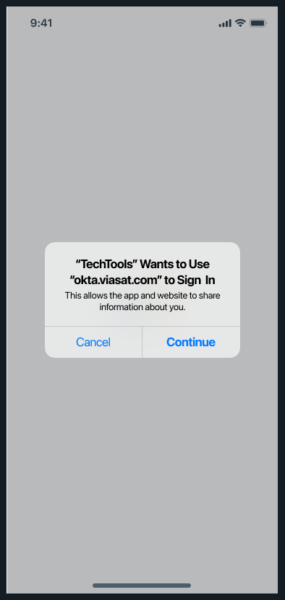
You will be prompted that “‘TechTools’ wants to Use ‘okta.viasat.com’ to Sign In.” Press Continue. You’ll see a blank load screen, and when loaded you will register securely with your credentials (8-digit installer ID) via Okta.
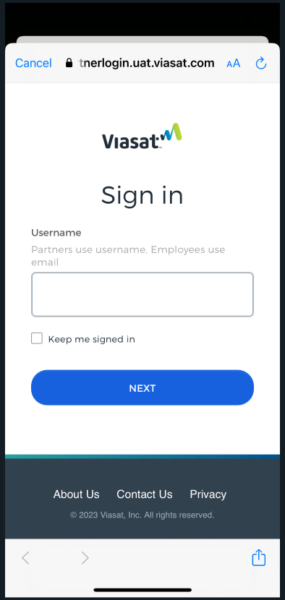
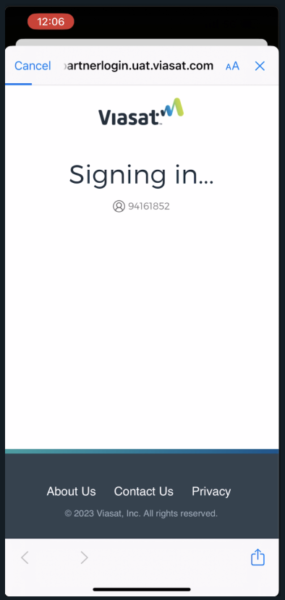
You will be then signed into TechTools.
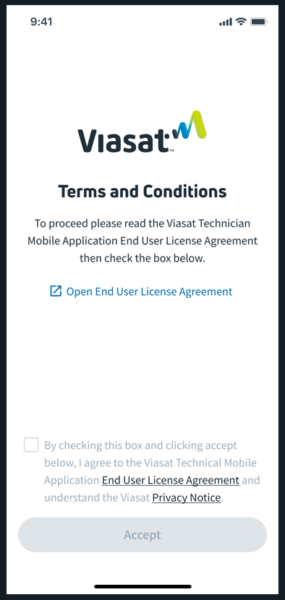
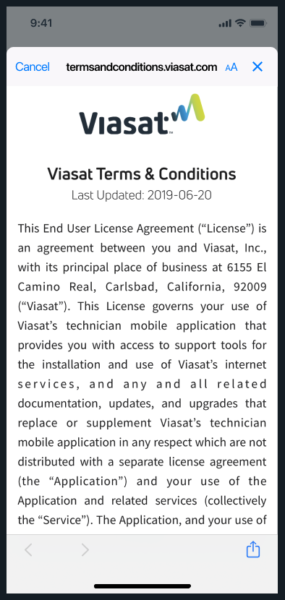
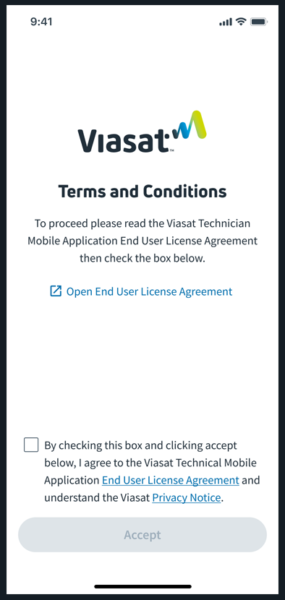
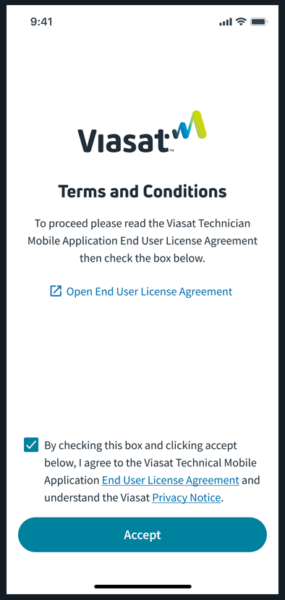
Next, you’ll be sent through the Terms and Conditions page. You will need to open and read the End User License Agreement first to enable the checkbox to move on to the next step to accept the Terms and Conditions.

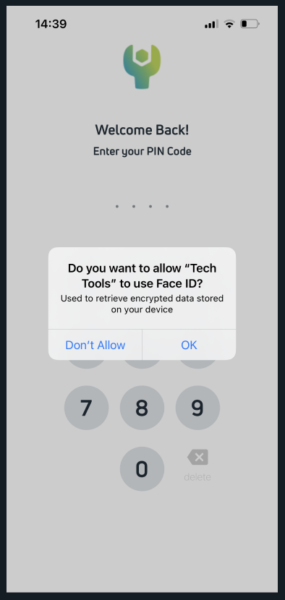
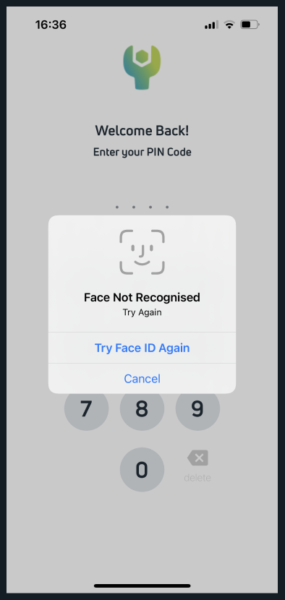
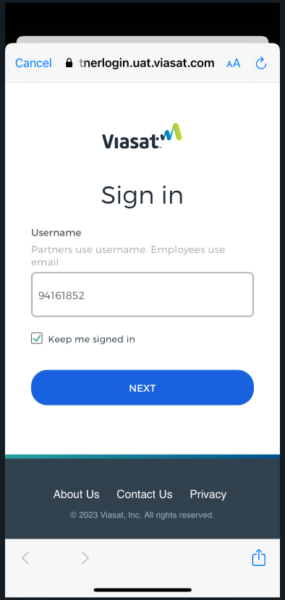
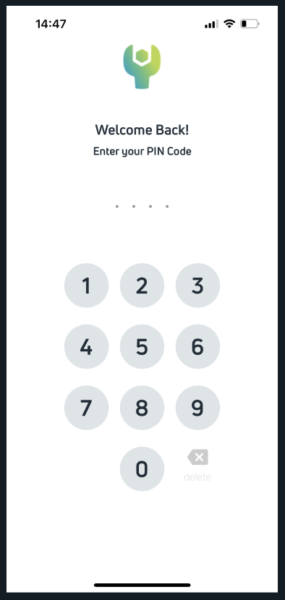
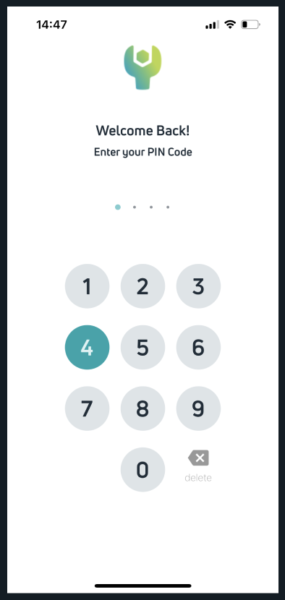
Login
Now back in the app, open the app and enter the PIN used to set up the account.
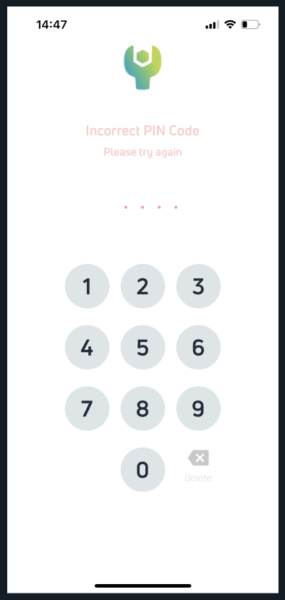
Should the pin not match, a prompt will have you try again. Too many failed attempts will require a reset of the PIN code.

Login Issue
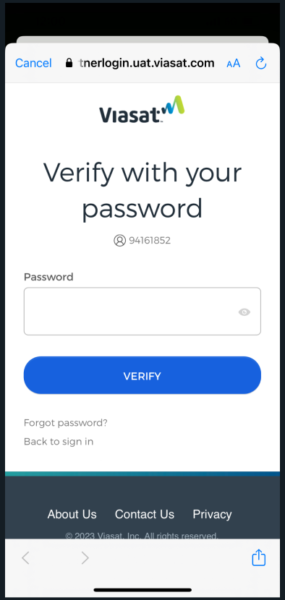
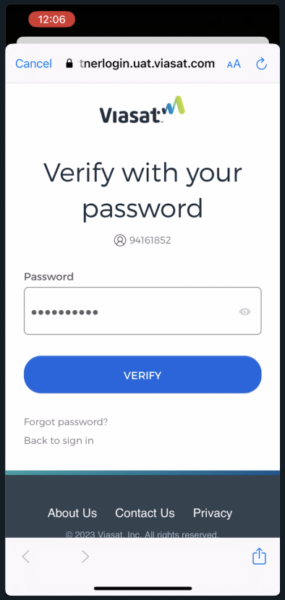
Password Reset Not Working
If you attempt to log in, but the self-serve password reset option fails and you do not receive the email to recover it, attempt the “forgot password” after entering tech ID (No Letters at the end) as username.
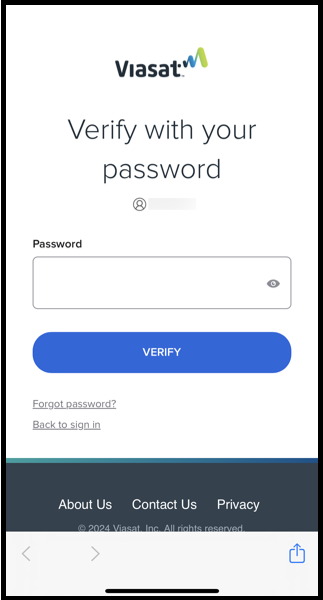
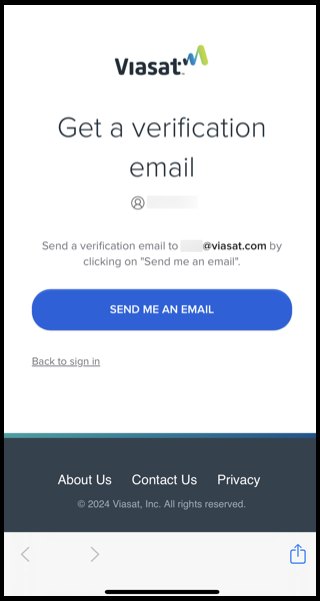
The “Forgot password?” will send a code to the email on file. The technician uses the code to create a new password.
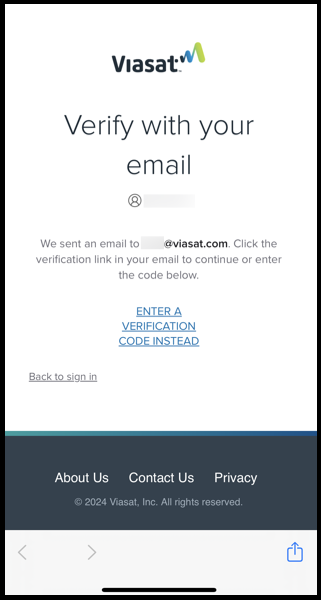
Click the “Reset Password” button.

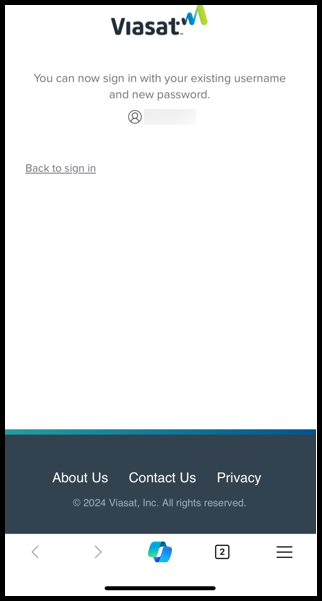
Once the password is reset, log back into the app.
Click the “Review” button to Read and agree to the licensing agreement.
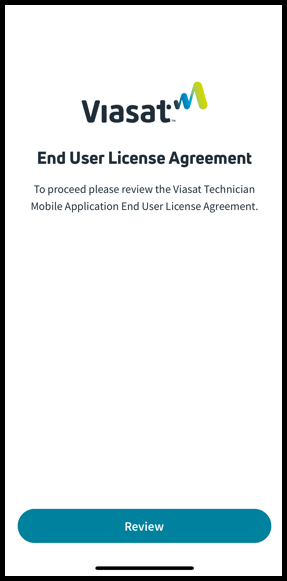

Finally, you’ll be sent through the Terms and Conditions page. You will need to open and read the End User License Agreement first to enable the checkbox to move on to the next step to accept the Terms and Conditions.
Dashboard
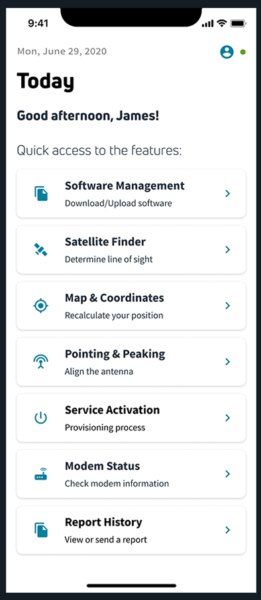
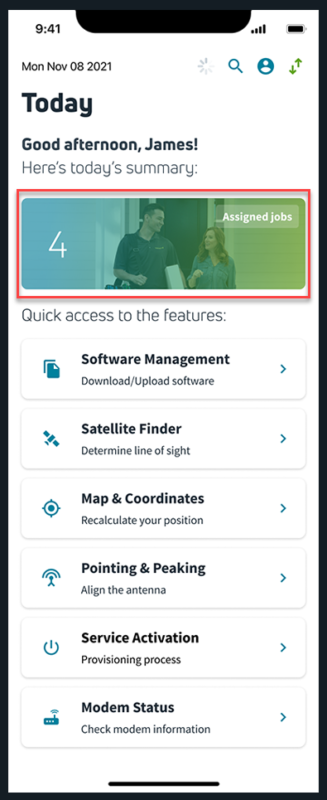
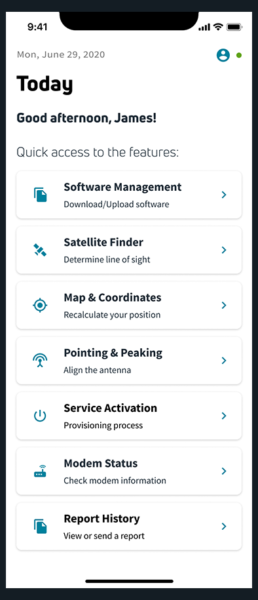
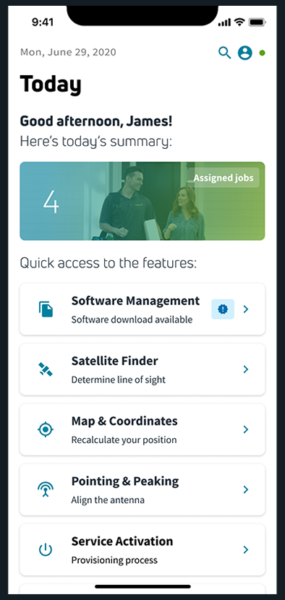
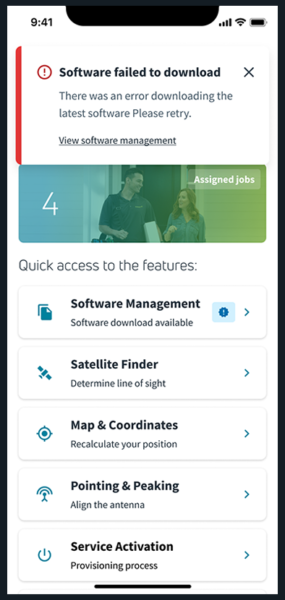
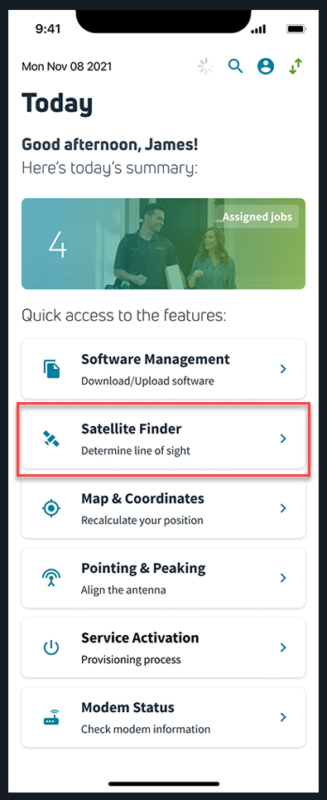
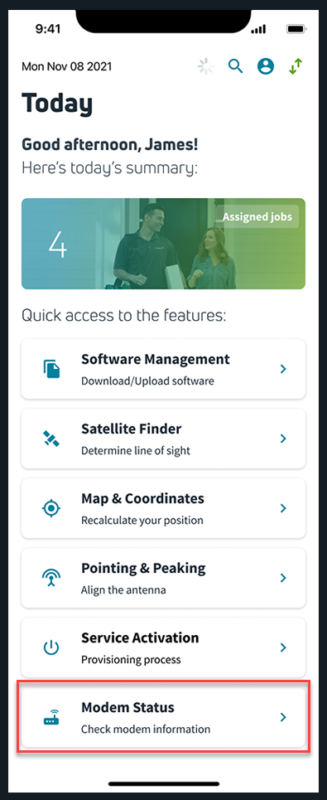
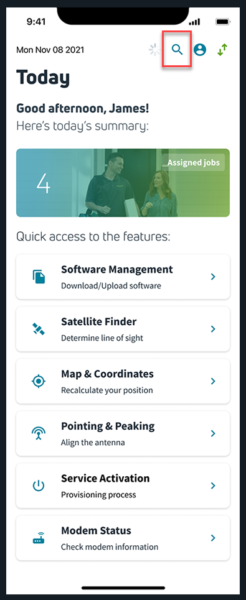
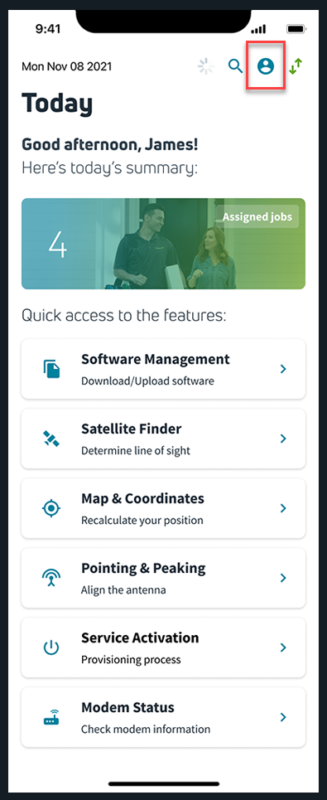
When you have logged in, the Dashboard will display. Here, you will find the following quick access features – Assigned Jobs, Software Management, Satellite Finder, Map & Coordinates, Pointing & Peaking, Service Activation, and Modem Status; as well as search, account profile, and online status.

WHOLESALE ONLY – Here, you will find the following quick access features – Software Management, Satellite Finder, Map & Coordinates, Pointing & Peaking, Service Activation, Modem Status, and Report History; as well as account profile and online status.
Assigned Jobs
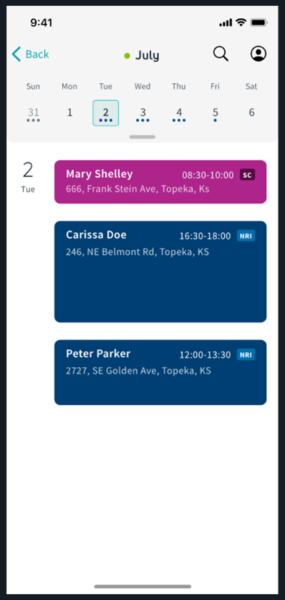
In the Job Details area, you’ll see your Assigned Jobs.
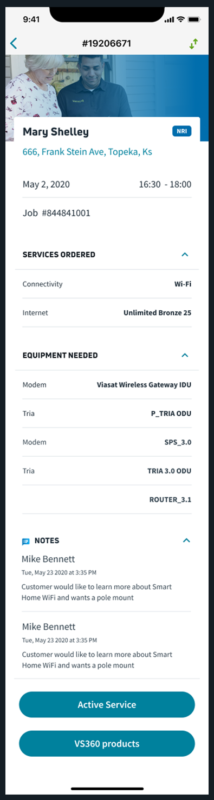
You’ll see your calendar agenda and pressing each one gives you more detail of each job.
Equipment Swap
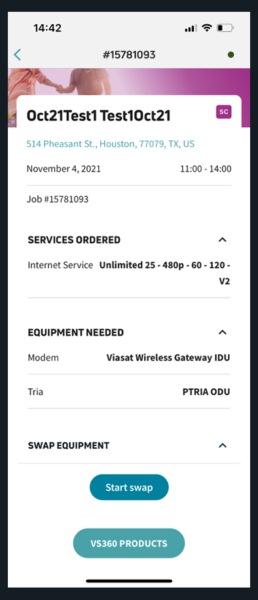
If your job asks requires a swap, your work order will display this. Press Start Swap.
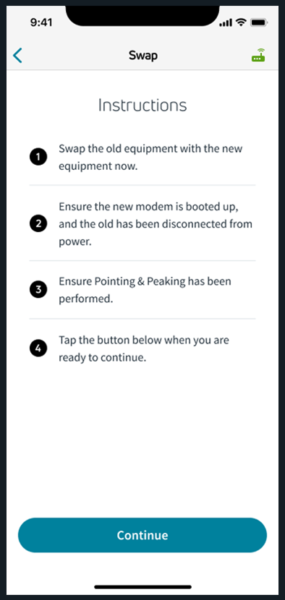
Next, the app will prompt you with swap instructions.
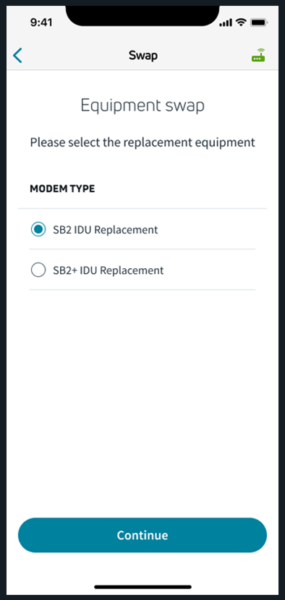
If working with ViaSat-1 (VS-1) equipment, it will prompt you to select the modem type.
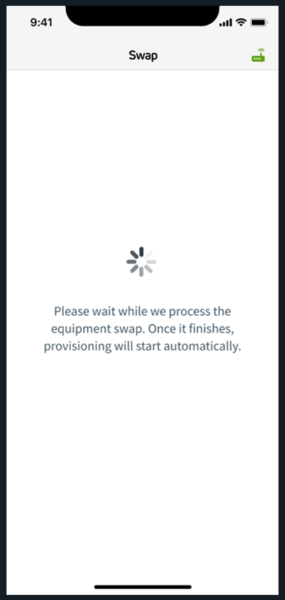
When the equipment swap finishes, the app will automatically proceed to provisioning.
If you are swapping more than the Viasat WiFi Gateway 3.0 (VWG3) and the Viasat Network Power Adapter for ViaSat-3 (VS-3), or any equipment for ViaSat-2 (VS-2) or ViaSat-1 (VS-1), your app will proceed to these provisioning screens. When finished, it will take you to the Work Order page.


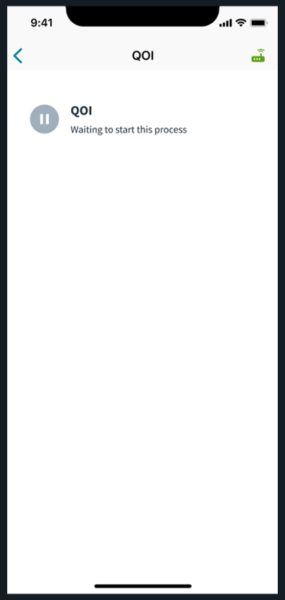
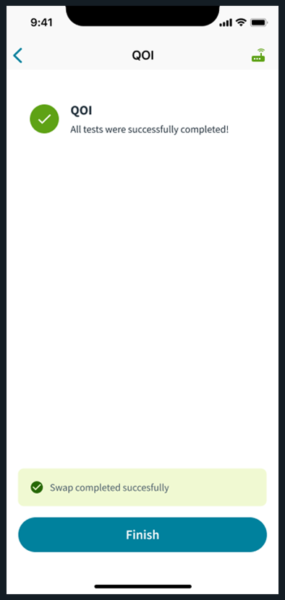
If you are only swapping out the Viasat WiFi Gateway 3.0 (VWG3) and the Viasat Network Power Adapter, you will proceed to these provisioning screens that only show QOI. When finished, it will take you to the Work Order page.
Equipment Swap – WHOLESALE ONLY
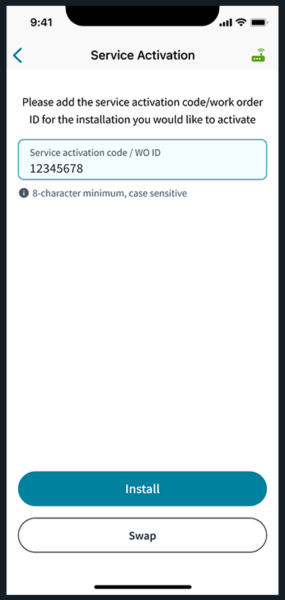
If you are doing a wholesale service that requires an equipment swap, press Service Activation on your dashboard.
Then, enter your Service Activation code or Work Order ID.
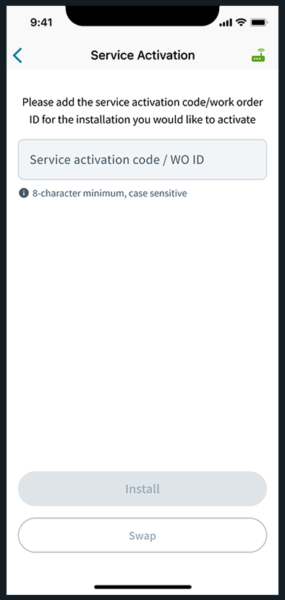
Press Swap.
Next, the app will prompt you with swap instructions.
If working with ViaSat-1 (VS-1) equipment, it will prompt you to select the modem type.
When the equipment swap finishes, the app will automatically proceed to provisioning.
If you are swapping more than the Viasat WiFi Gateway 3.0 (VWG3) and the Viasat Network Power Adapter for ViaSat-3 (VS-3), or any equipment for ViaSat-2 (VS-2) or ViaSat-1 (VS-1), your app will proceed to these provisioning screens. When finished, it will take you to the Reporting page.
If you are only swapping out the Viasat WiFi Gateway 3.0 (VWG3) and the Viasat Network Power Adapter, you will proceed to these provisioning screens that only show QOI. When finished, it will take you to the Reporting page.
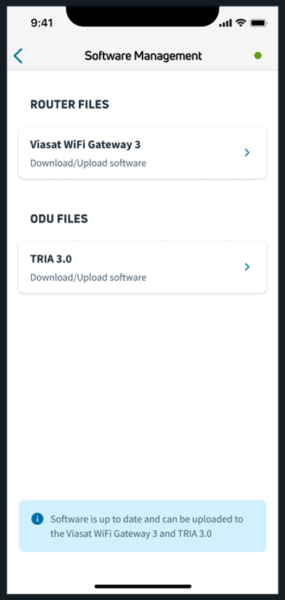
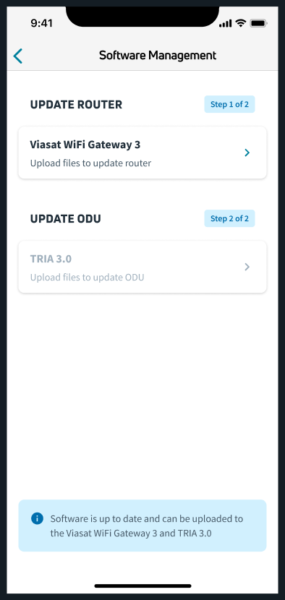
Software Management
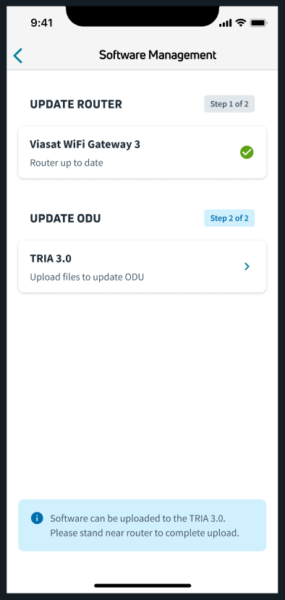
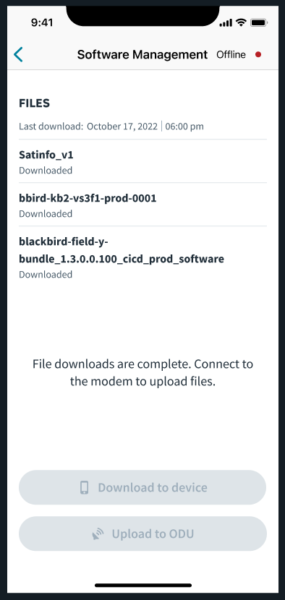
Before heading onsite, you’ll want to make sure you have the newest software package downloaded to your personal device.
When you log into the app, the app will check for the software for the Router and the ODU. If you do not have the software, it will start an automatic download. If you have software but it is out of date, the app will download the update.
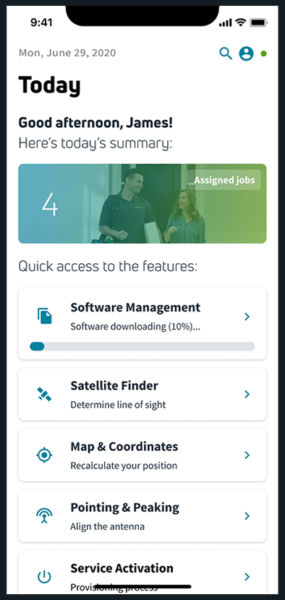
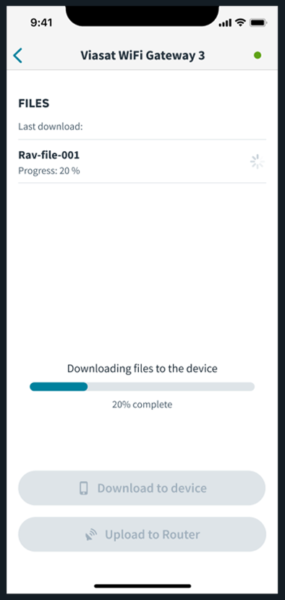
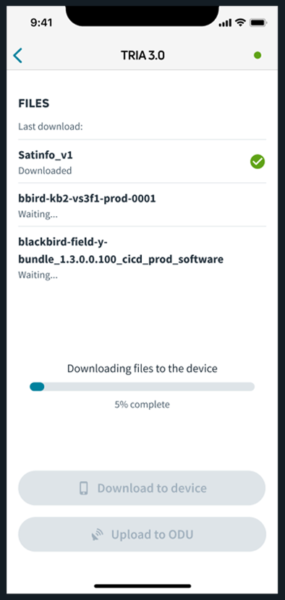
When software is automatically downloading, you should ensure the download completes before closing the app.
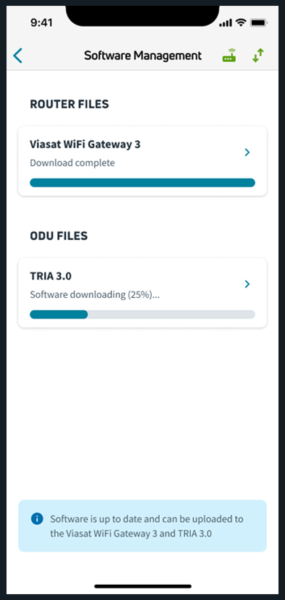
If you are having any issues with the automatic download you can proceed to the ODU or Router software management screens to manually download the software.
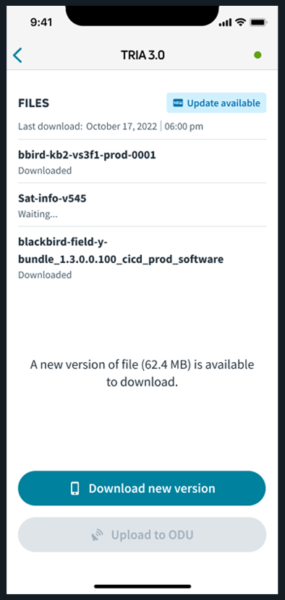
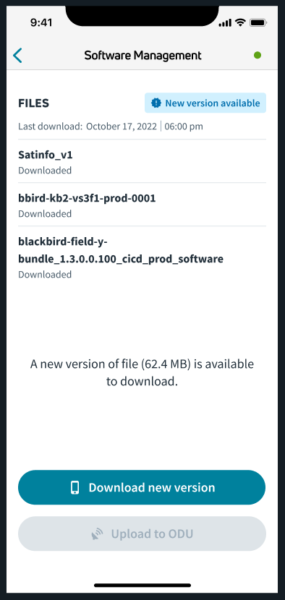
If the app attempts to download the software or a new version of the software, the Software Management screen will show you that a new version is available. This will also be signified on the dashboard to let you know.
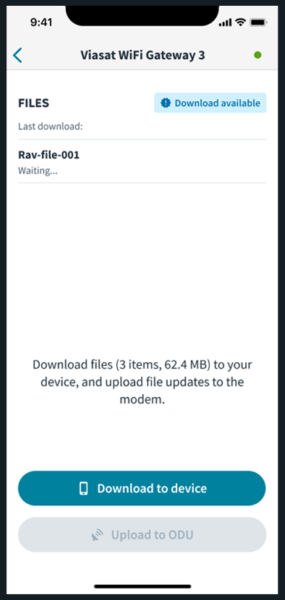
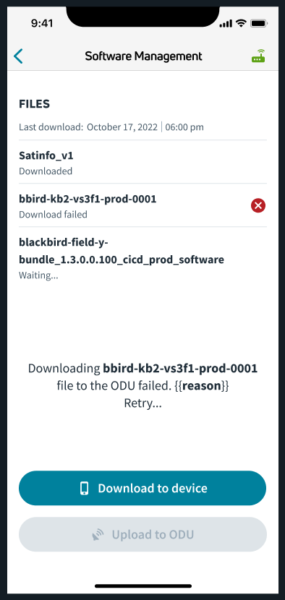
If you receive an error during download or upload, you can re-trigger both from either of the individual Software Management screens.
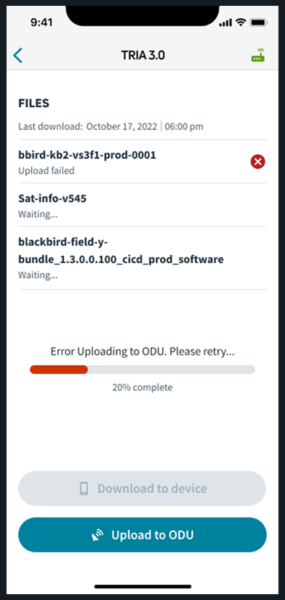
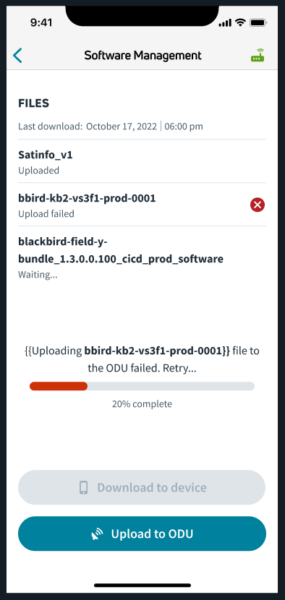
If an upload failure occurs, you’ll see this screen.
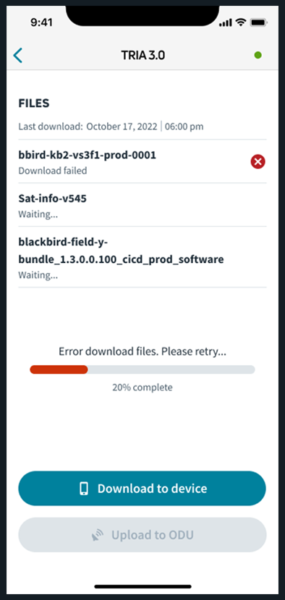
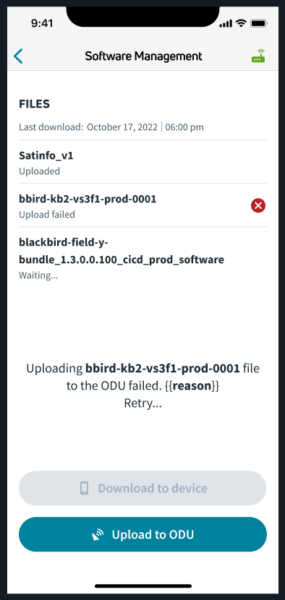
If a download failure occurs, you’ll see this screen.
If there is a failure of auto-download away from the software management screens you will see this error notification.
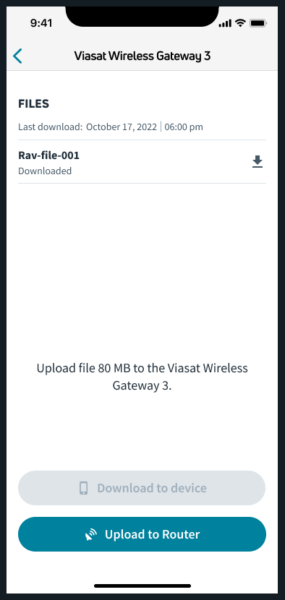
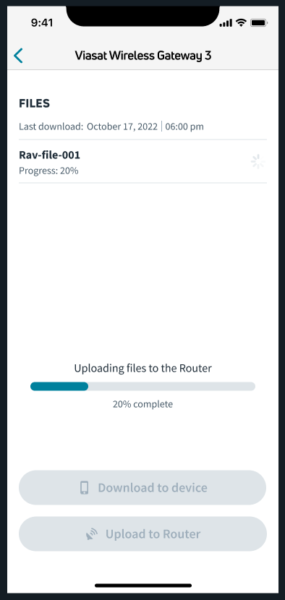
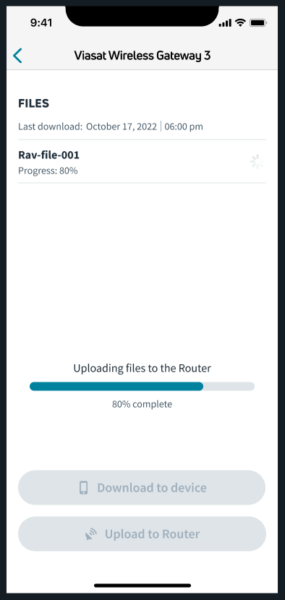
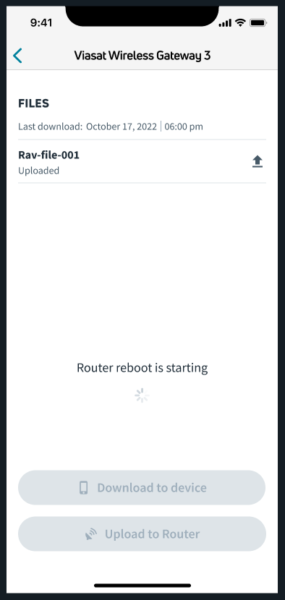
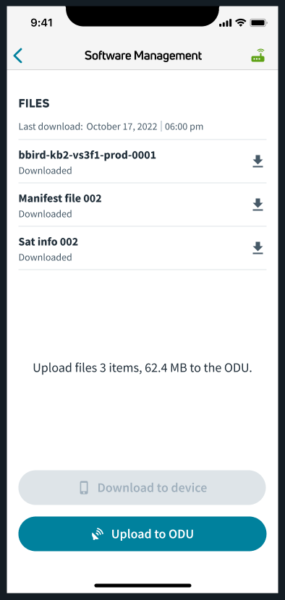
Upload software
Next, you’ll need to upload the downloaded files to the router and the ODU by connecting to the router via WiFi first.
When the app detects the connection to the router, the Upload to Router button will be enabled. Press Upload to Router and the app will continue through its process.
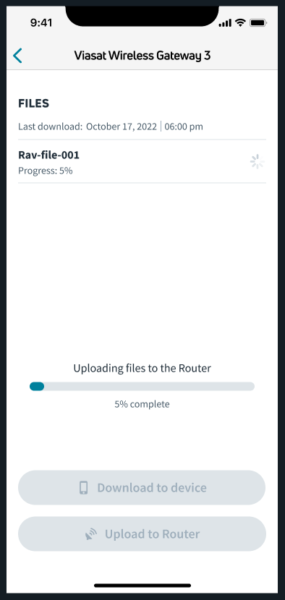
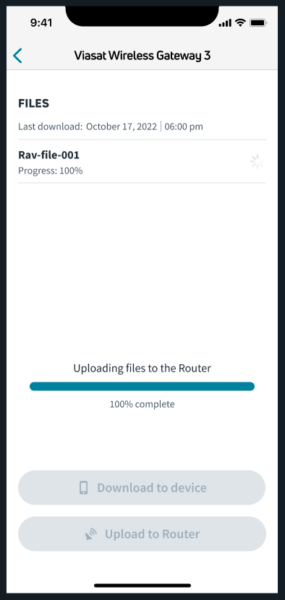
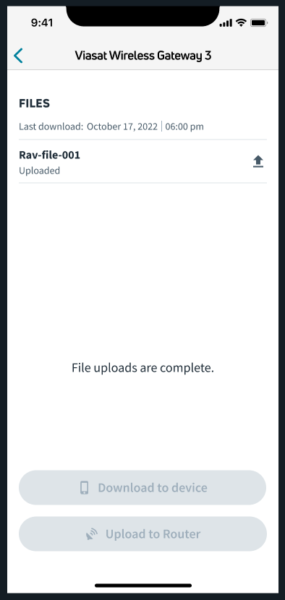
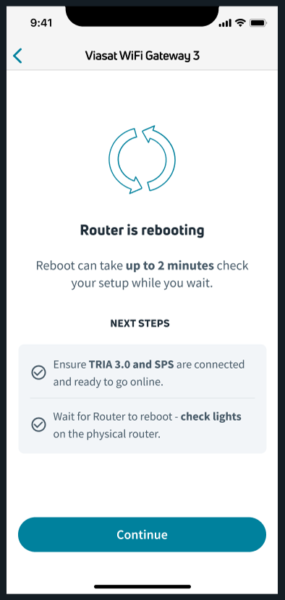
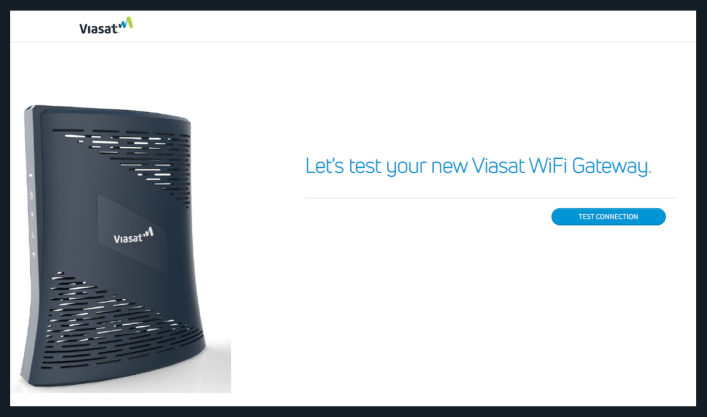
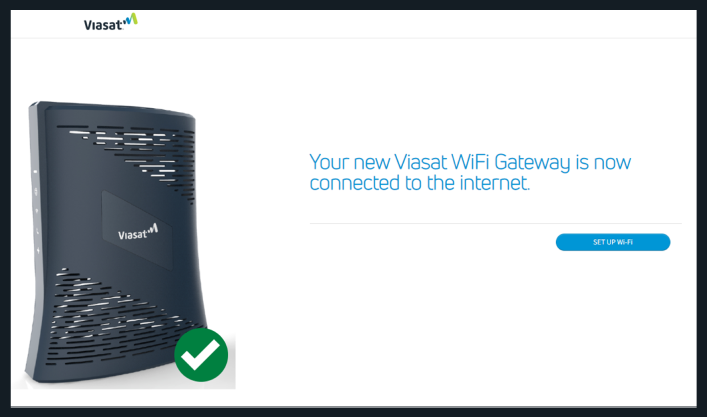
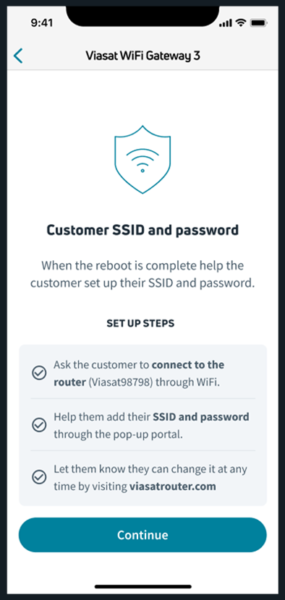
The router will then reboot. When completed, you’ll be instructed to guide the customer to set up their SSID and password.
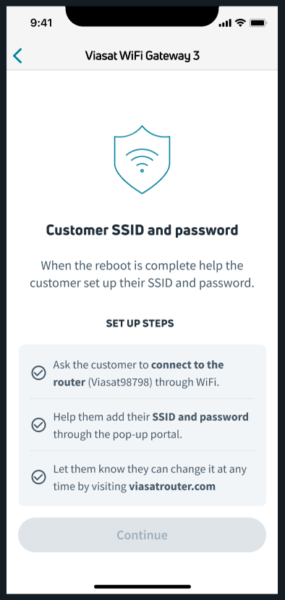
On the technician’s device, connect to the Viasat router.
In the pop-up, help guide them through setting up their SSID and password through the portal. They can change this information at any time.

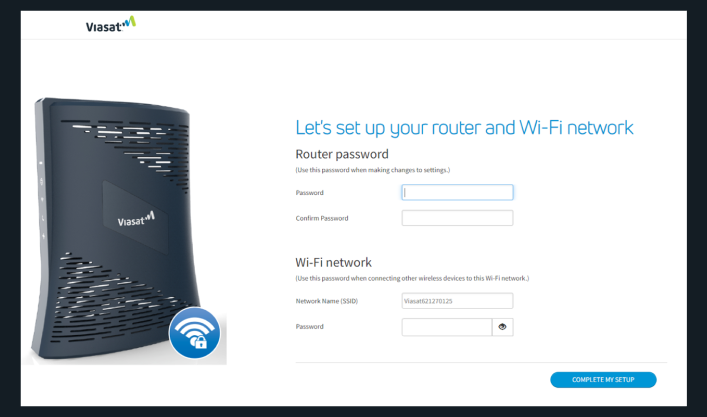
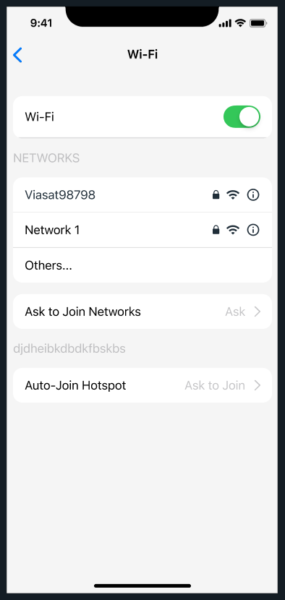
On the customer’s device, have them connect with their new SSID and password.
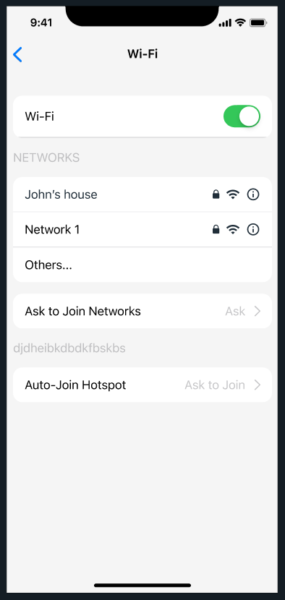
Back on the technician’s device, connect to WiFi with their new SSID and password.
Go back into the VTT app and connect to the new SSID using the password.
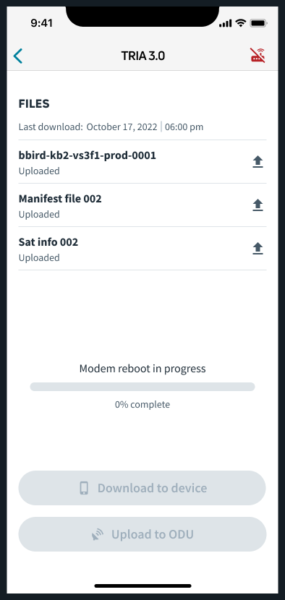
Press Upload ODU.
Press Upload to ODU. The app will continue through its process.
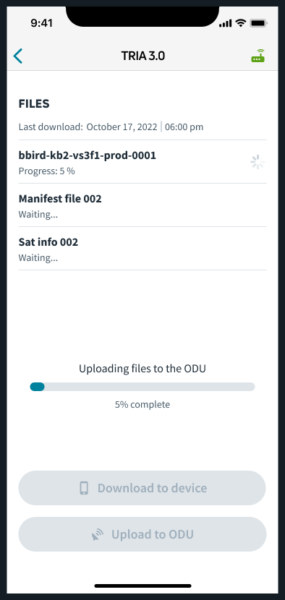
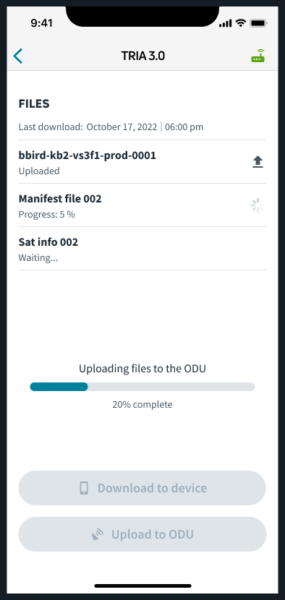
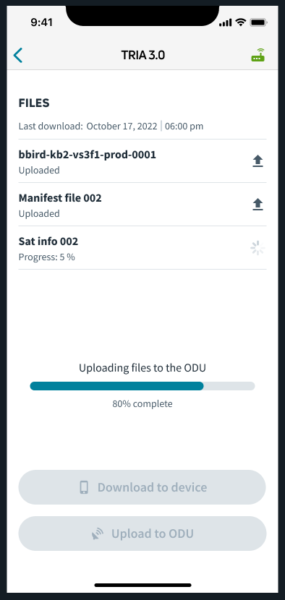
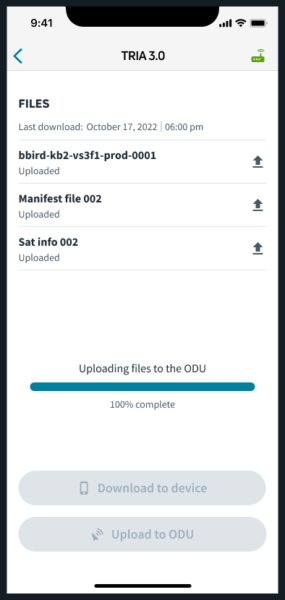
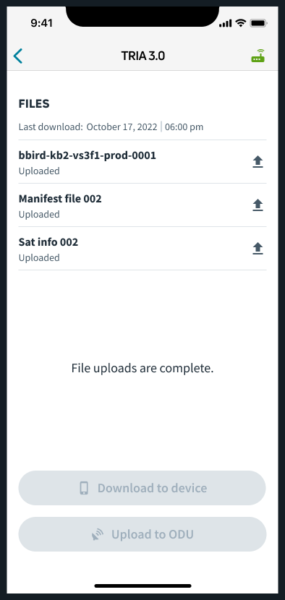
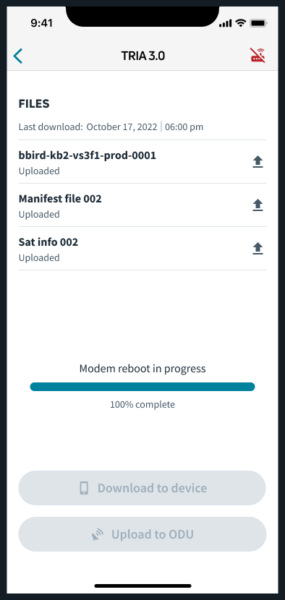
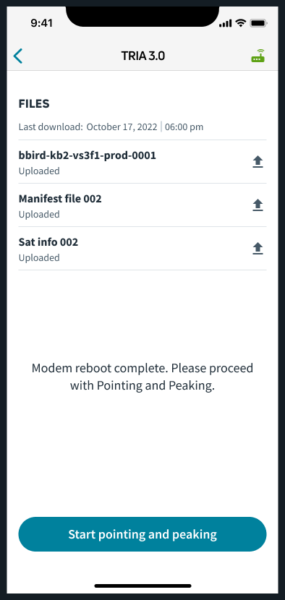
The modem will begin a reboot process. And then you will be able to begin Pointing & Peaking.
The app will alert you if the software package has a newer version.

Should the upload to the ODU fail, you may try the upload again or restart the download from the beginning and then try uploading again.
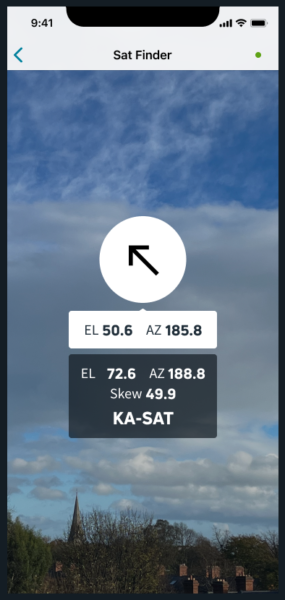
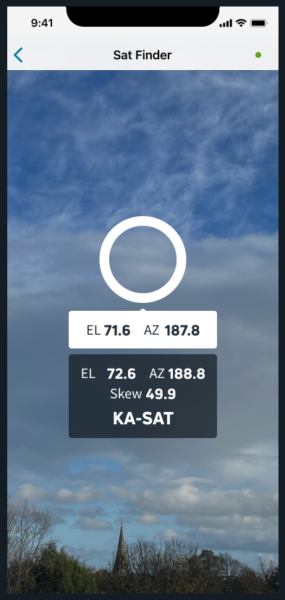
Satellite Finder
Press Satellite Finder from the Dashboard.
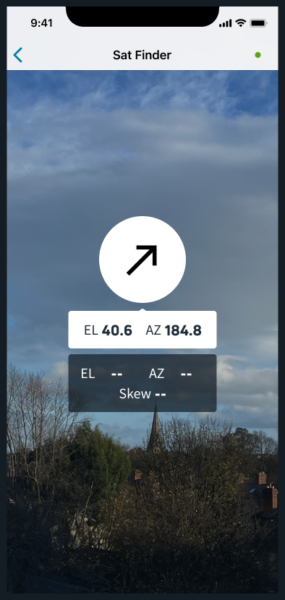
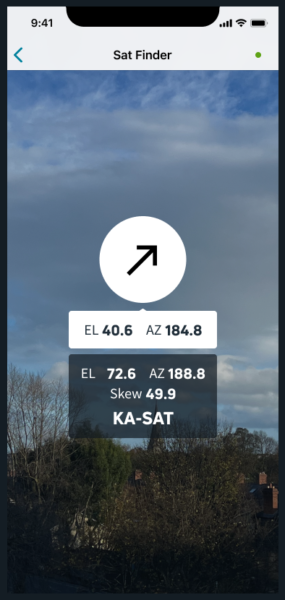
Press the correct satellite and use the mobile camera to locate the satellite. Before entering an area with no service, Satellite Finder will easily let you find the satellite in space. From your position on site, simply follow the prompts.


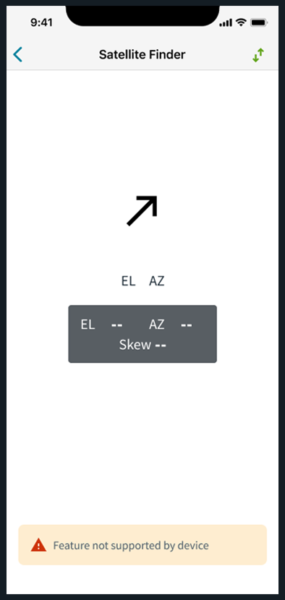
If your device has no magneto, gyro, or compass sensor, you will see these screens stating that the feature is not supported by your device.

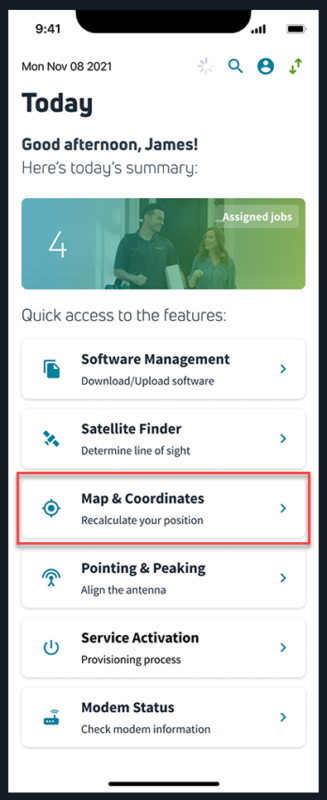
Map & Coordinates
Press Map & Coordinates from the Dashboard. This will allow you to see the selected satellite’s direction. By entering the customer’s location, you’ll be able to previsualize the site before you arrive.
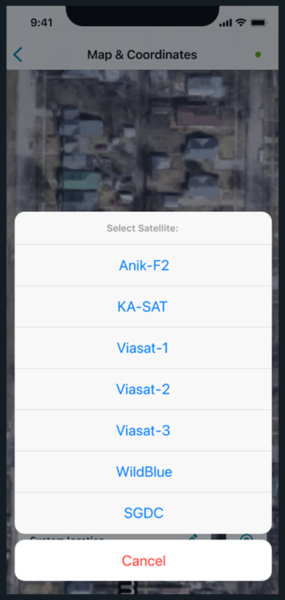
Press the appropriate satellite.
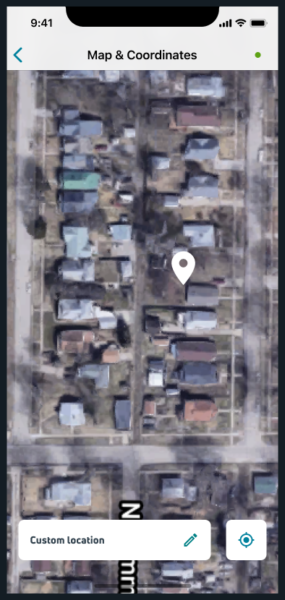
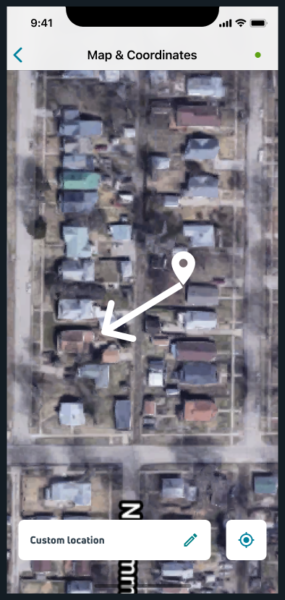
Your current location will show on the map along with an arrow showing the direction of the satellite.
Press the Locate Me icon or the Edit Pen ![]() next to Custom Location.
next to Custom Location.
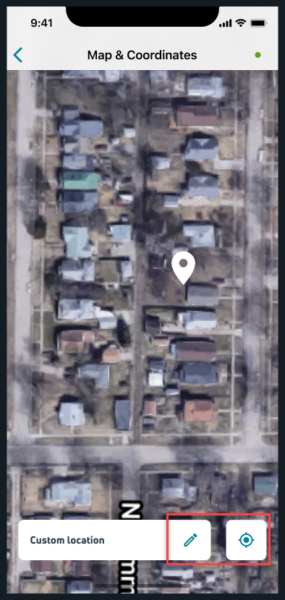
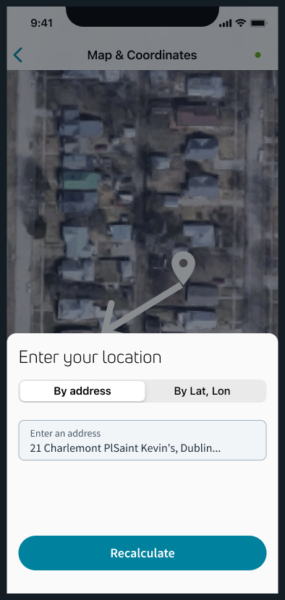
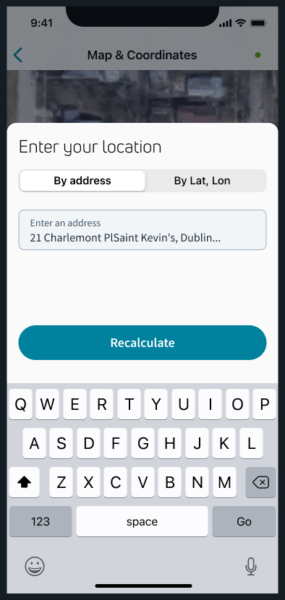
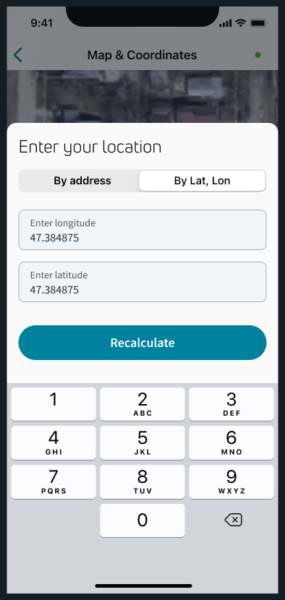
Now, enter your location by address or by Latitude and Longitude.
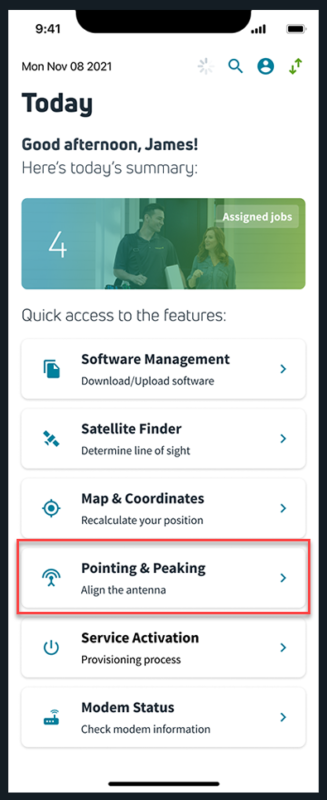
Pointing & Peaking
ViaSat-3
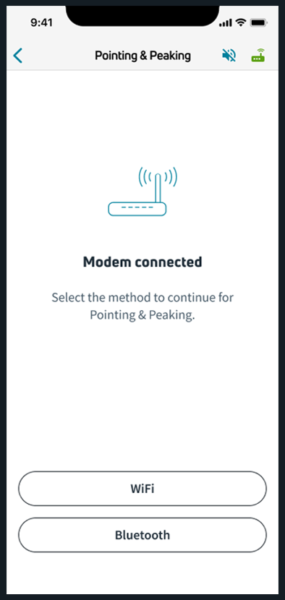
Press Pointing & Peaking from the Dashboard.
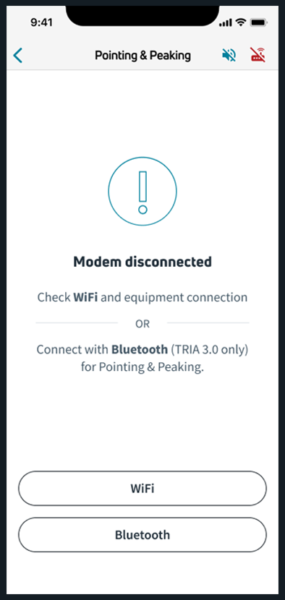
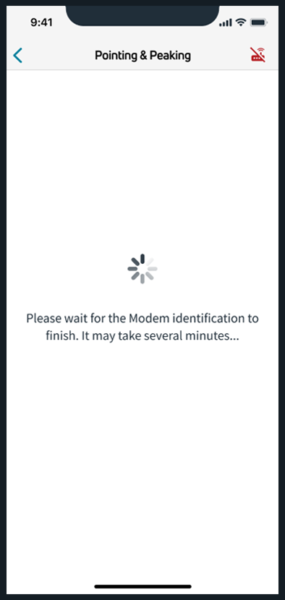
The app will assess the modem connection.
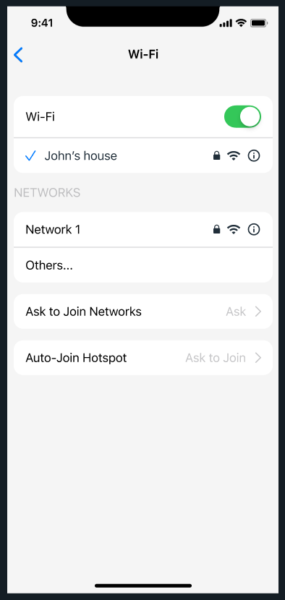
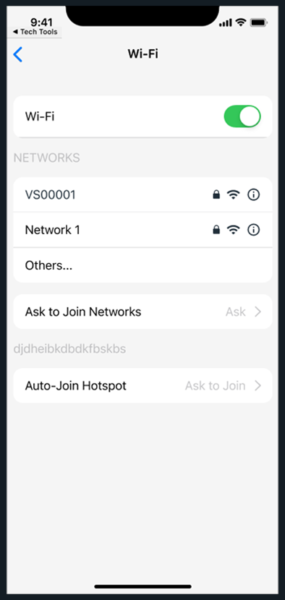
If connected or disconnected, you can continue the process via WiFi by pressing WiFi.
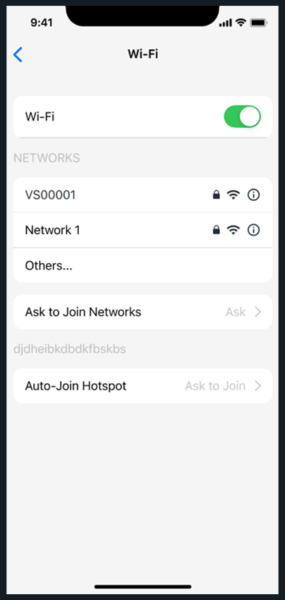
Press Ask to Join Networks and press the Viasat router (in this example, VS00001).
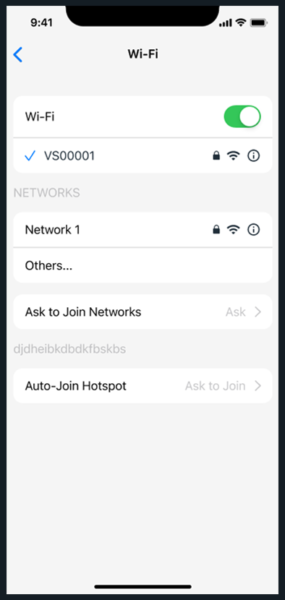
The Pointing & Peaking process can resume.
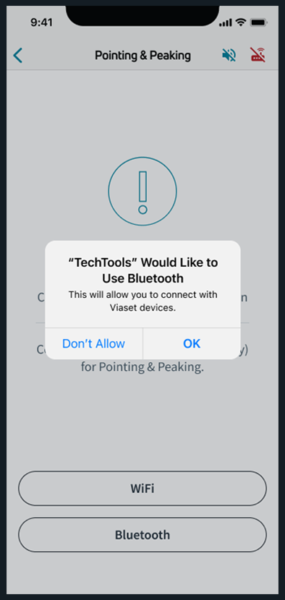
If connected or disconnected, you can continue the process via Bluetooth by pressing Bluetooth.
The first time you select Bluetooth, you’ll receive a permission pop-up.
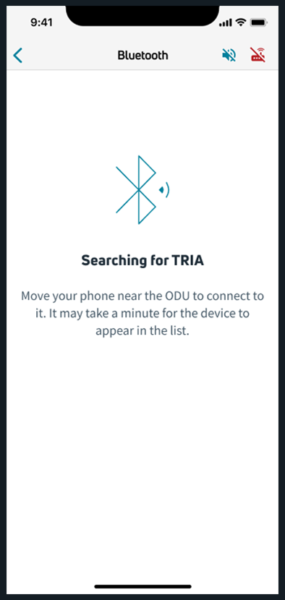
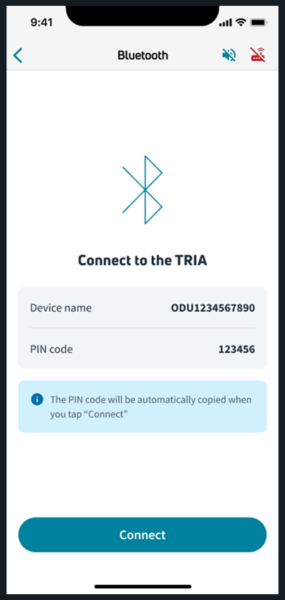
Move your device near the ODU.
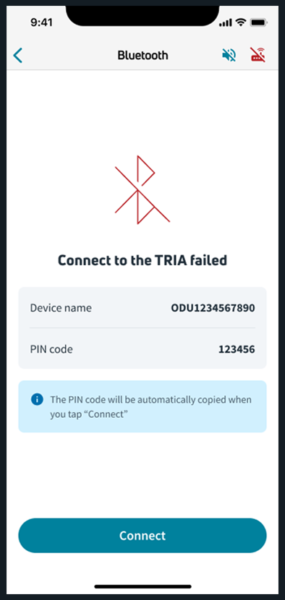
When the user presses Connect, the pin code is automatically copied into the system and feedback will appear to remind you.

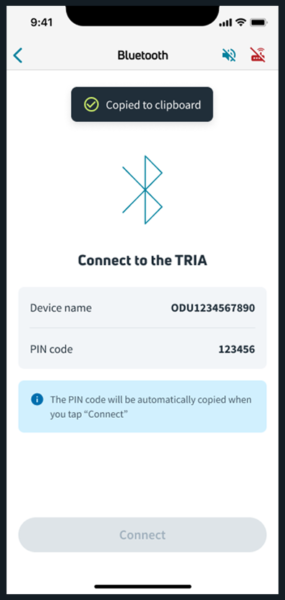
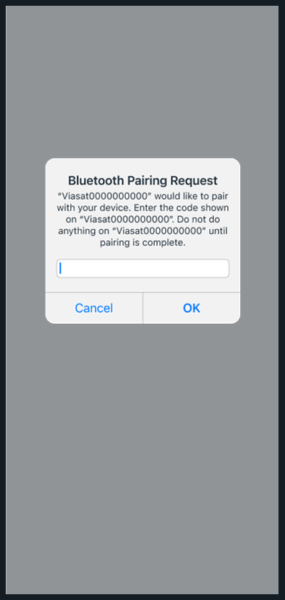
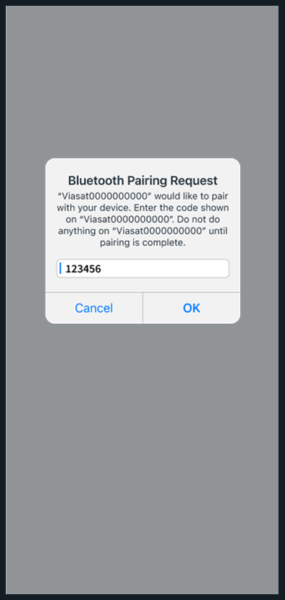
When the pin code pop-up appears, you can paste the pin or type it in manually.

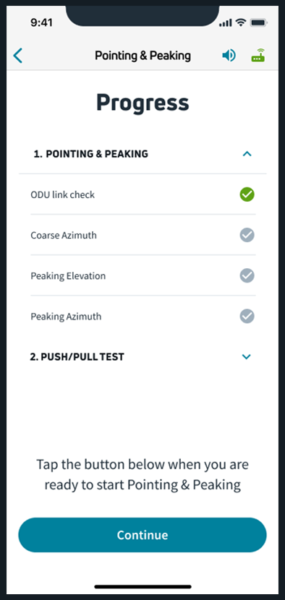
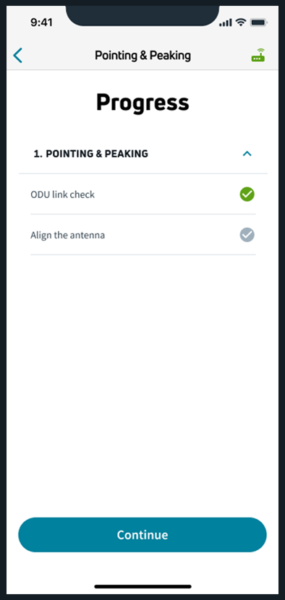
When the app connects to the TRIA via Bluetooth, it will automatically move to the Pointing & Peaking status screen. The ODU link check should turn green. Press Continue.
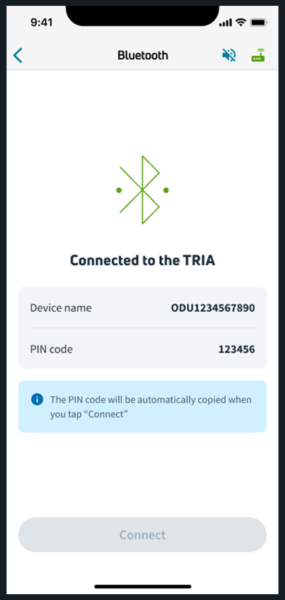

If the connection to the TRIA fails, press Connect and it will take you back to repeat the process starting with the copying of the pin.
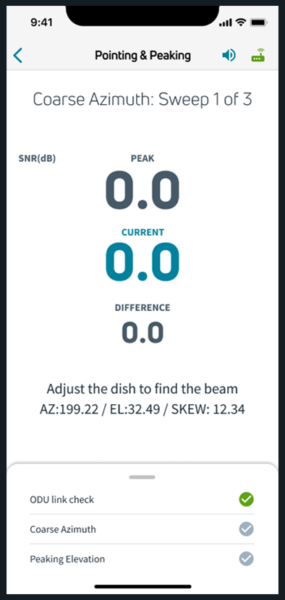
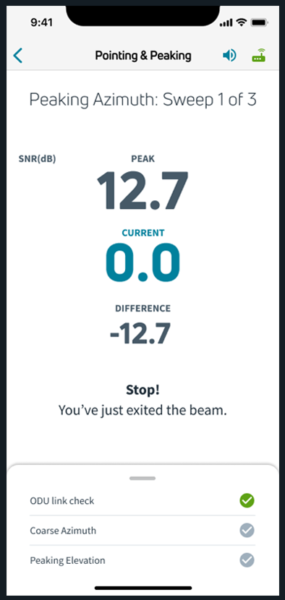
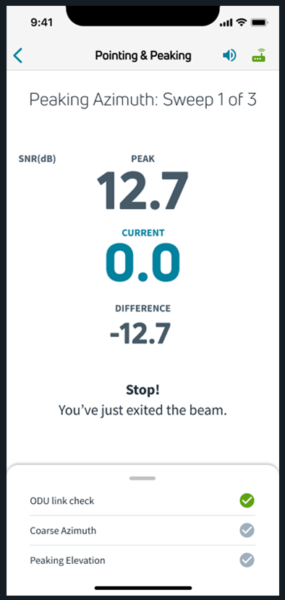
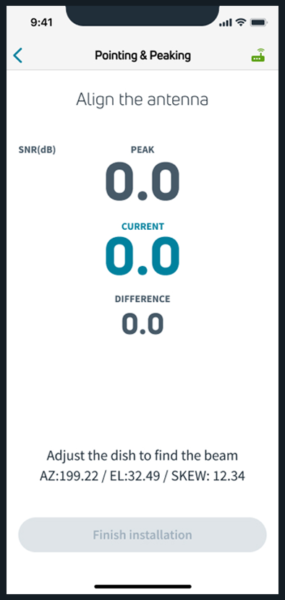
The process then moves into Coarse Pointing and the Signal to Noise Ratio (SNR) should rise.
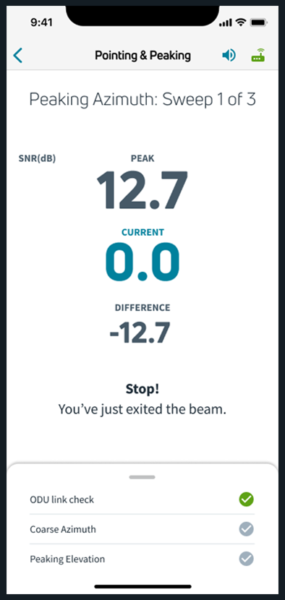
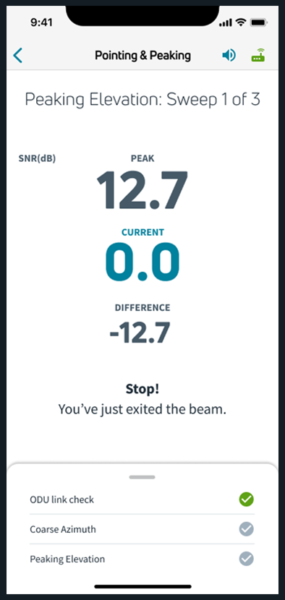
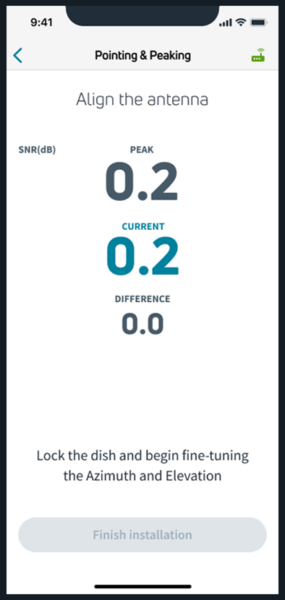
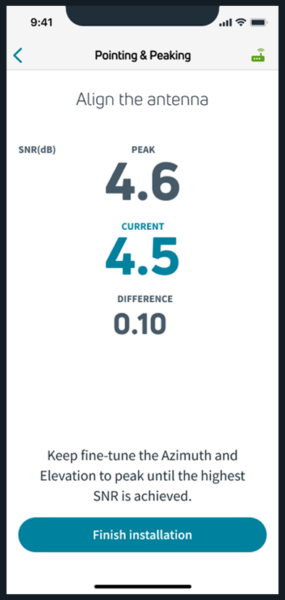
Once successfully Coarse Pointed, the system will move into the Fine Peaking stage. Throughout the sweeps, the SNR strength should rise.

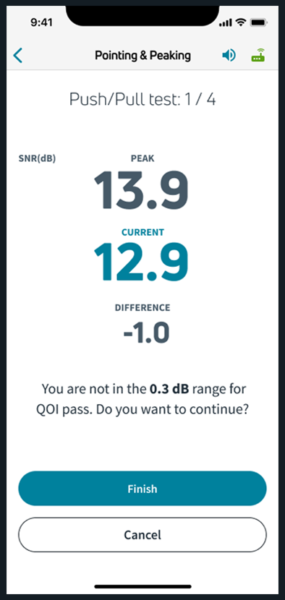
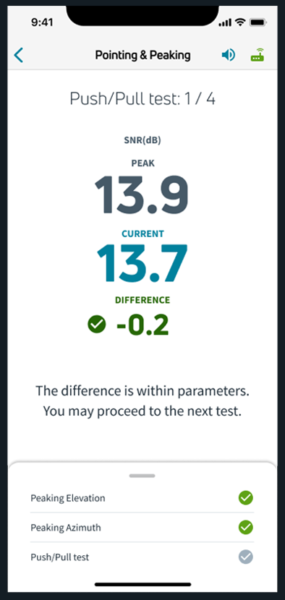
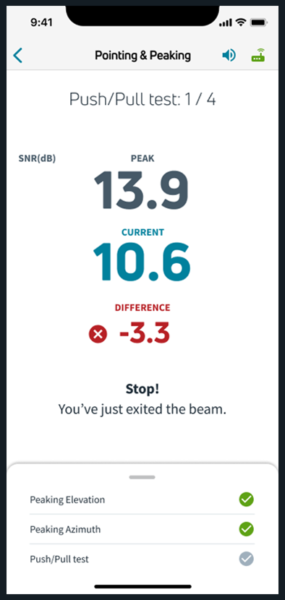
Once successfully Fine Peaked, the system will move into the Push/Pull stage. Press Finish.
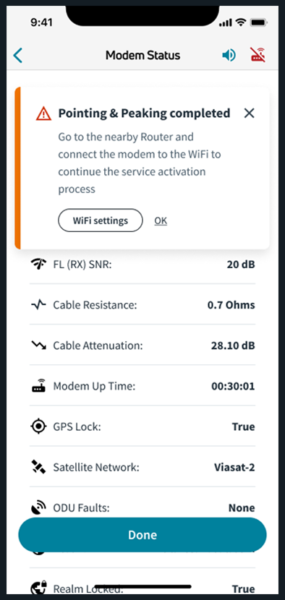
If Pointing & Peaking is done via Bluetooth, the app will alert you to change the connection to WiFi to proceed with the modem lock process.
In your WiFi settings, select the Viasat router (in this example, VS00001). Return to the app, and continue the Modem Lock process.
Finishing Pointing & Peaking in progress
If at any time you wish to see the status of or interrupt the Pointing & Peaking process, swipe up on the bottom bar to expand the Progress view. Press Finish and you’ll be met with a pop-up of confirming Yes or No.


Pressing Yes will take you to the Modem Lock page.

Pressing No will take you back to Continuing Pointing & Peaking.
Cancelling Pointing & Peaking in progress
Press Cancel and you’ll be met with a pop-up of confirming Yes or No.
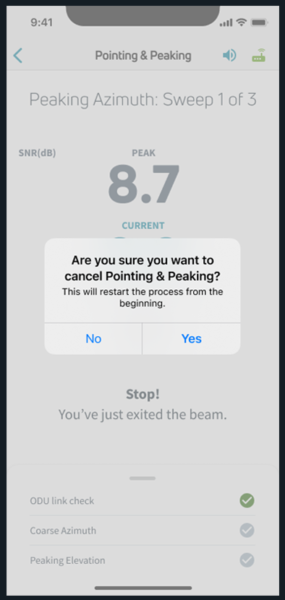
Press Yes and you’ll be directed to the Modem Lock page.
Press No and you’ll be taken to Continue the Pointing & Peaking process.
ViaSat-2
Press Pointing & Peaking from the Dashboard.
The app will assess the modem connection.
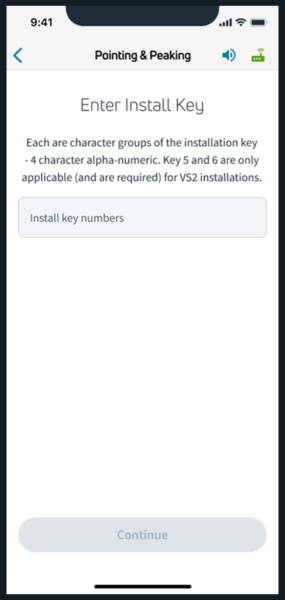
Next, enter the 24-character Install Key and press Continue.

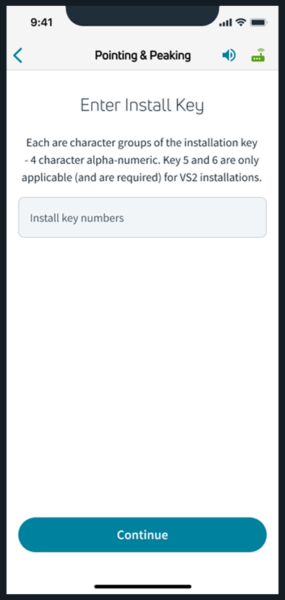
You will be prompted to press Continue to begin the Pointing & Peaking process.
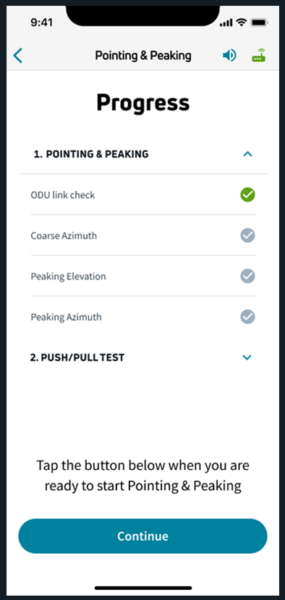
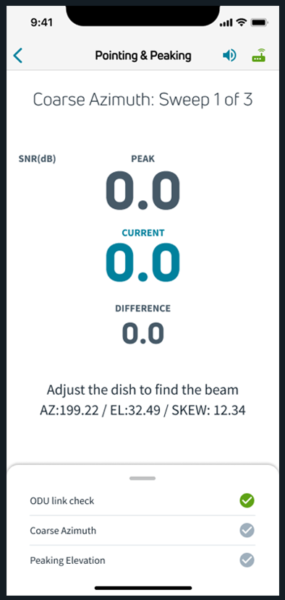
The app will guide you in each step, with each sweep.


After the Push/Pull test, press Finish and the app will move on to Modem Lock process.

ViaSat-1
Pre-onsite installation requirements for SURFBEAM 2 (SB2)
SurfBeam 2 (SB2) terminals do not have inherent WiFi connection capabilities. In order for an installation to succeed, a connection between the technician’s third-party router and the terminal must occur (for software updates and related activities). You will connect the terminal to the router through an Ethernet cable and will connect to the router using your mobile device.
Press Pointing & Peaking from the Dashboard.
The app will assess the modem connection.
Next, enter the 16-character Install Key and press Continue.
You will be prompted to press Continue to begin the Pointing & Peaking process.
After Pointing & Peaking, press Finish installation and the app will move on to Modem Lock process.
Service Activation
For Provisioning, press Assigned Jobs.
Find your current work order, and press it to find more details. Scroll to the bottom and press Activate Service.
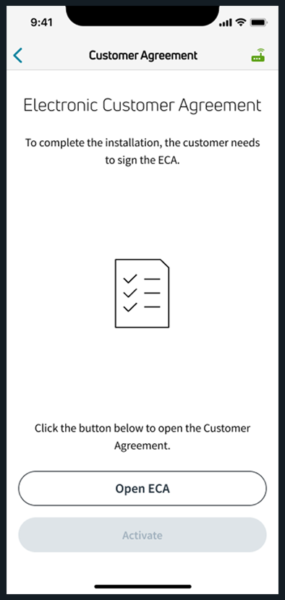
Press Open ECA to have them sign the Electronic Customer Agreement.
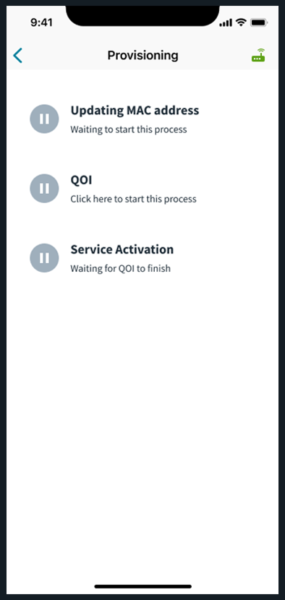
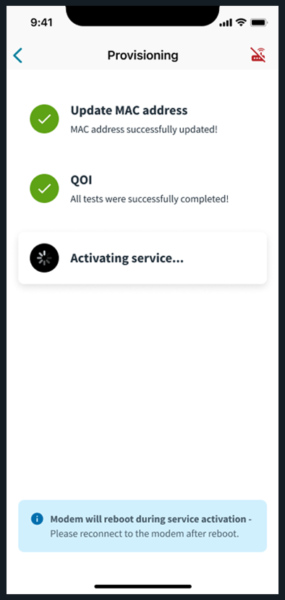
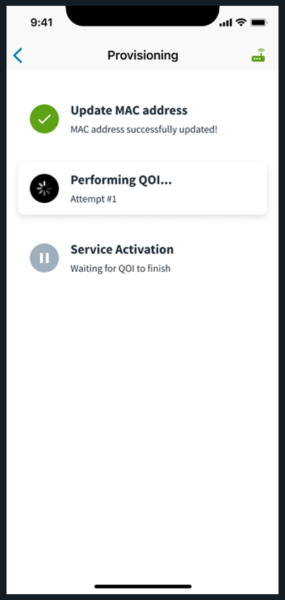
A green checkmark will appear next to Update MAC address and QOI when the system passes its checks.

The system will automatically continue to Service Activation. You will likely see multiple modem reboots during this process.

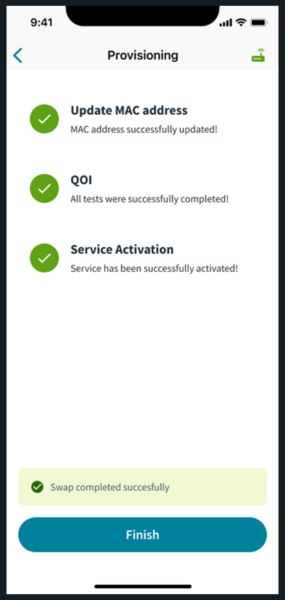
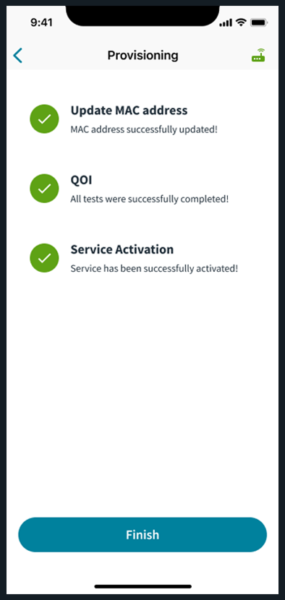
A green checkmark will appear next to Service Activation once the activation is complete. Press Finish to exit.

When finished, it’ll take you to the customer’s work order.
After three attempts to perform QOI, it will bypass QOI and move onto Service Activation.


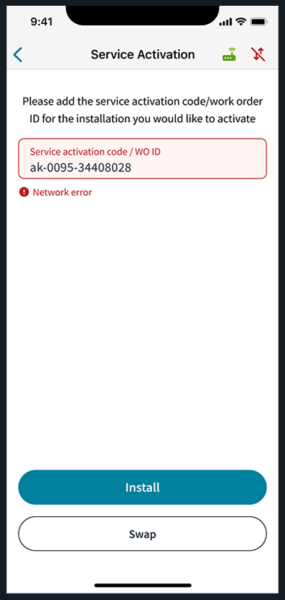
WHOLESALE ONLY – Press Service Activation.
Then, type in the Service activation code, or the Work Order ID.
If you see this screen, this means the app is connected to the modem, but the modem is not online. If you see this, you will need to Point & Peak and reboot the modem.
Press Open ECA to have them sign the Electronic Customer Agreement.
A green checkmark will appear next to Update MAC address and QOI when the system passes its checks.
The system will automatically continue to Service Activation. You will likely see multiple modem reboots during this process.
A green checkmark will appear next to Service Activation once the activation is complete. Press Finish to exit.
After three attempts to perform QOI, it will bypass QOI and move onto Service Activation.

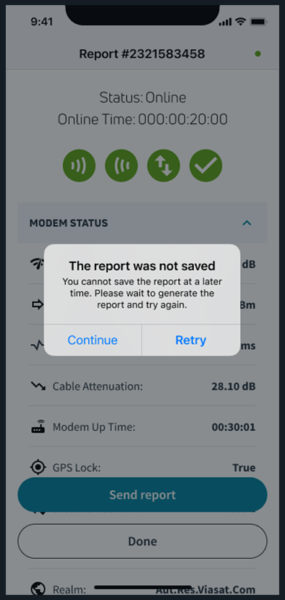
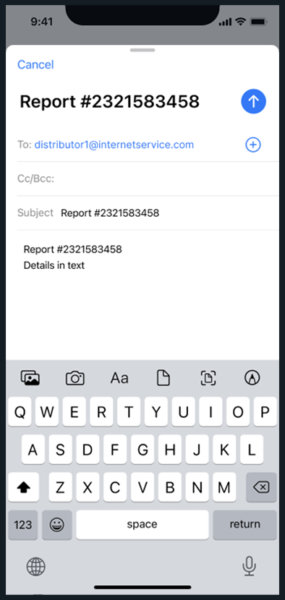
When finished, it’ll generate the Reporting page. Press Send report.
The email will populate and your email client and press Send.
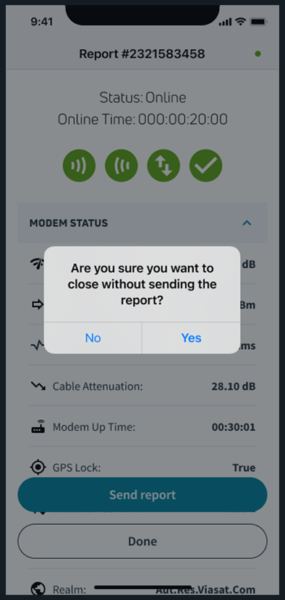
If you try closing without sending your report, you will be prompted twice before closing out the order.
Regardless if the status is Online or Offline, if you press Done, it will take you back to the app dashboard.
VS360 Products
After the retail installation service has been activated, you can press VS360 products. You may access VS360 48 hours before and 48 hours after installation for any upsell(s).
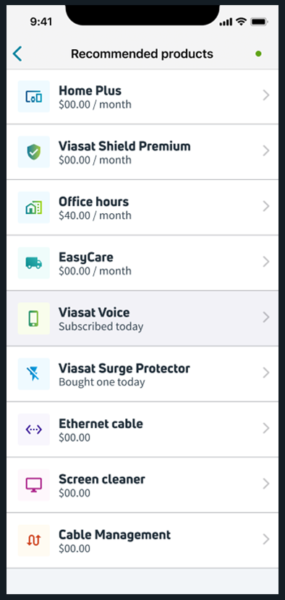
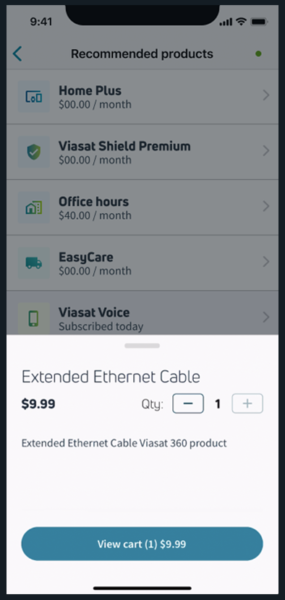
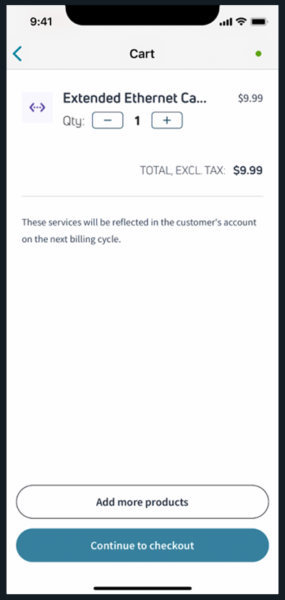
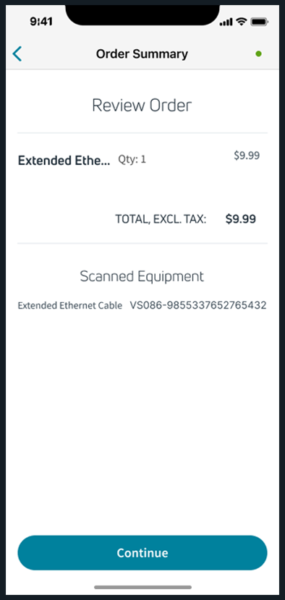
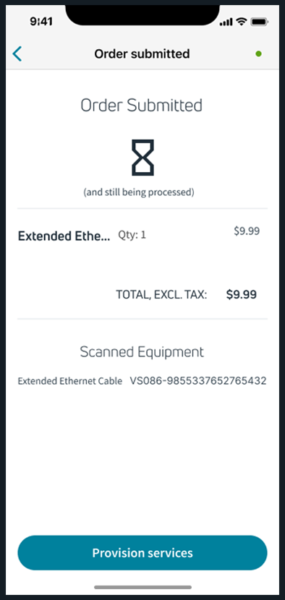
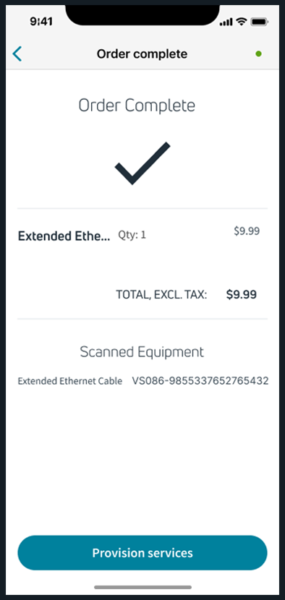
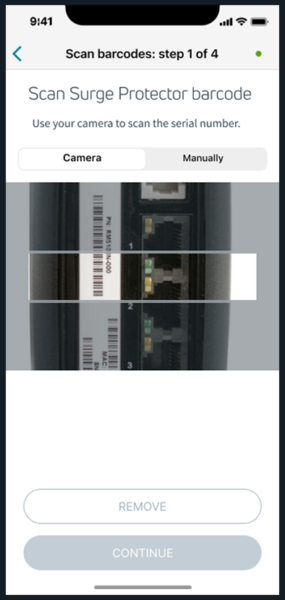
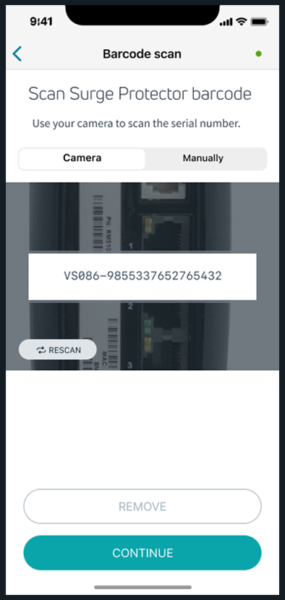
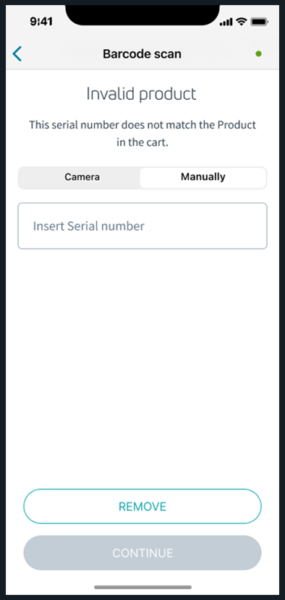
Some products require a barcode scan to match or validate the back-office inventory system.

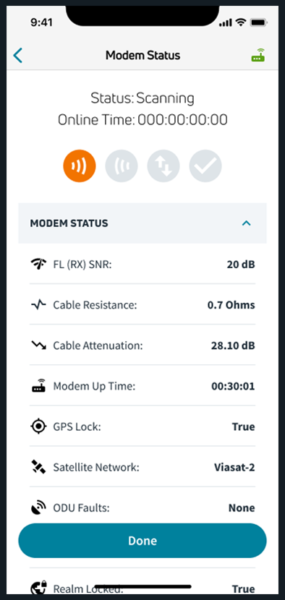
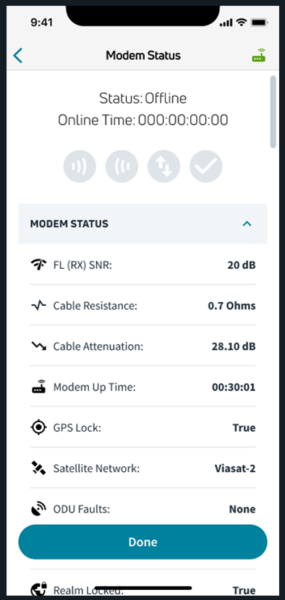
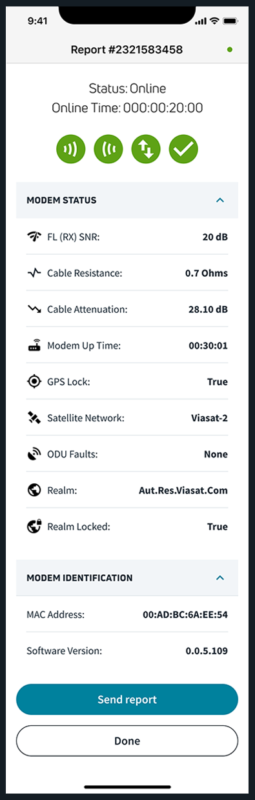
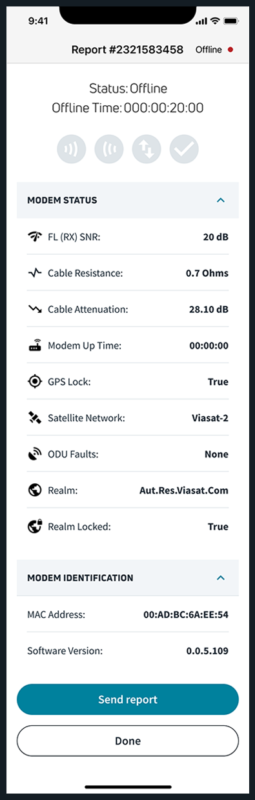
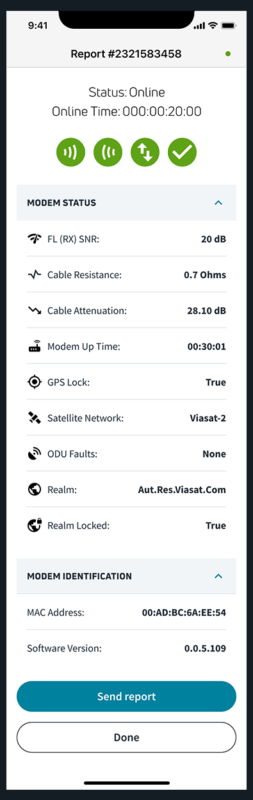
Modem Status
The Modem Status will allow you to check any current connection status. Usually, the app will go to this section automatically immediately following Pointing & Peaking.
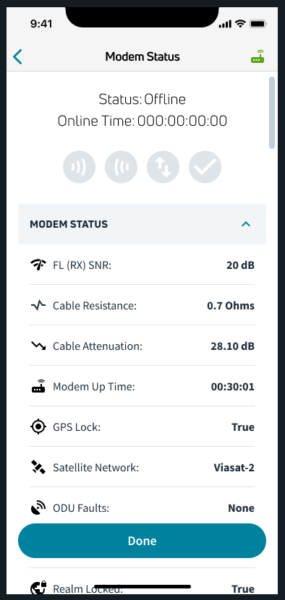
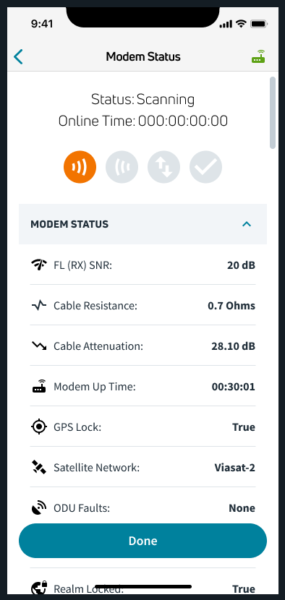

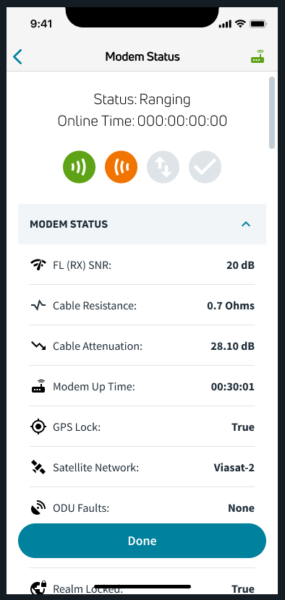

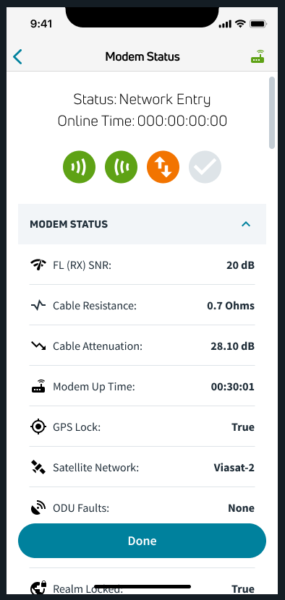
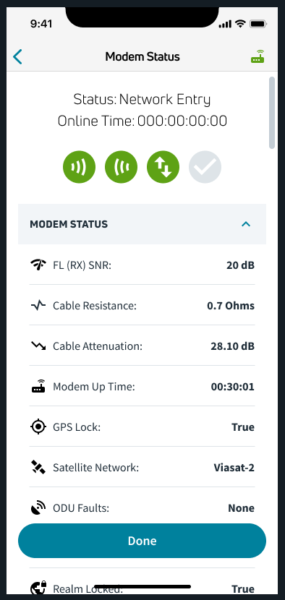
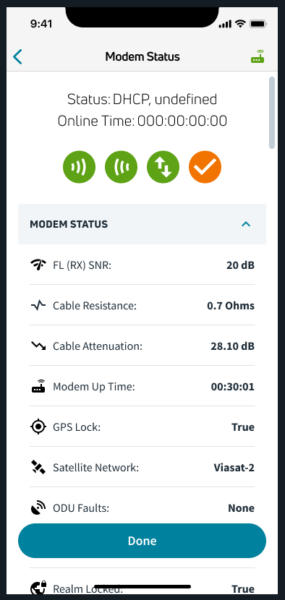
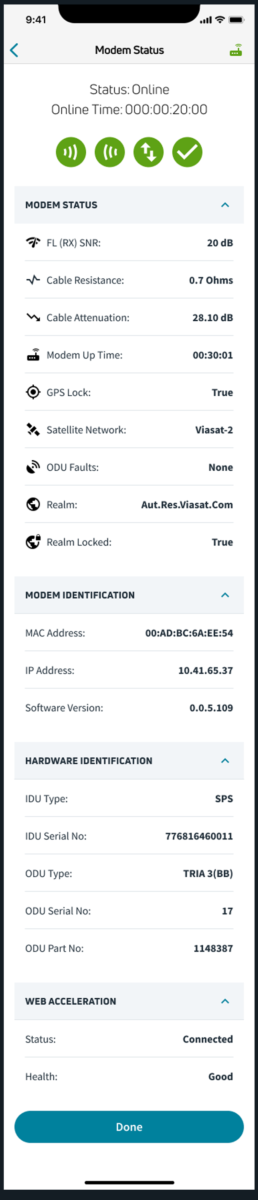
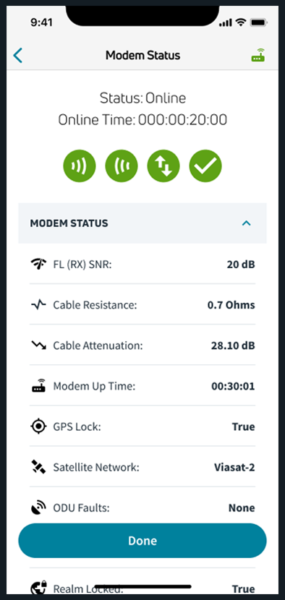
After the Modem Status changes to Online for the first time, it then will reboot itself to update its necessary updates to function. Following the reboot process, it should come back Online and all indicator icons should be green. Press Done and you’ll return to the app dashboard.
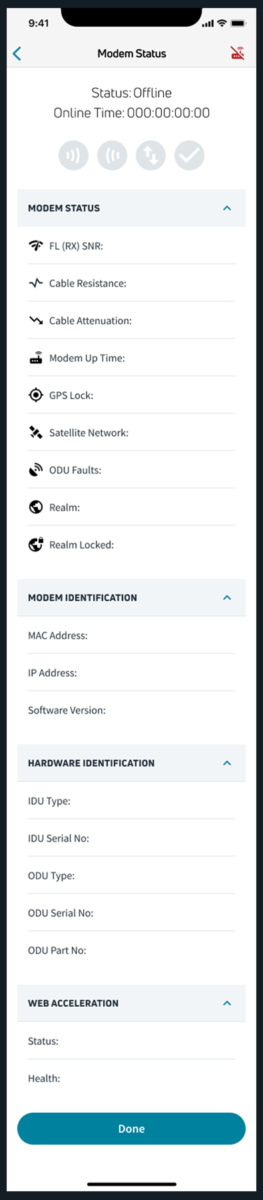
If the connection is offline, it will look like this.
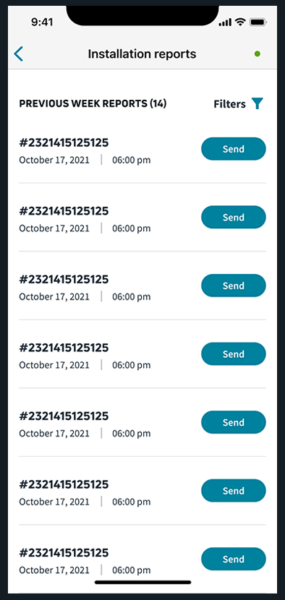
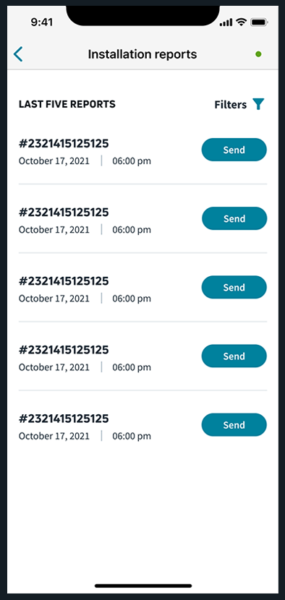
Report History
WHOLESALE ONLY – Report History is available for Wholesale technicians.
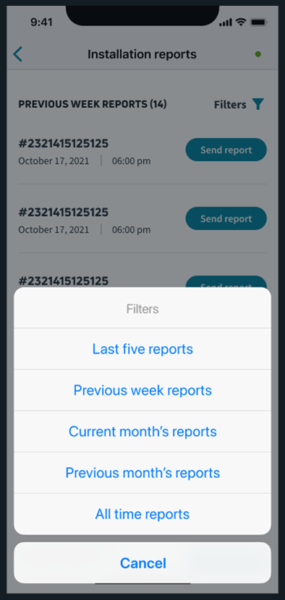
Here, you will be able to view previous installations, filter your timeline, and manually send reports.

Account Settings
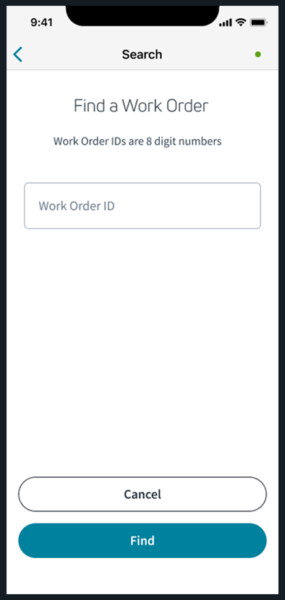
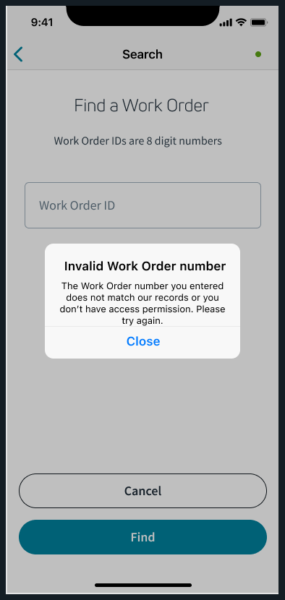
Search
RETAIL ONLY – Pressing on the Search icon will allow you to find a work order with a work order ID number.
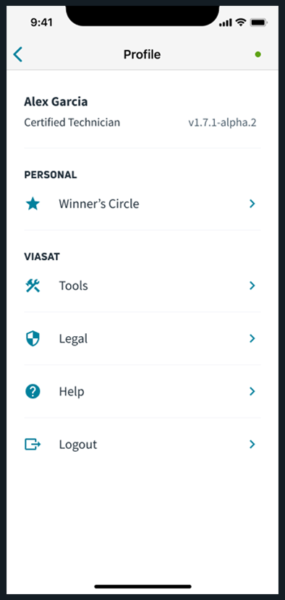
Profile
To open Account Settings, press the person icon in the top right of the Dashboard.
Your profile section will look like this.
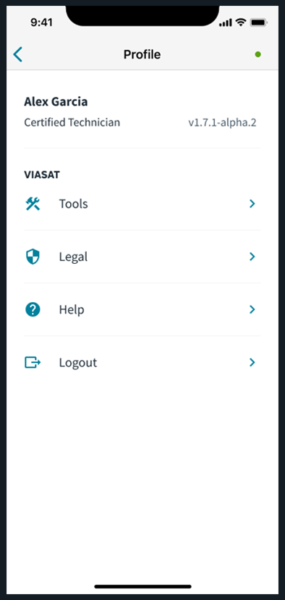
WHOLESALE ONLY – Your screen will look like this.
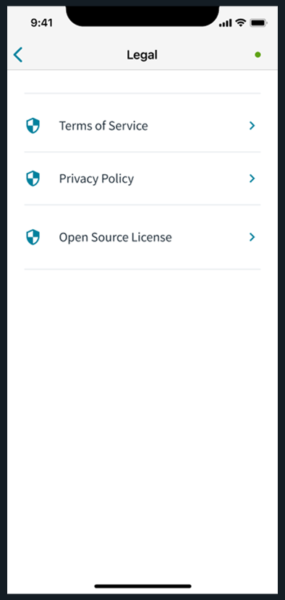
Legal
Press Legal to view the Terms of Service, Privacy Policy, and the Open Source License.
Tools
Press Tools to view the Installer Portal, Home Plus, and an IRS 1099 Form (this form is only for US Retail technicians). Clicking the IRS 1099 Form hyperlink opens the address in the app browser page.
After doing upsells, technicians must complete their 1099 tax forms.

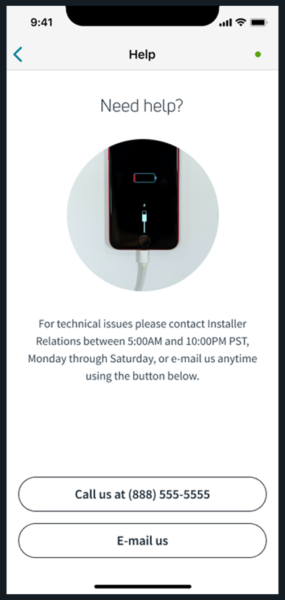
Help
Press Help to call or email Installer Relations.