Account Activation – Customer Present Job Aid
Summary
This Job Aid covers:
Customer Agreement – Customer Signer
This Job Aid supports the Viasat Retail (Fulfillment and Dealer) Technician audiences.
Introduction
This Job Aid provides steps the Customer and the Technician must follow for the Account Setup and Customer Agreement process for the residential service. It is the Technicians responsibility to help the Customer understand that Account Setup is important because:
- All billing statements and ViaSat contacts are directed at the Account’s Contact email.
- Access to Data Usage is only available to the customer if the Account is set up.
Note: If an Authorized Signer is present (instead of the Customer), follow the procedure in the Service Account Activation – Authorized Signer – Job Aid.
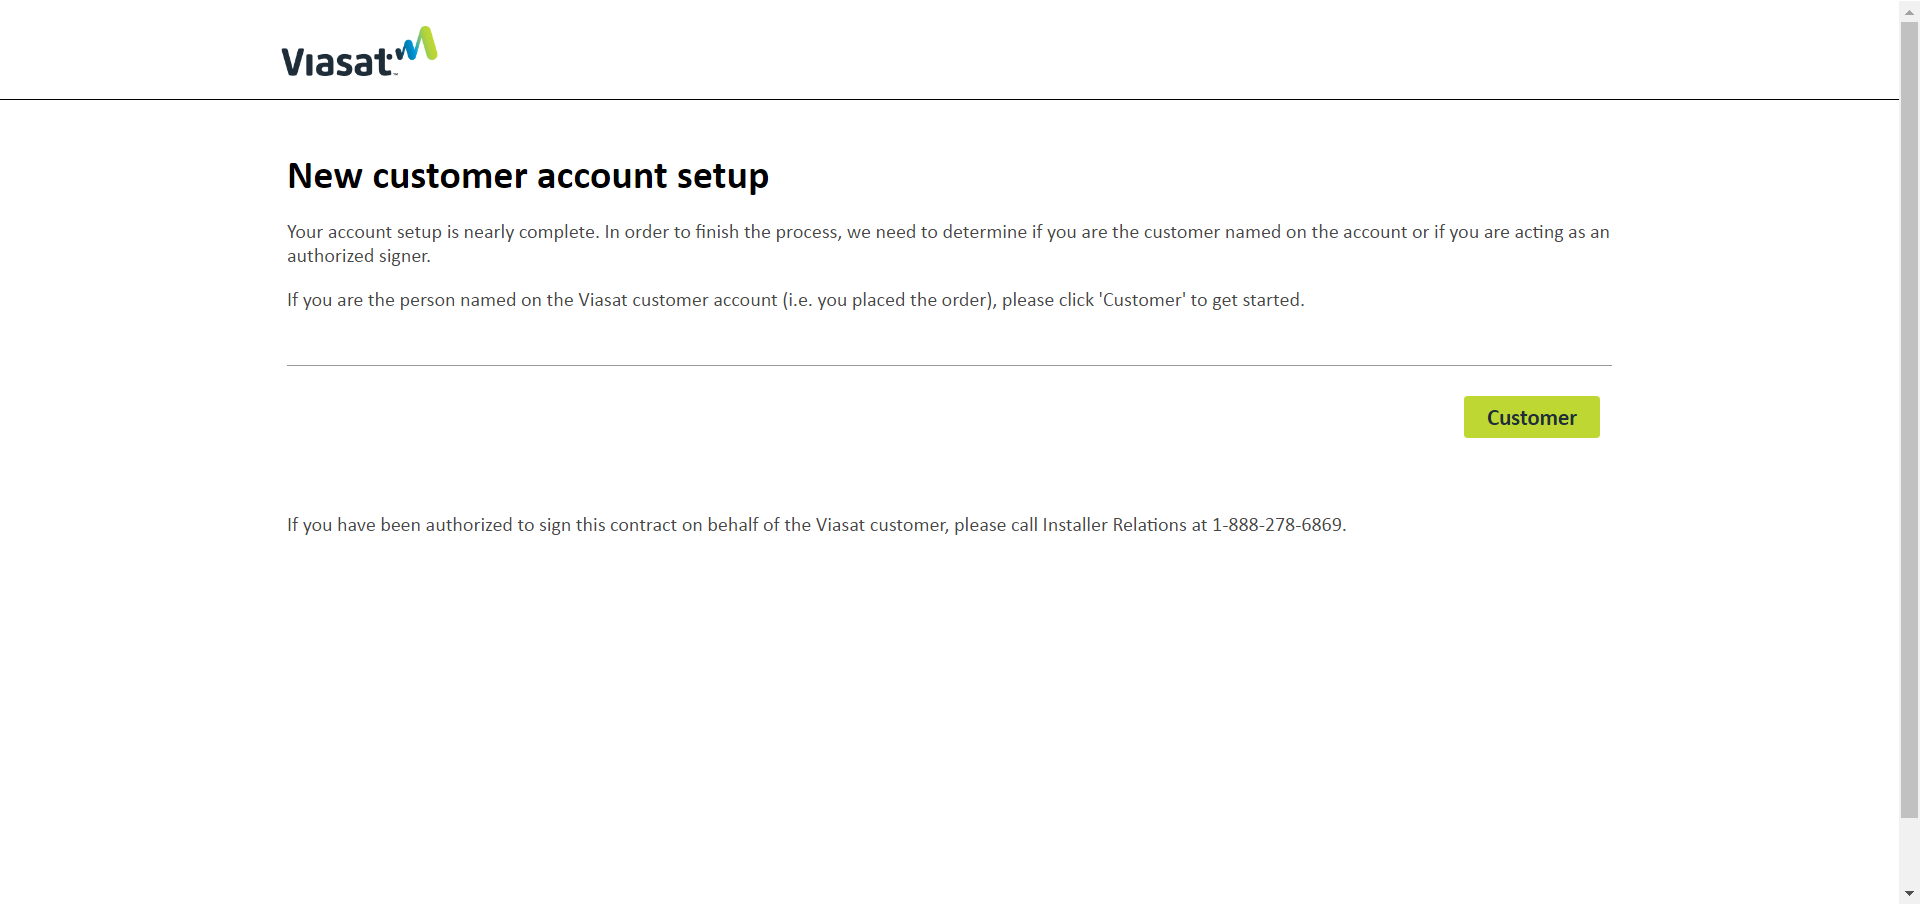
This process begins in the Install Portal (Provisioning system) after the Quality of Installation (QOI) process registers all green LED values. The browser refreshes to show the New Customer Account Setup page.
Customer Agreement – Customer Signer
Note: The procedure shown below requires that the Customer be present.
- On the New Customer Account Setup page, click Customer.
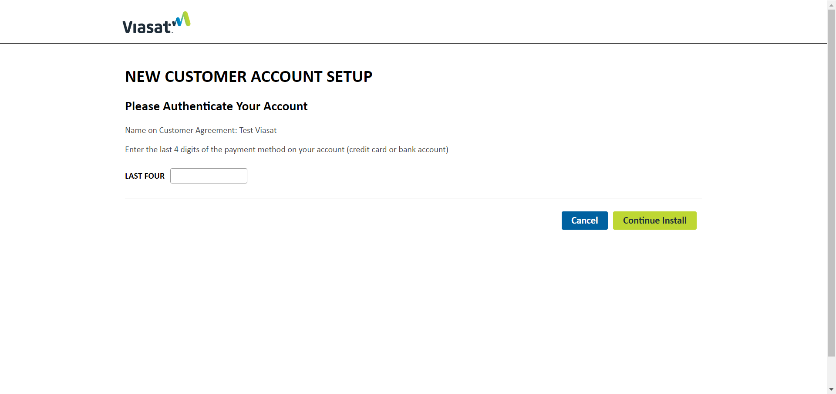
- The Customer types the last four digits of the payment method on their account.
Note: This payment method was given when they placed the order for their new service.
- Wait for the Customer Agreement to appear.
Note: If it fails to appear, contact Installer Relations.
Note 2: If it fails to appear and you are using IE 10; set it to compatibility mode.
- When the Customer Agreement is available, the Technician reviews these four Viasat-specific topics while the Customer follows along:
- The Service
- Description
- Minimum System Requirements
- Minimum Service Commitment
- Responsibility and Supervision
- Age and Account Setup
- Multiple Use of Account
- Installation of Equipment
- Subscriber Responsibility
- Data Access Policies
- Disclaimer of Warranties
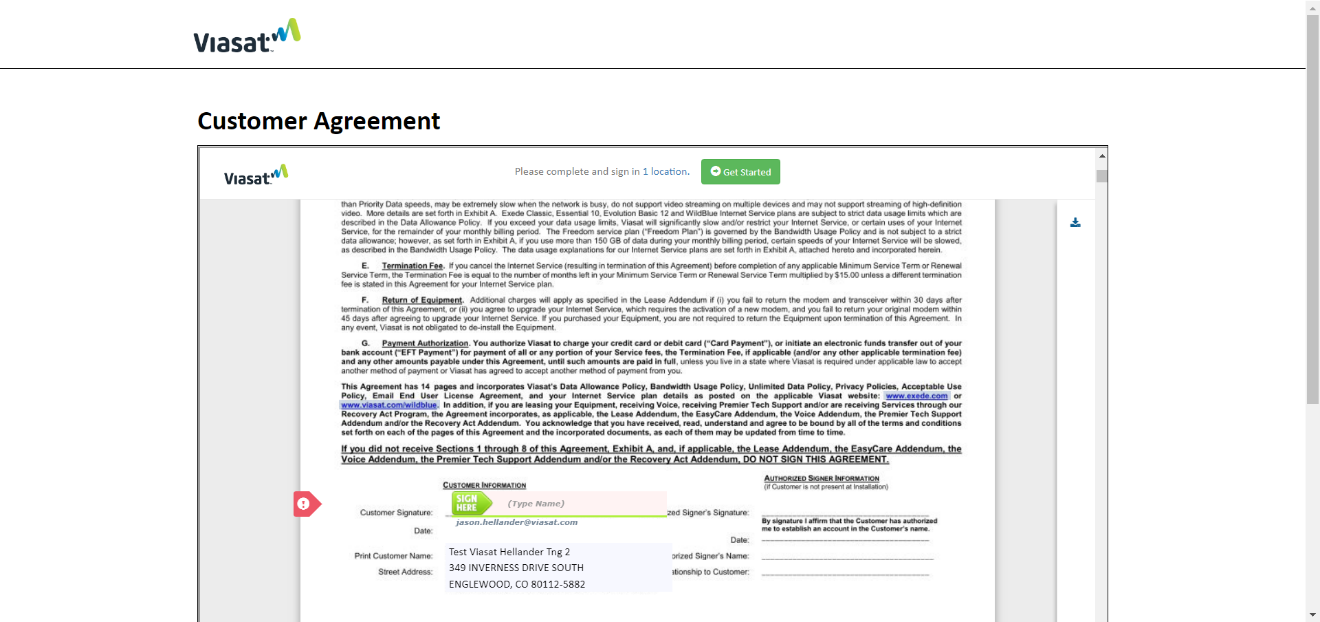
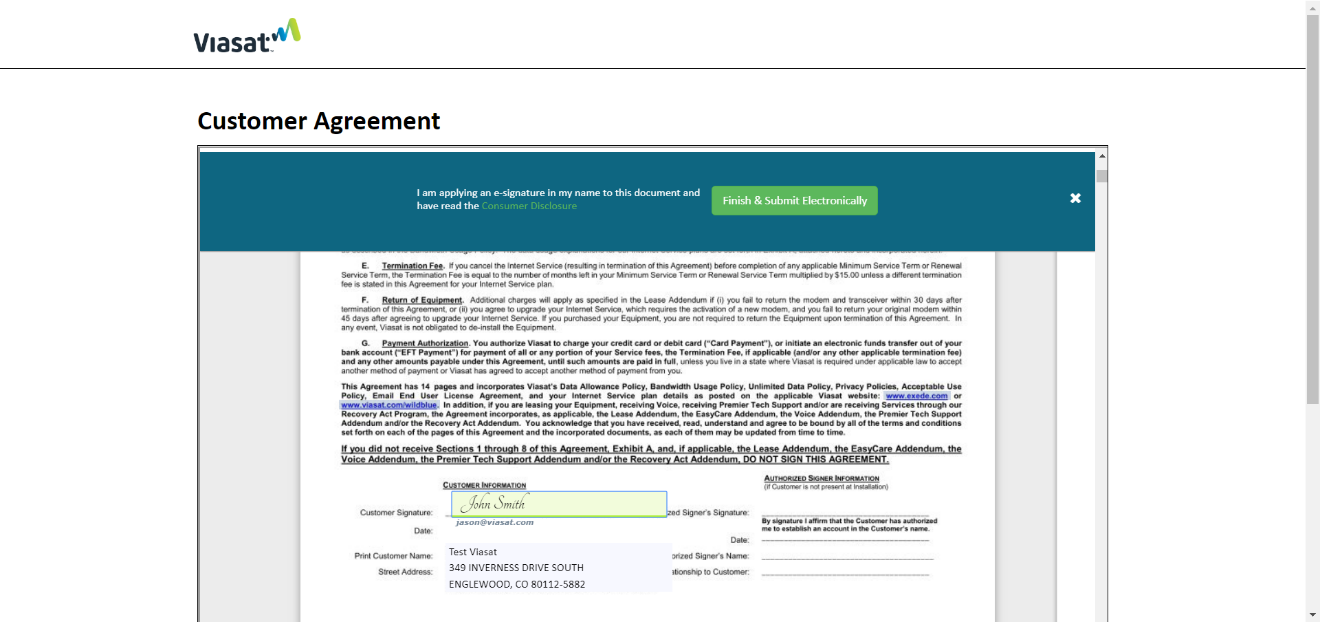
- The Customer accepts the agreement by completing the following steps:
- Typing their name in the Name to Sign field: They enter their name the same way they would normally sign a legal document. (Example: if the customer normally uses their middle initial they should type it in = John Q Smith)
- Reading the statement and clicking the checkbox beside the “I am applying a legally binding e-signature…” statement. Optionally, they may optionally click the Consumer Disclosure link to read more about e-signatures.
- At the top of the page, click the Finish & Submit Electronically button. This button creates the e-signature in the document, then creates the document name, and stores the document in the account storage area.
Important: If the customer refuses to set up their account and/or accept the Customer Agreement, the Technician is required to contact Viasat Field Support immediately. The Technician cannot leave the customer’s site until the issue is resolved or the account is deactivated.
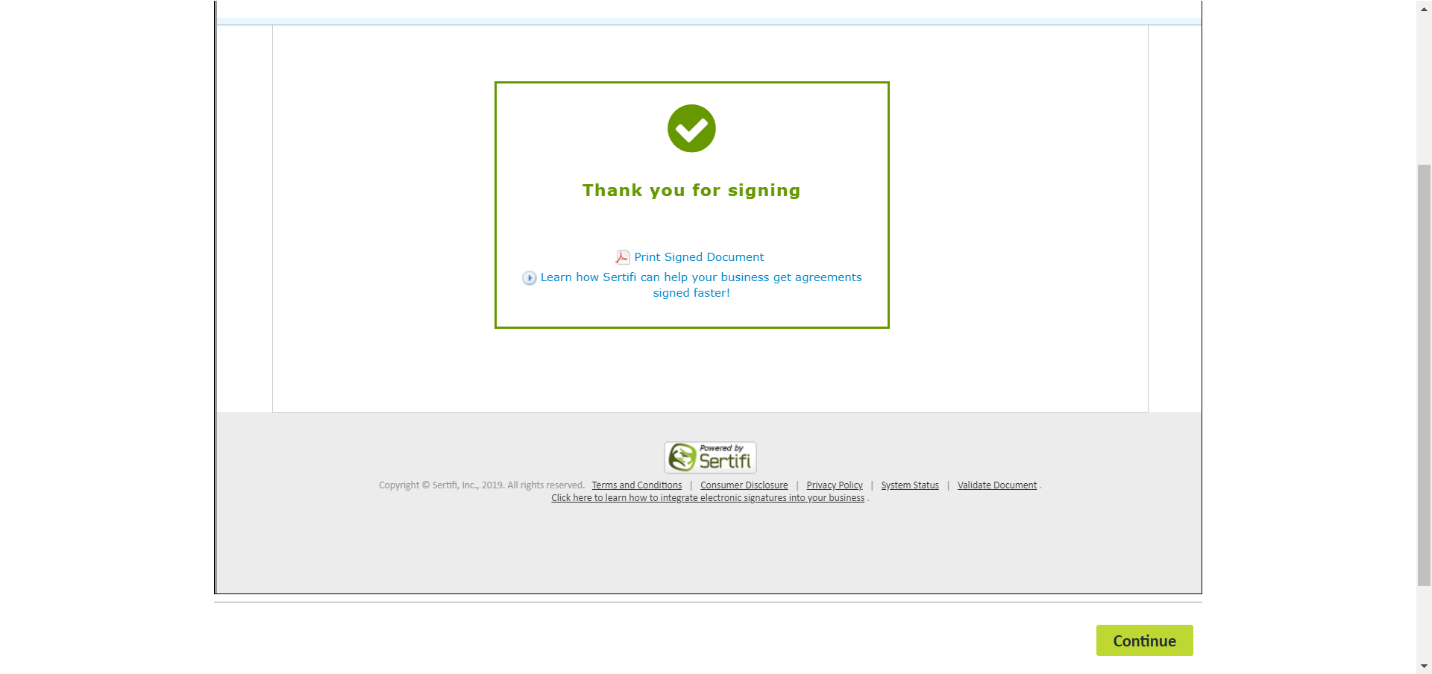
- After the Customer Agreement is signed electronically, the Thank you page appears.
Click the Print Signed Document link, and save the PDF to the desktop for the Customer.
Click Continue, twice.
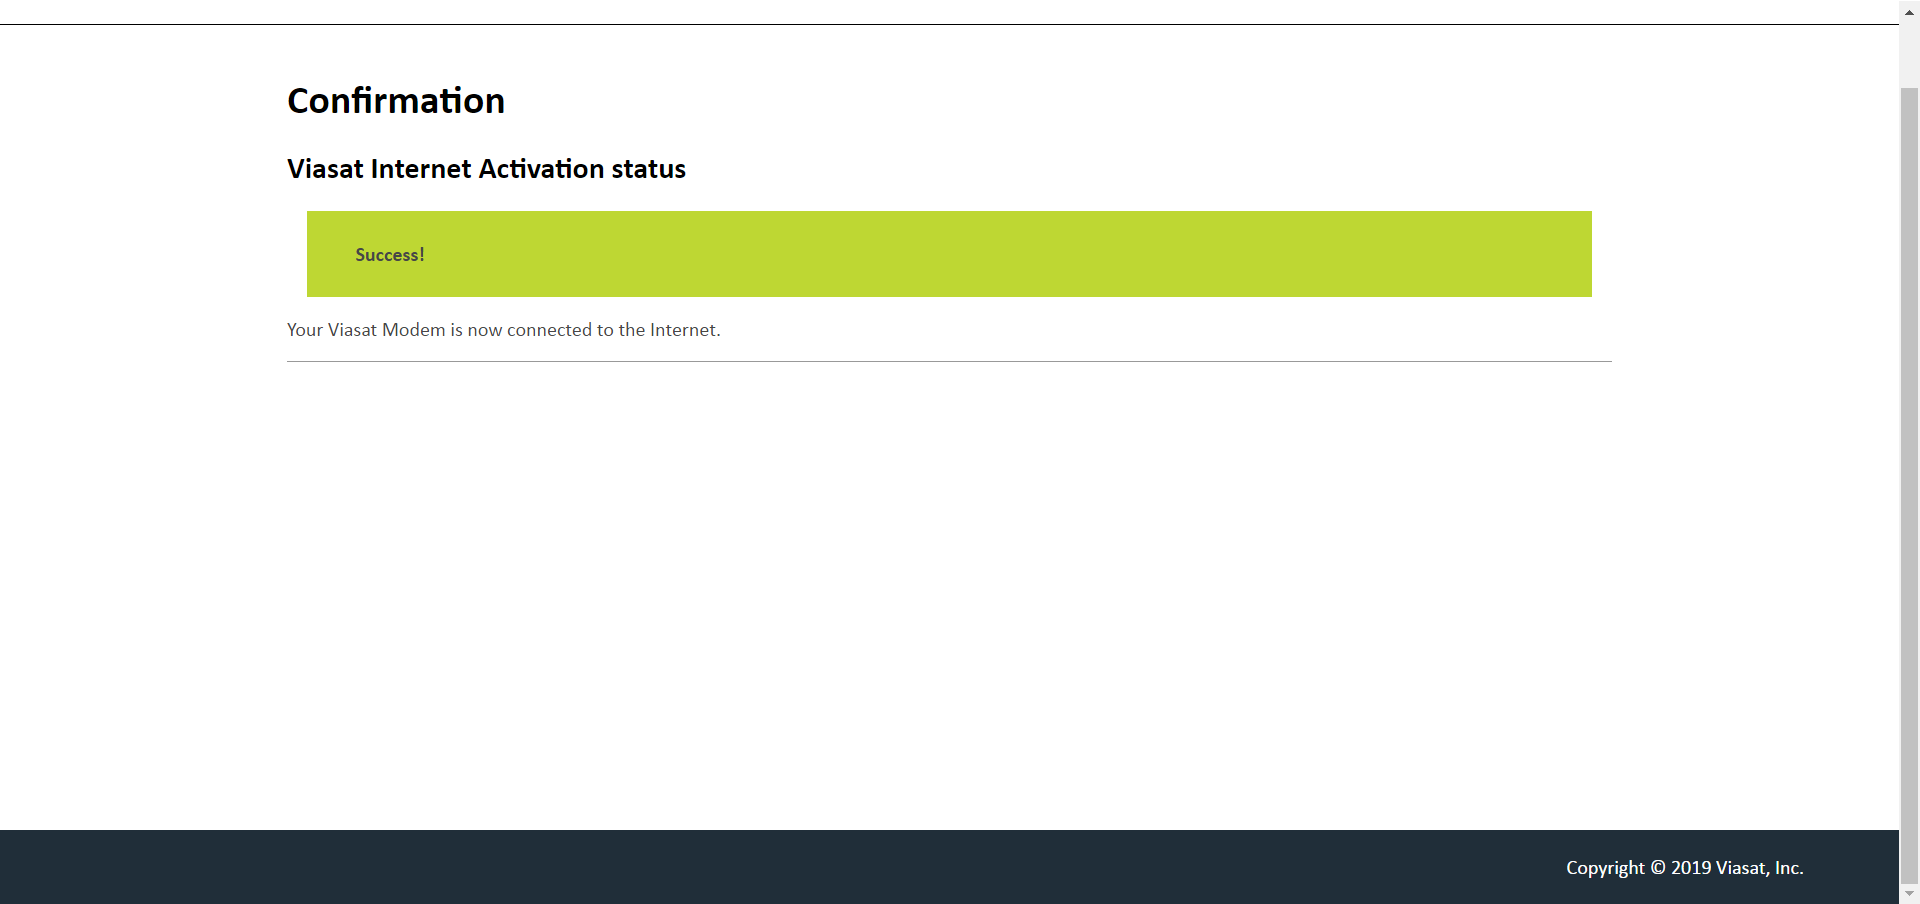
- The Confirmation page appears, displaying the activation status of all newly activated services.
Note: This page may also display Voice activation.