Scheduling Work Orders in FSM
This Job Aid Covers:
Scheduling Work orders
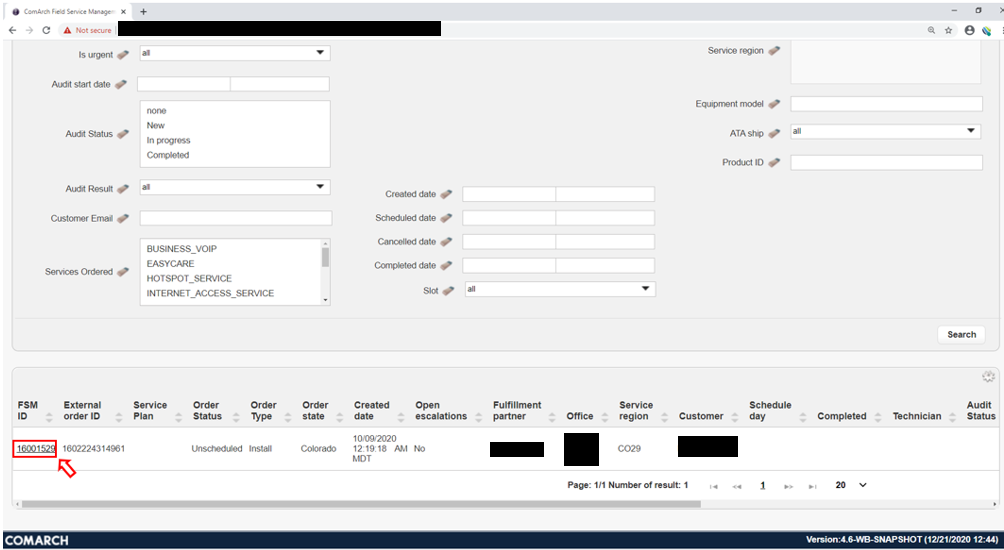
Access the work order you would like to schedule by clicking on the FSM ID link in the search results below:
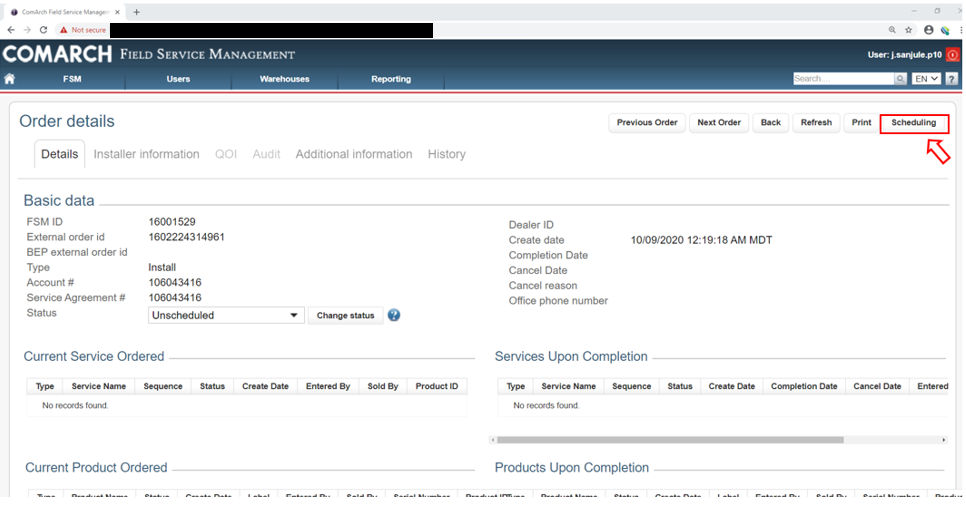
Click Scheduling:
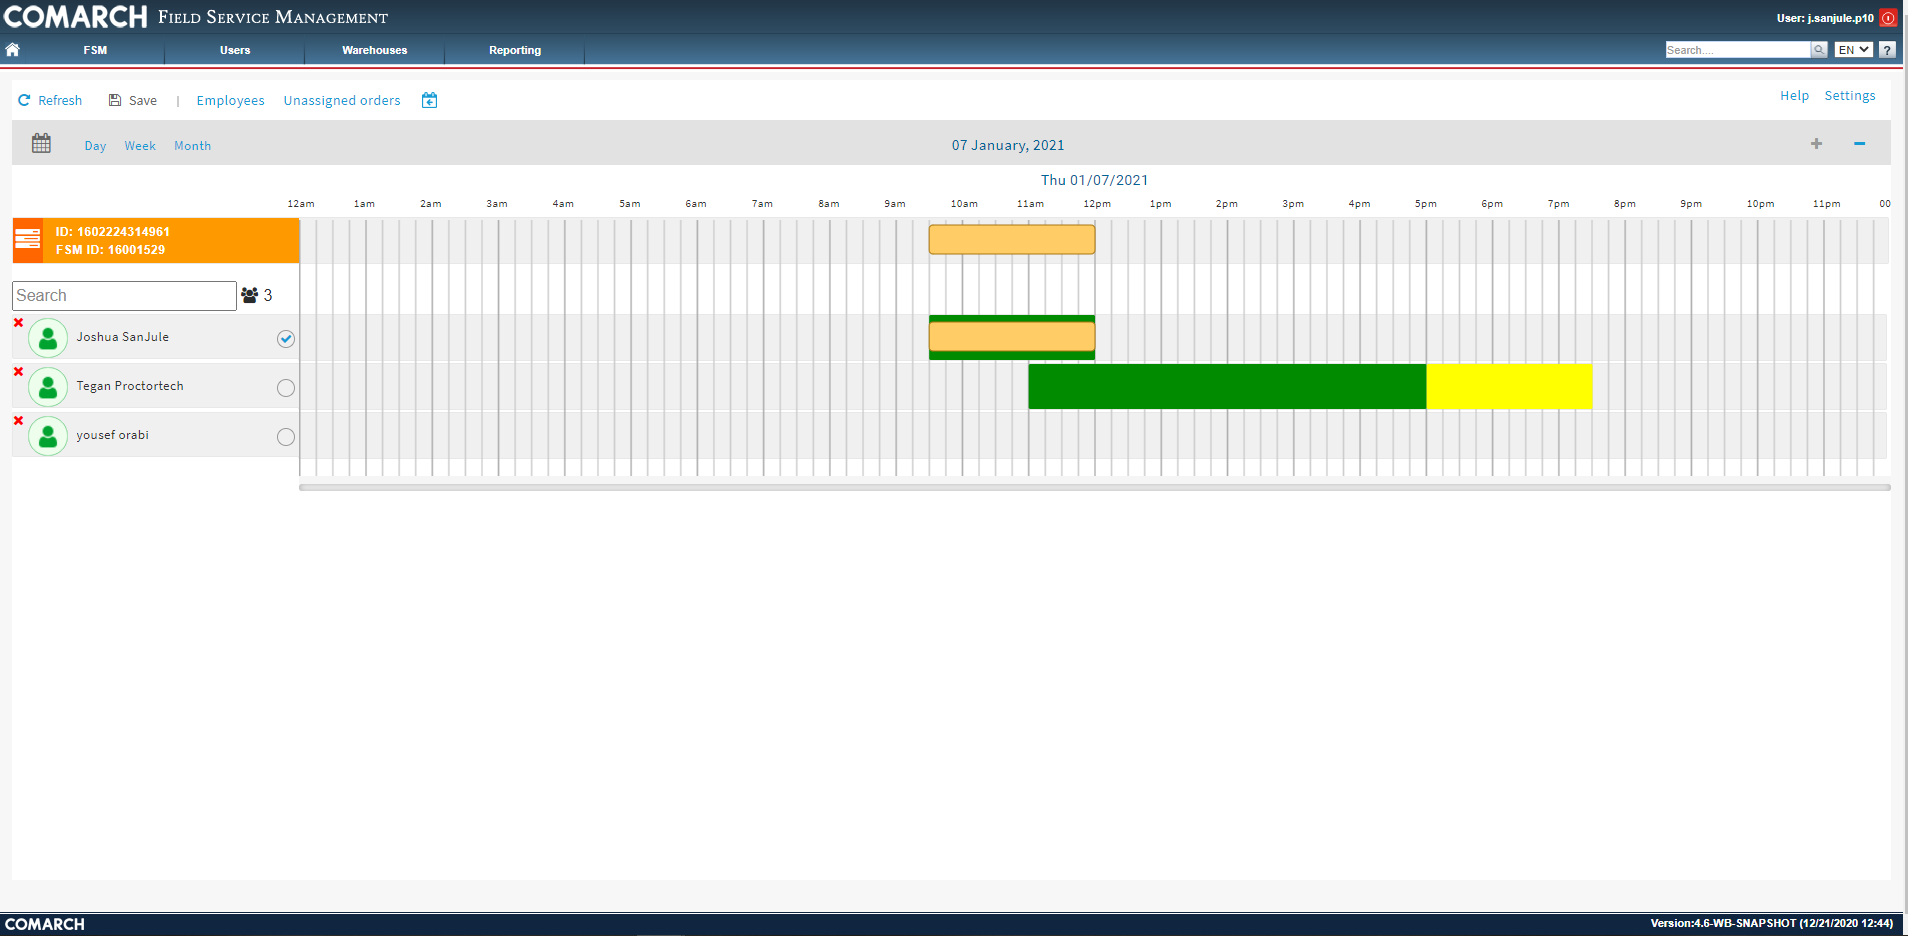
The scheduling grid shows available technicians on the left panel and times slots in the middle panel:
Dark Green Bars ![]() = technician is available for regular work time
= technician is available for regular work time
Yellow Bars ![]() = technician is available for overtime
= technician is available for overtime
Light Green Bars ![]() = work order time frame inserted
= work order time frame inserted
Light Orange Bars ![]() = the order currently being viewed is assigned
= the order currently being viewed is assigned
Light Green bar inside Dark Green Bar ![]() = technician assigned to another work order
= technician assigned to another work order
No Dark Green Bars = technician is not available for that date and time

Set work order time
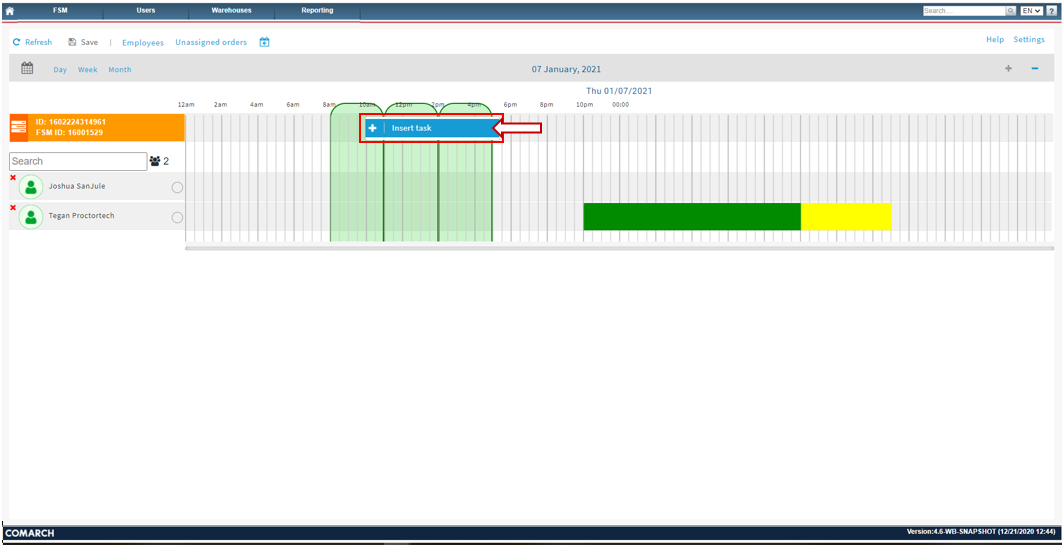
To set the work order time, right click in the same row as the FSM ID. Right click under the date & time that you want the work order to start:
Select Insert Task:
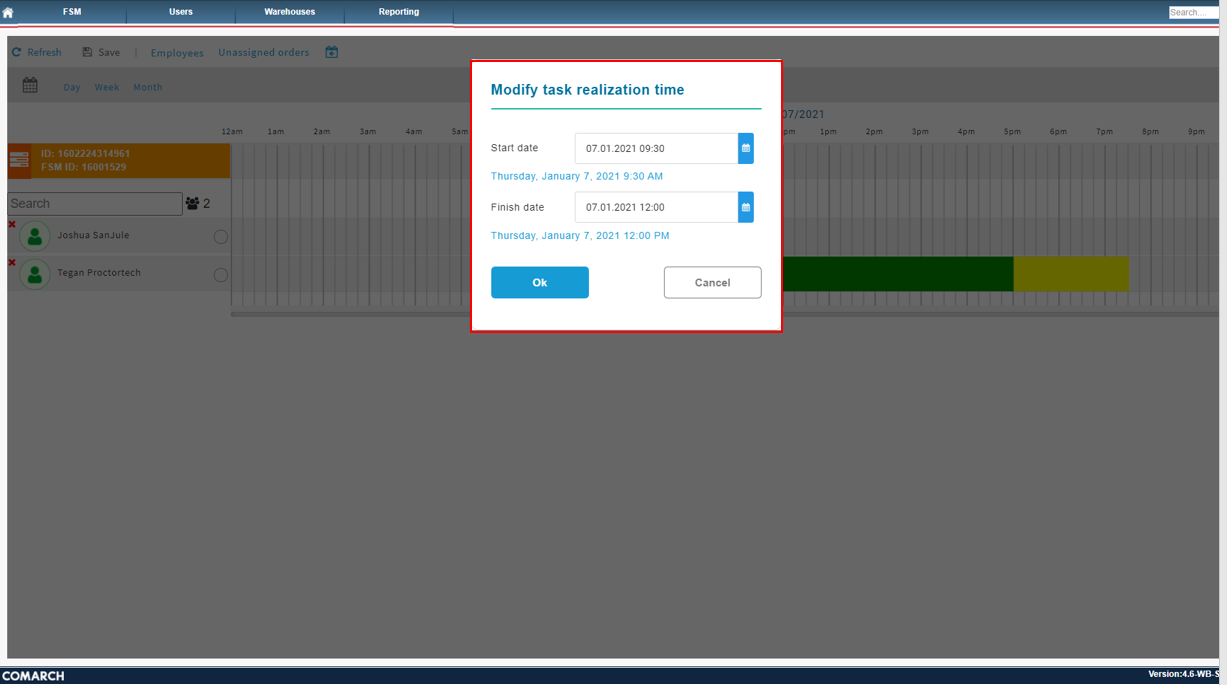
The Modify Task Realization Time pop up will appear
This pop up will allow the user to set the start date/time and finish date/time for the work order
Set the start date/time and finish date/time and click Ok:
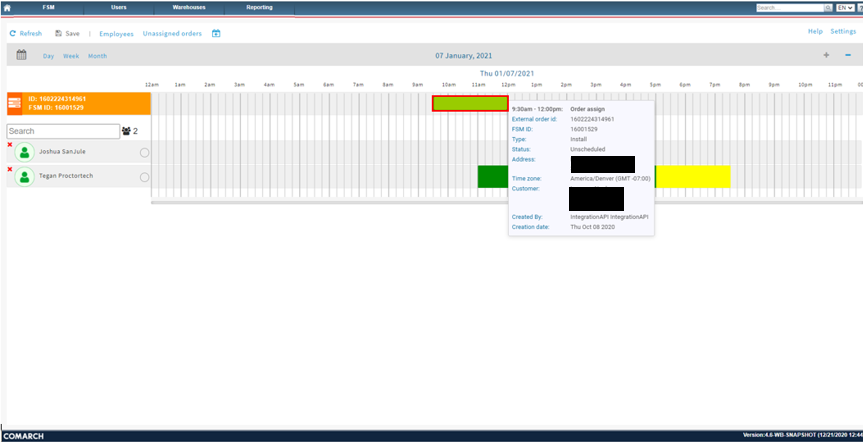
A Light Green Bar will now be inserted. The Light Green Bar represents the work order time frame:
Add available work time to a technician
Right click in the same row as the technician’s name under the desired date & time:
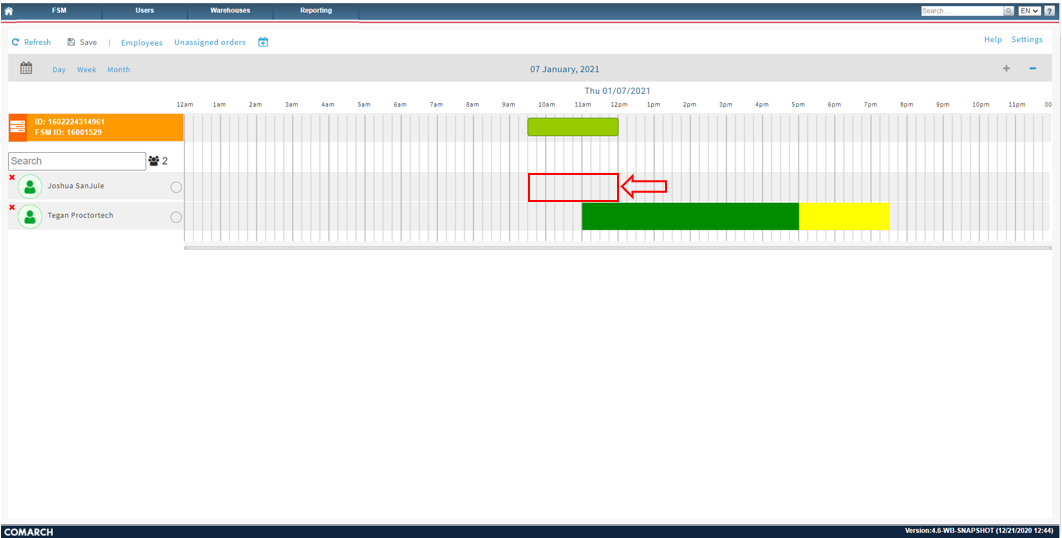
Hover over Add availability
Select Work time:
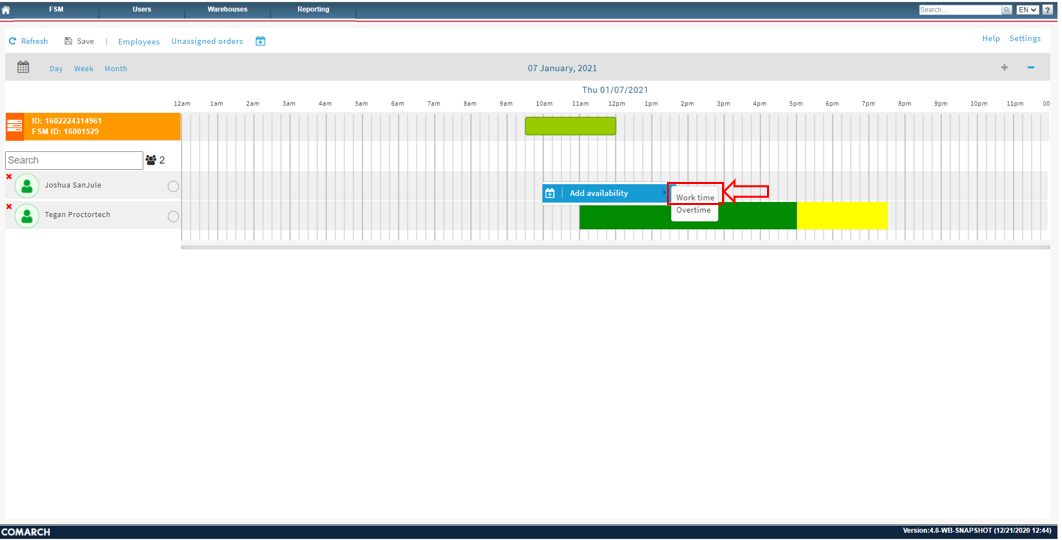
A Dark Green Bar will be inserted. This represents the technicians available work time:
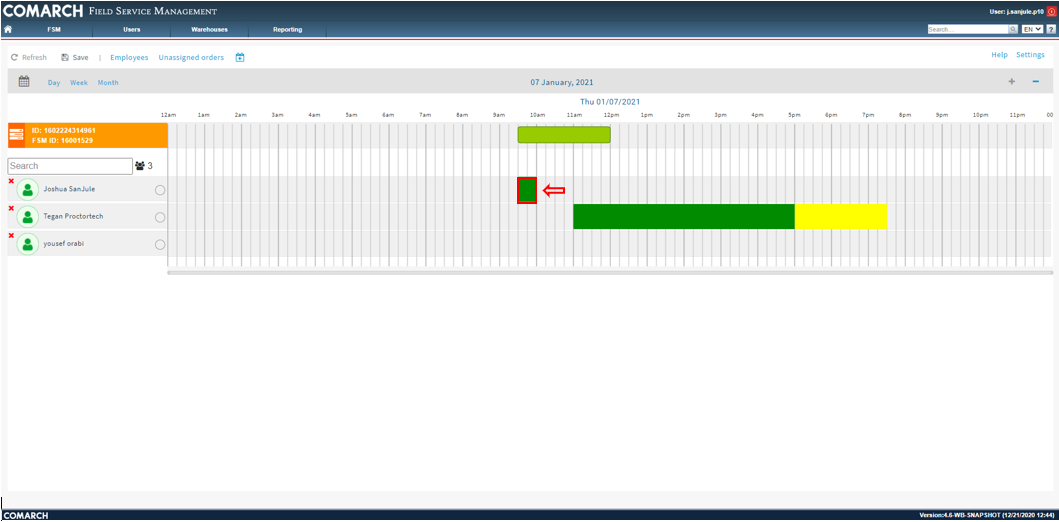
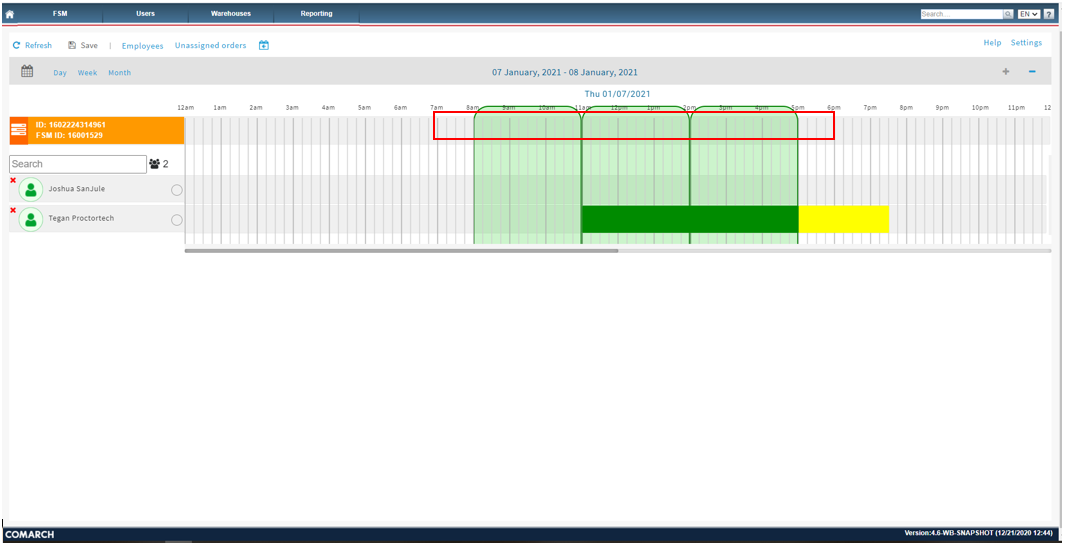
Drag the Dark Green Bar in either direction to extend available work times. To assign the workorder the Dark Green Bar must be within the same time limits or greater than the Light Green Bar:
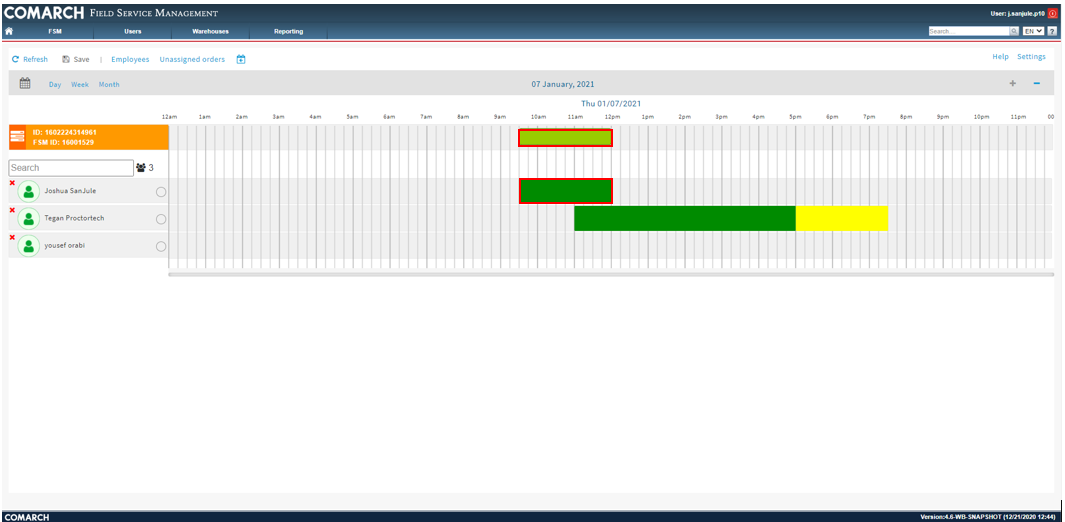
When the work order time frame (Light Green Bar) and technicians available work time (Dark Green Bar) are inserted, we can now assign the technician
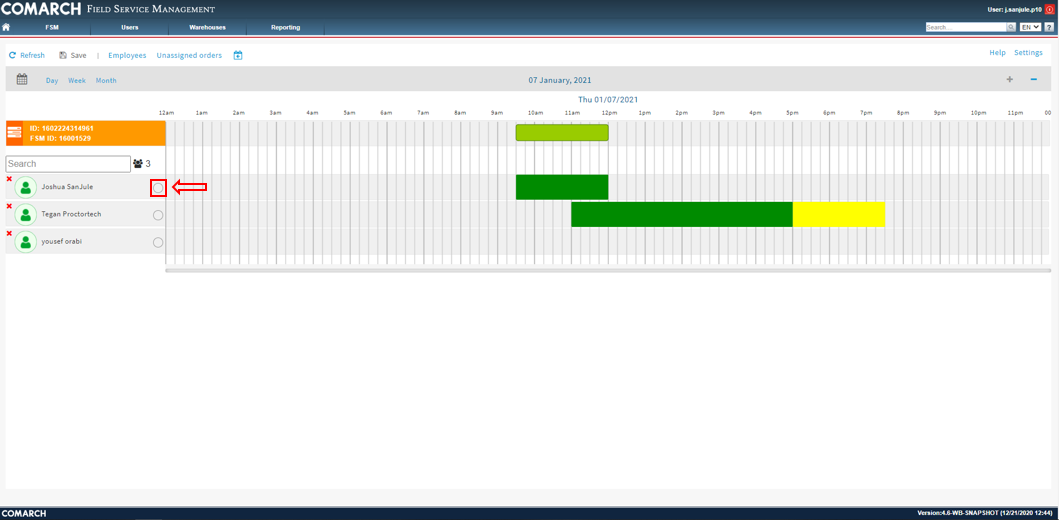
Click the checkbox next to the technician’s name.
To assign a technician, click the checkbox next to their name:
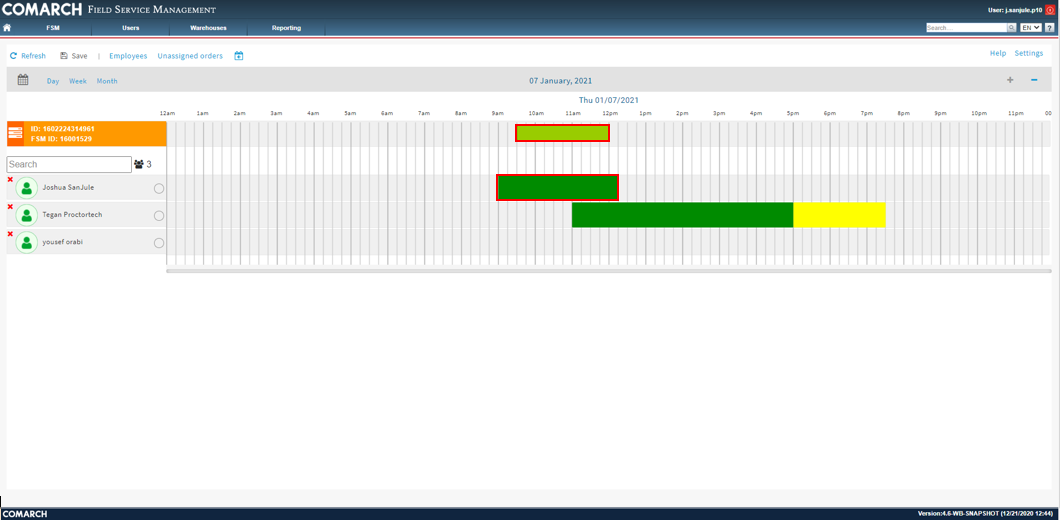
Once the technician’s name is checked, the work order is assigned. The work order will auto save: