S-Tube Mount Job Aid


Surfaces
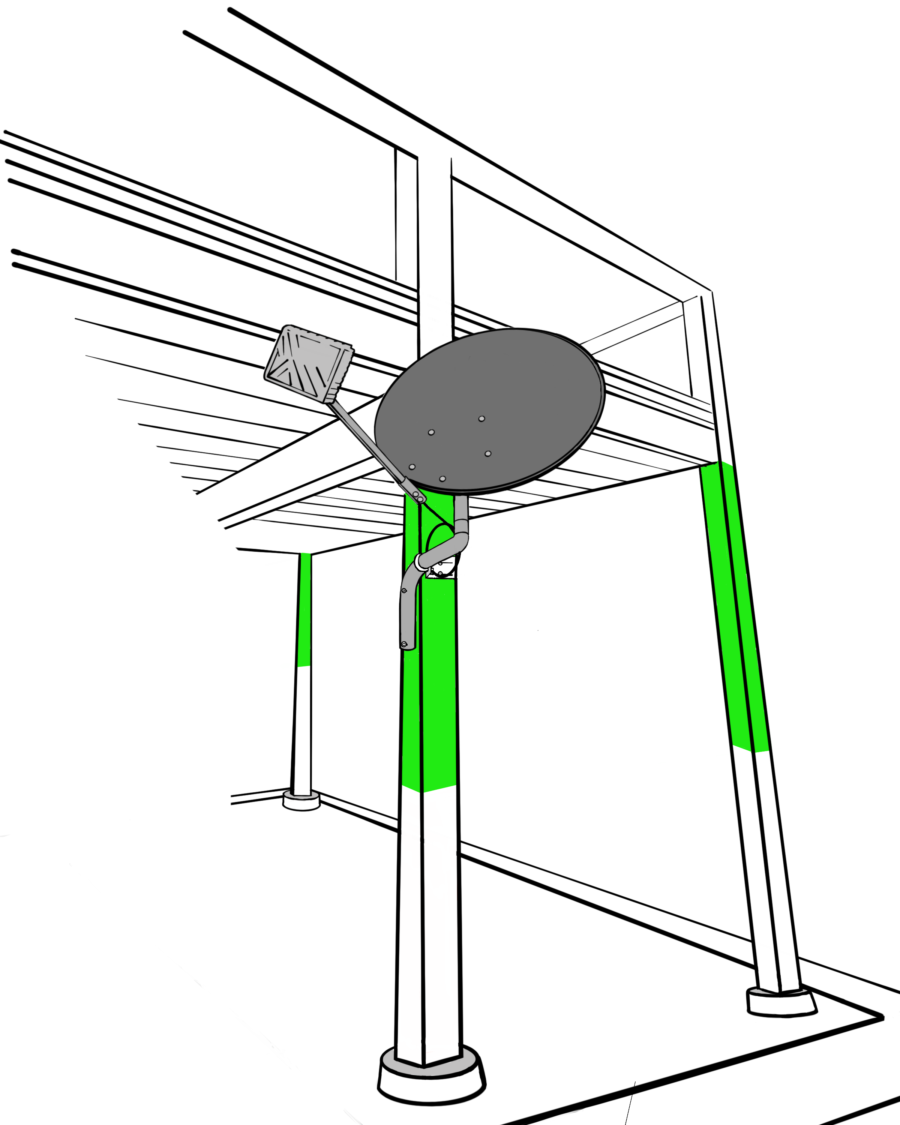
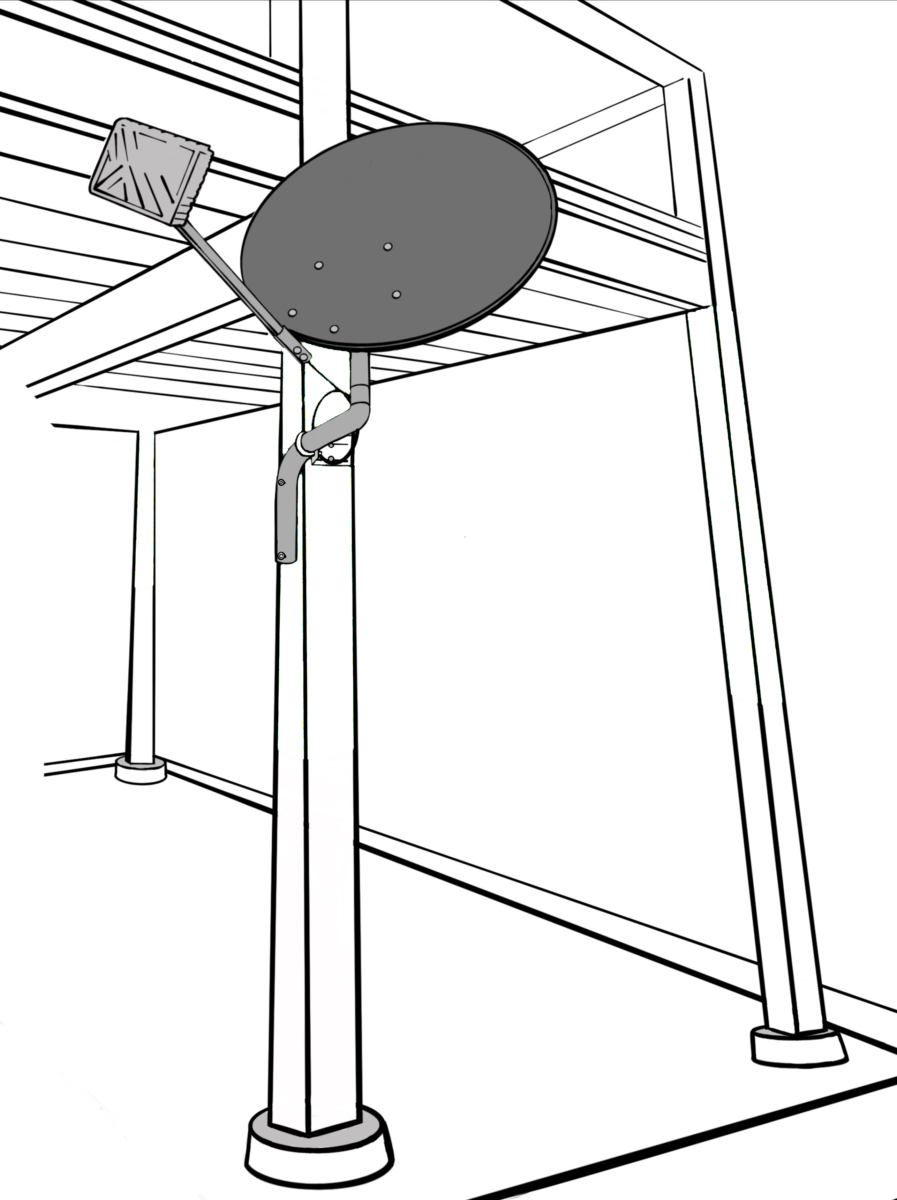
The only approved locations for this mount are the corner of a structure constructed of wood, concrete, brick, or cinder block; and a wooden post that is at least 4″x4″, anchored at both the top and bottom.

Structural Elements
The approved structural elements for S-Tube mounts are studs, concrete, brick, or cinder block; and a wooden post that is at least 4″x4″, anchored at both the top and bottom.
Requirements for Wooden Posts
Important Considerations
- S-tube mount only (NO OTHER MOUNTS MAY BE USED)
- Exposed 4”x4” or larger wood deck post
- Wood post must be anchored at the top and the bottom
- Must meet the 4-foot minimum height requirement.
- Photo must include the top and the bottom of the post
Prohibited Mounting Options
- Fencing and fence posts
- Railing and caps
- Walkways, stairs, or gates
- Fascia boards and other manufactured materials
- Freestanding posts
- Pergolas
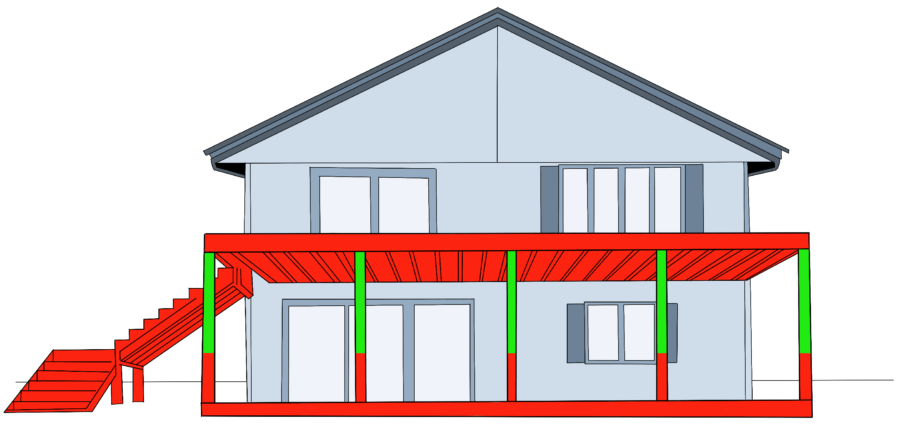
Green areas are approved.
Red areas are prohibited.
DANGER! Locate power lines before you start the installation. These include overhead and underground power lines, electric lights, and power circuits.
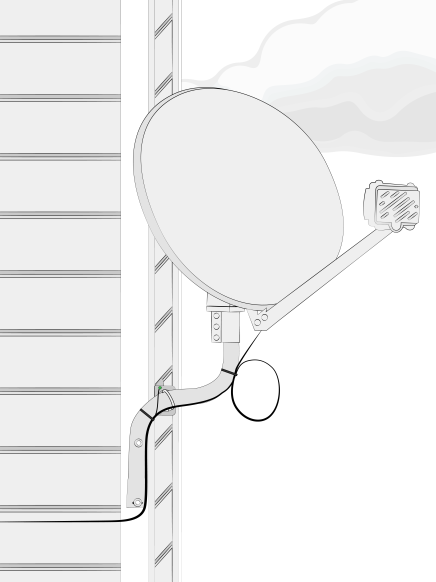
Position the mount so that:
- The center hole of the S-Tube mast is at least 4 feet below any obstruction, such as the awning of a roof
- The building eave or overhang will not block or partially shadow the line of the site
- The bottom of the reflector is at least 4′ above any walking surface
Other Considerations
- The ground block must be within 20 feet of the NEC approved ground
- The total cable run from the modem to the TRIA must be less than 150 feet
- All antennas must be located at least 20 feet from any overhead power lines and 3 feet from any standard power circuit or electric light
Mounting Materials for Mount
The Technician must provide the following materials:
- 4 — 5/16 x 3/4 Metal lag shields – if mounting to concrete, brick, or cinder block
- Silicone sealant
Installing the S-Tube Mount
Note: Regardless of the mounting surface, the steps for installation are the same. If the wall is brick/poured concrete or cinder block, see the Brick/Poured Concrete Mount Job Aid or the Cinder Block Mount Job Aid for additional installation steps.
As previously mentioned, be sure to leave a distance of at least 4 feet between the center hole of the “S” mast tube and any overhead obstruction.
Position the tube in its appropriate place and mark the top hole’s position. Predrill a 1/8 inch hole. Ensuring the mast is plumb, mark and predrill the remaining 1/8 inch hole. Fill the holes with silicone-based sealant.
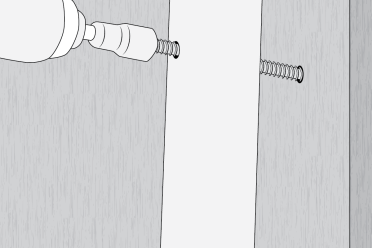
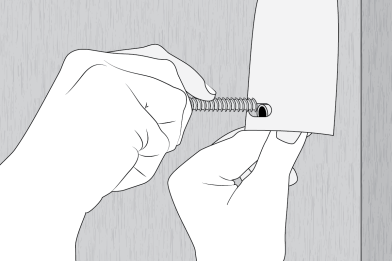
While holding the S-Tube mast against the mounting surface with your hand, insert and fasten the center 5 inch hex-head lag bolt. Do not tighten the bolt completely.
Position and level the side mount upright and ensure anti-crush tube is inserted. Fill the holes with silcone-based sealant, then insert and fasten the other 5 inch lag bolt to the center of the base slot. Do not tighten the bolt completely.
The L-bracket must be movable horizontally, so do not tighten the lag bolts all the way. The S-Tube mast tube is now ready for leveling.
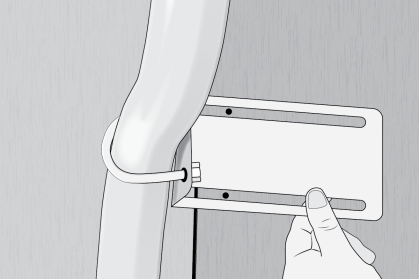
With all the bolts slightly tightened, it is time to plumb the mast tube. Use a level on the top and side of the mast to assist in alignment.
When the mast tube is plumb, and while still keeping hold of the mast tube, tighten all the lag bolts and nuts, and make sure they are secure. You may want to tighten further with an adjustable wrench.
Note: Do not over-tighten the lags. This could cause the holes to become stripped, resulting in the mount not being secure.
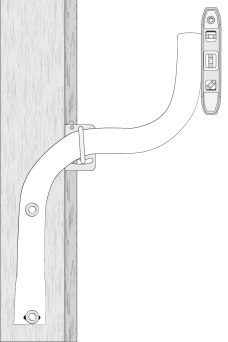
Once the S-Tube mast is level, perform a quick tug test on the mount to verify that it is stable. Then you are ready to attach the antenna.