Viasat TechTools (VTT) App [EMEA Wholesale]


Any non-English version is provided for convenience purposes only and if there are any conflicts between the non-English version and the English version, the English version shall control.
Application Overview
The Viasat TechTools app is meant to facilitate all types of installations and service calls within the ViaSat Network.
The Viasat TechTools app is compatible with ViaSat-2 (VS-2), ViaSat-1 (VS-1), SGDC-1, and KA-SAT Satellites.
Please follow the steps below to get started with the Viasat Tech Tools Application.
Please ensure that you have completed all steps of the Installation & Onboarding and Registration & Log In sections before going to an installation to ensure a smooth experience onsite.
This Job Aid supports the technician audience.
![]()
Overview:
Installation & Onboarding
The Viasat TechTools app is available for download on both iOS and Android devices by clicking the appropriate link below.
They can also be found and downloaded on Google or Apple play stores and installed directly from there.
Internet connectivity is required to install and update the app.

![]()
![]()
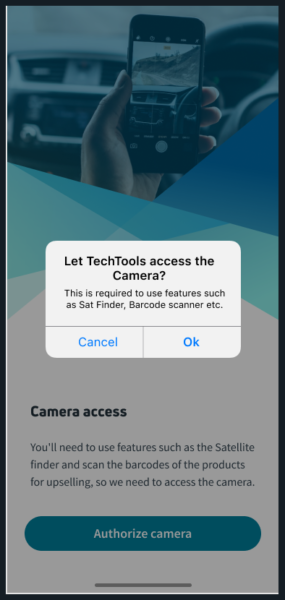
The app requires several permissions from the user to facilitate the installation process. If you do not allow permissions during the onboarding step, the app will be blocked from certain functionalities vital for a correct installation.
See the information on the onboarding screens for additional information.
Step-by-step guide:
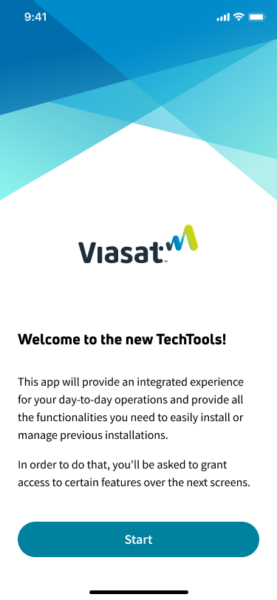
- Starting the App: Launch Tech App and press ‘Start’.
- Permissions: Grant access to Camera, Location, and Notifications.
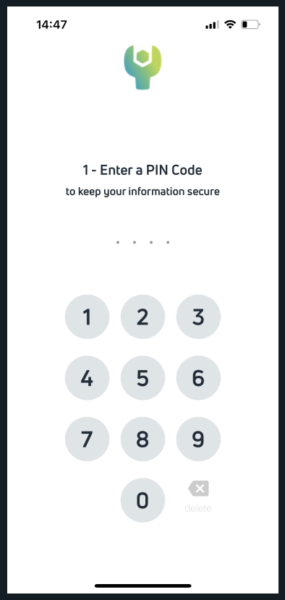
- Authentication Pin: Create a 4-digit pin and enable biometric authentication if available
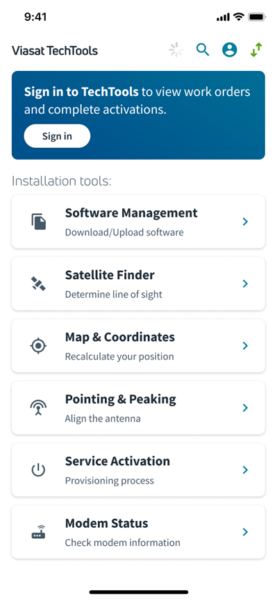
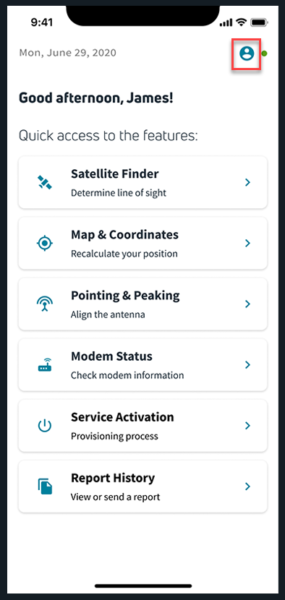
Dashboard
Once you have completed the onboarding process, you will arrive at the Dashboard section. From here you will be able to navigate to every main functionality of the application. A summary of each & how they can be used will be presented below.
Viasat Tech Tools can only be used in a restricted capacity while not logged in.
To proceed with the activation of an installation or with an equipment swap, user login will be needed.
Is it strongly recommended that you proceed with the login process once you have downloaded the app and have reliable internet access. An Internet connection is required for user login.
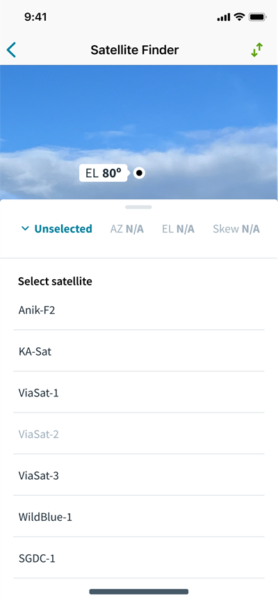
Satellite Finder
This functionality can be used to find a suitable location for antenna placement.
Requirements: The user’s device needs to have a magneto, gyro, or compass sensor.
If your device has no magneto, gyro, or compass sensor, you will see these screens stating that the feature is not supported by your device.
Press Satellite Finder from the Dashboard.
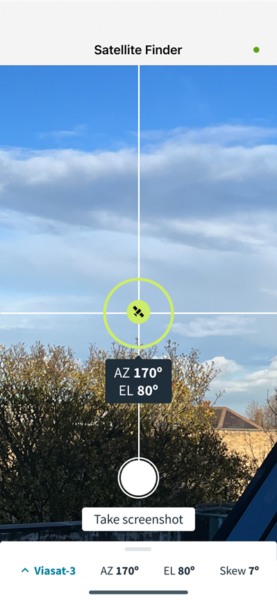
Once at the customer’s location, you will need to decide on the best location to place the antenna based on a clear line of sight between the antenna and the satellite you wish to point at.
Select the corresponding satellite and use the mobile camera to locate it. Once close to the satellite’s location, an icon will appear along with green markings. Getting the antenna oriented as close as possible to these markings will make the Pointing & Peaking process go smoother.
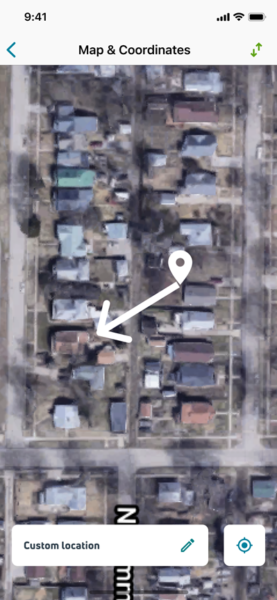
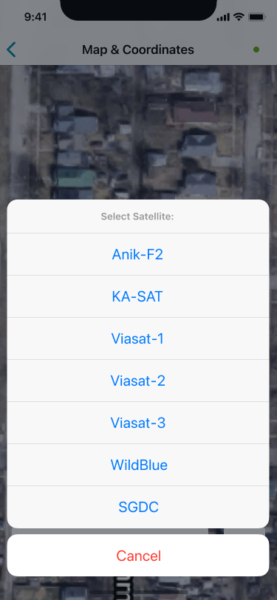
Map & Coordinates
This functionality can be used to preview the antenna orientation based on the customer’s address coordinates and the satellite used.
Requirements: Knowledge of the installation location or coordinates.
You can get a bird’s eye view of the rough installation location and antenna orientation provided you add a specific longitude and latitude and select a satellite.
Your current location will show on the map along with an arrow showing the direction of the satellite.
Press the Locate Me icon or the Edit Pen next to Custom Location.
Now, enter the installation location by address or by Latitude and Longitude.
Pointing & Peaking
This functionality can be used to accurately adjust the antenna towards the peak satellite signal.
Requirements: The antenna has been installed. The ODU(outdoor unit) has been added at the top of the antenna.
IDU(indoor unit) has been connected to the ODU.The phone has an active connection to the IDU.
Once you have went through the steps outlined above, you can use this section of the app to go through the flow of finding the peak azimuth & peak elevation by slowly adjusting the antenna based the audio & on-screen feedback while going through the Pointing & Peeking sweeps.
This step is vital for securing a strong signal between the satellite and the antenna and ensuring a good internet connection.
Depending on the equipment being used, the details of this process may differ.
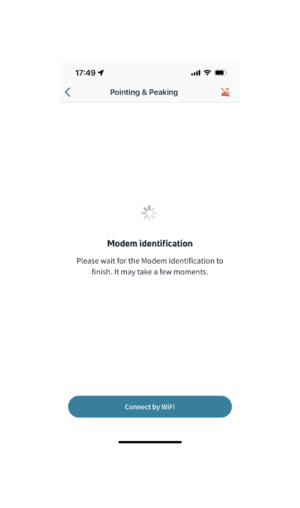
Step 1. Ensure you have an active connection with the Modem.
Connect your device to the modem’s WiFi endpoint.
Depending on the device you are using, you might have to enforce the connectivity by using a “Use as is…” command if the device attempts to disconnect you due to it not detecting an active internet connection.
You can detect if you are connected to the modem by ensuring the modem icon at the top right of the screen is green. A red icon means the connection has not yet been established.
For IDUs that do not have an inherent WiFi connection(such as an SB2), another device with WiFi capabilities will be needed to act as the connection between the IDU and the mobile phone.
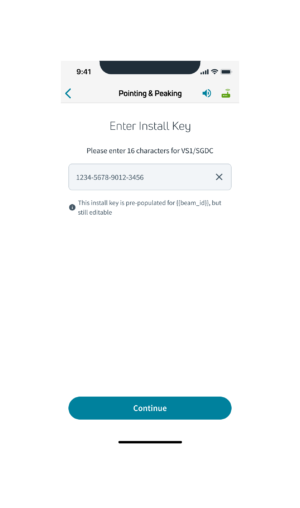
Step 2. Add the Installation Key to being Pointing & Peaking
Depending on the region the installation is taking place, you will need a specific Installation Key that will ensure the devices connected are being setup in the proper satellite beam.
In some cases this key will be prepopulated based on the region the application estimates you are in. In all cases, it is recommended that you use the beam key provided by your point of contact.
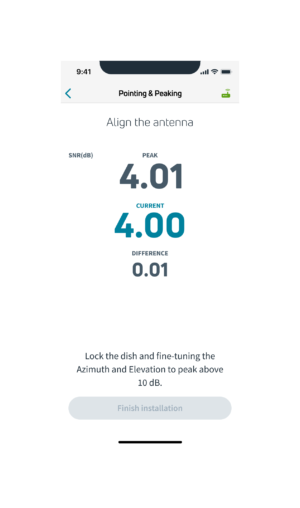
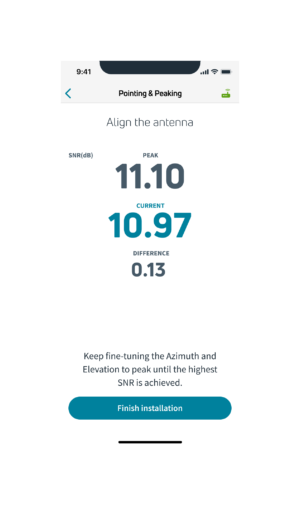
Step 3. Follow on-screen instructions to find peak azimuth & elevation and complete push & pull tests
The app will now guide you to finetune the antenna orientation and properly align the satellite beam with your antenna. Once complete, the greyed-out “Finish Installation” button will be enabled, and pressing it will move the user to the Modem Lock step.
Step 4. Complete the Modem Lock Step
Modem lock occurs at the end of a successful pointing & peaking and is meant to update the modem with the values & variables found during P&P.
The modem will go through 4 stages, and throughout the process, it will reboot itself.
After it reboots, the user may have to manually reconnect to the modem. This depends on the operating system and modem type.
Once this is complete, the Pointing & Peaking flow can be considered as done, and the user can proceed with the Service Activation.
Service Activation
This functionality can be used to provision the equipment & activate the client’s subscription once everything is in place.
Requirements: Antenna, ODU & IDU have been installed & connected. The user is connected to the IDU (modem). P&P has been successful, and the “arrows” icon at the top right of the screen is green.
You will require a valid Service Activation Code for the new installation or equipment swap you are performing.
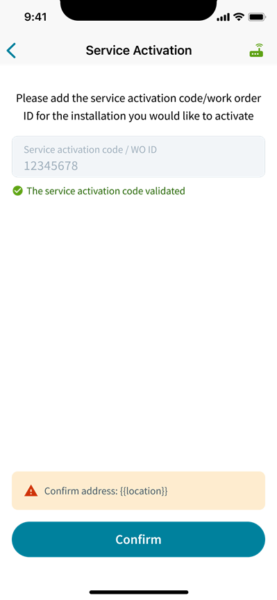
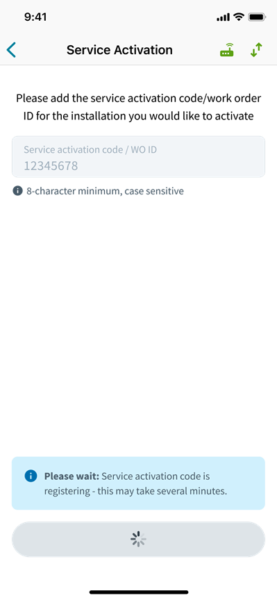
Step 1. Add the Service Activation Code
From the dashboard section, select “Service Activation”. Add in the Service Activation Code you have received from your point of contact.
The app will perform a check in the background to validate that the code you have added is correct and that there are no issues with the subscription you are attempting to activate.
Once the code is approved, you will be asked to confirm the location of the installation.
The app will automatically detect if you are performing a new installation or an equipment swap.
If doing an equipment swap, you will also be made aware of basic instructions for completing the SWAP successfully.
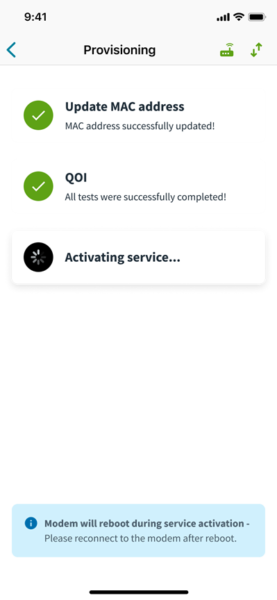
Step 2. Wait while the “Provisioning” is completed
Once the code has been validated, the address has been confirmed, and, if necessary, the SWAP instructions followed, the Provisioning step will be initiated.
During Provisioning the following steps are being completed in the background:
- the MAC Address for the equipment being installed is updated.
- The QOI (Quality of installation) values are being assessed
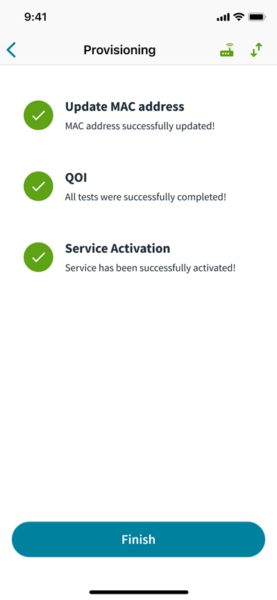
- Service Activation is processed if the above are completed successfully
During this process, the IDU is expected to reboot at least once. Please be patient.
There is a chance the modem may disconnect during the activation process due to it changing its software. If this happens, you’ll need to manually reconnect to the modem on your device to complete the Service Activation.
You can verify the connectivity status between the phone and modem at all times during this process by looking at the modem icon at the top right of the screen.
This step may take time, so be patient and wait for the provisioning to be completed.
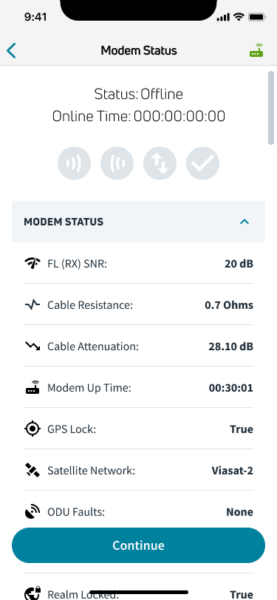
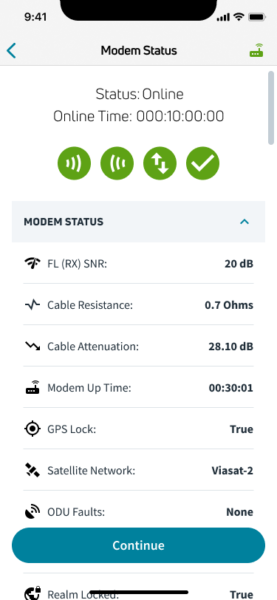
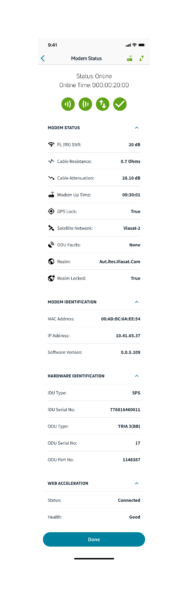
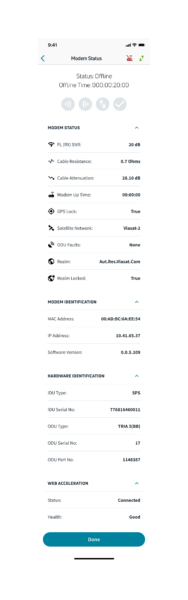
Modem Status
The modem status page will show details of any connected IDU. This can be used to either troubleshoot an existing installation or to check the quality of a new one.
Requirements: You are connected to the WiFi point of an active modem.
After the Modem Status changes to Online for the first time, it then will reboot itself to update its necessary updates to function. Following the reboot process, it should come back Online and all indicator icons should be green. Press Done and you’ll return to the app dashboard.
Depending on the model of the IDU connected, some information may not be available.
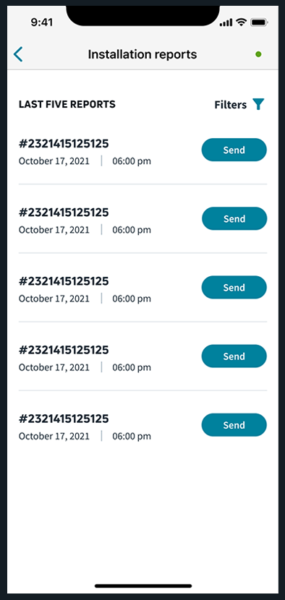
Report History
The report history section allows you to view information regarding previous installations you have performed, filter them, and manual report sending.
At any time, you can view your report history.
Account Settings
This section will have various information available such as the Viasat Terms & Conditions, the Privacy Policy, a Help section as well as information regarding the account you are logged in with.
Registration and Login
Viasat Tech Tools can only be used in a restricted capacity while not logged in.
To proceed with the activation of an installation or with an equipment swap, user login will be needed.
Is it strongly recommended that you proceed with the login process once you have downloaded the app and have reliable internet access. An Internet connection is required for user login.
Once you have reached the dashboard of the app, you can trigger the login process by clicking the “Sign In” button at the top of the page.
The app will also force you to sign in once you attempt to go through the activation process.
When starting the app, you will have to select Europe as a login option.
Then, you will be asked to log in to your account.

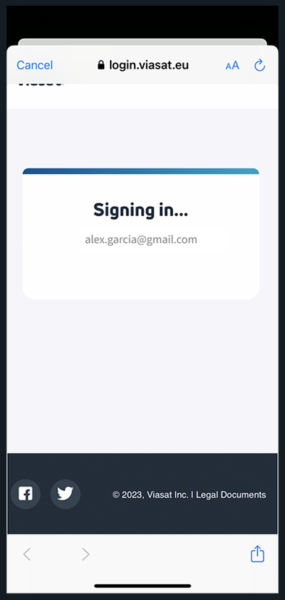
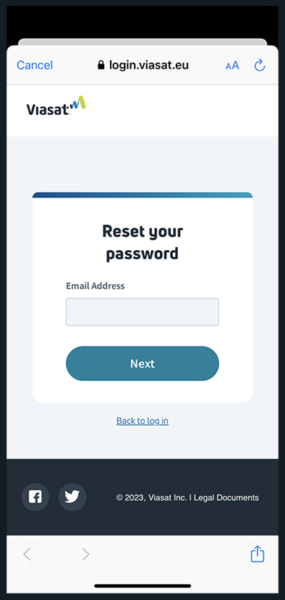
If you have entered an incorrect email or password, you will be prompted to reenter it. If you have forgotten your password or would like to reset your password, you may do so by pressing Forgot your password?
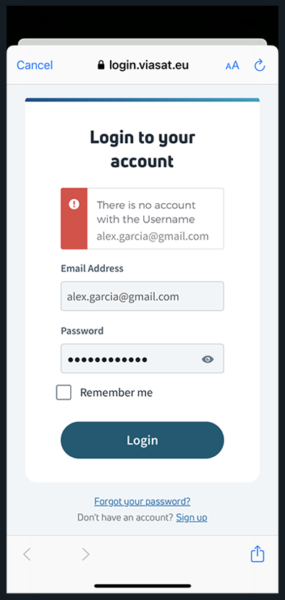
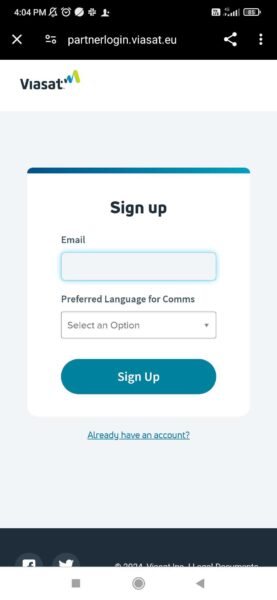
If you have not yet registered, you may press Sign up.
Add in your email address and preffered language to be used in the communication regarding the account.
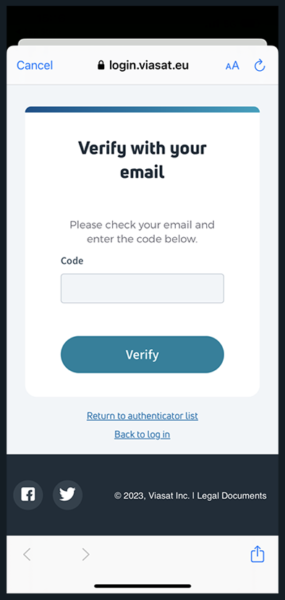
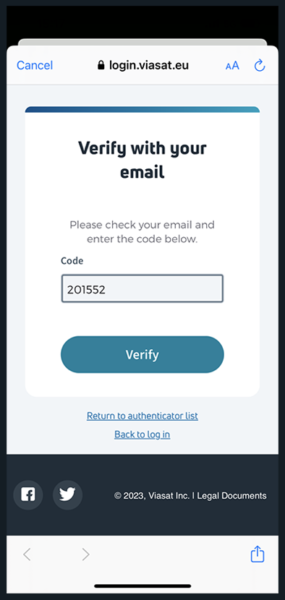
Then, you will need to set up security methods by validating your email.
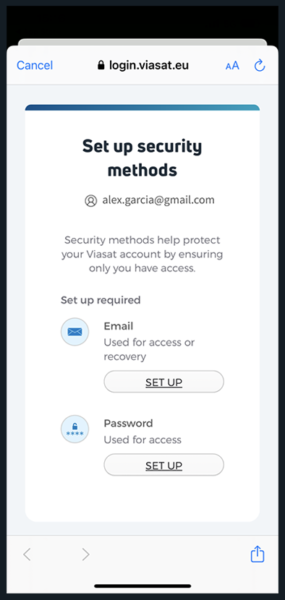
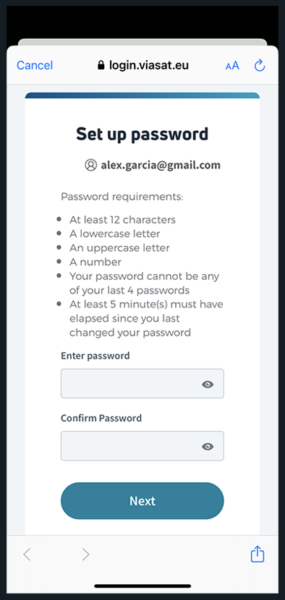
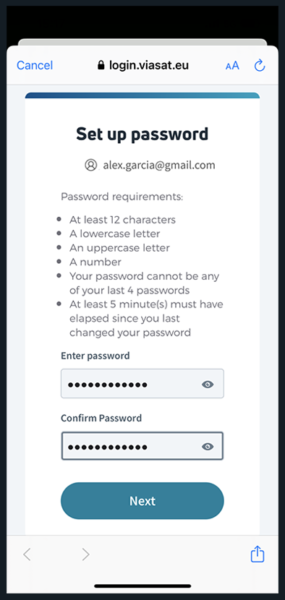
Next, you will need to set up your password for the account.

Then, you will be prompted to set up an optional security measure by using your phone number for access or recovery.


You will be then signed into TechTools.
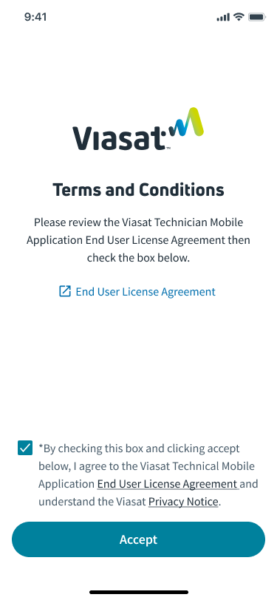
Next, you’ll be sent through the Terms and Conditions page. You will need to open and read the End User License Agreement first to enable the checkbox to move on to the next step to accept the Terms and Conditions