Quick Tips Guide: VS-1 Enhanced WiFi Installation(US)


In this article, we will walk you through the steps of setting up the Aria2210 Enhanced WiFi as a router and confirm the customer has the Aria2210 router added to their account.
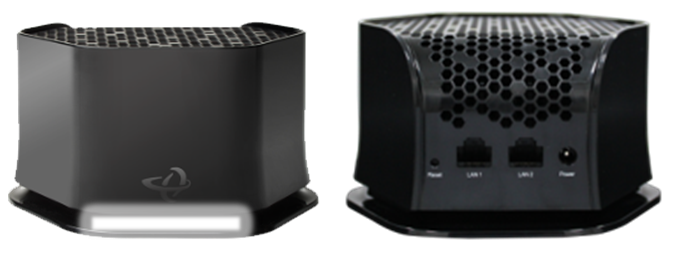
The Enhanced WiFi solution includes a NEW WiFi ARIA2210 router, which will replace the SB2+ routing functionality.
You will see “ROUTER_1.0” on the FSM work order if the customer qualifies to get the new Enhanced WiFi equipment.
IMPORTANT!
- If the customer is upgrading to a VS1 High-Speed plan and has an SB2 Modem:
Swap out the SB2 modem for an SB2+ Modem, activate the SB2+ modem, and add the ARIA2210 router.
You will ONLY re-point and peak if the customer is currently on our Anik F2 or Wildblue-1 satellites. - If the customer is upgrading to a VS1 High-Speed plan and already has an SB2+ modem:
Do NOT swap the SB2+ modem. You will simply add the ARIA2210 router.
Check eSVT to ensure the dish is still pointed correctly, but no equipment change is needed. - With the VS1 High-Speed plans, technicians may see an upgrade work order in FSM where a customer is moving from VS2 to VS1.
While it might seem counterintuitive for a customer to move from a newer satellite to an older one, the new VS1 High-Speed plans on the SB2+ modem & Aria router are faster than some VS2 plans on the VWG modem, which is why it is considered an upgrade.
Add the new SB2+ modem, activate the SB2+ modem, and add the ARIA2210 router. You will need to Point and Peak because they are going to a different Satellite.
Please follow the standard process for the upgrade to ensure our customers’ service works properly and they get the best service possible.
Once the SB2+ Viasat modem is activated and Bridge Mode is enabled, you can start the ARIA2210 setup process.
The free service call for installation also includes setting up the WiFi network on the ARIA2210 router for the customer.
NOTE: The EasyConnect setup process flow is used for initial setup or after a Factory Reset is performed.
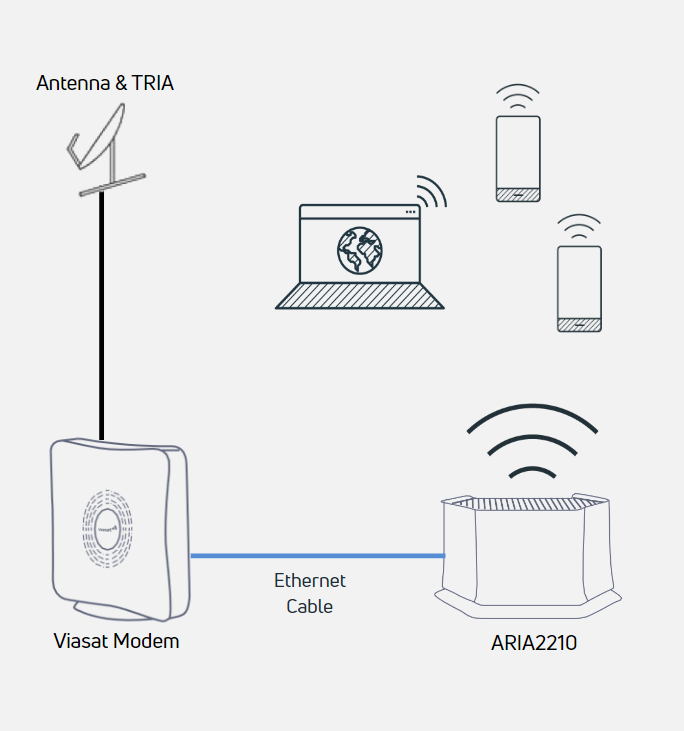
Step 1 – Connect ARIA2210
Plug the ARIA2210 router into Port 1 (located at the top, closest to the Voice port) of the SB2+ modem.
Note: The ARIA2210 router should be the only ethernet device connected to the SB2+ modem.
Connect the Ethernet cable from the Ethernet port on the SB2+ modem to the LAN1 Ethernet port on the ARIA2210.
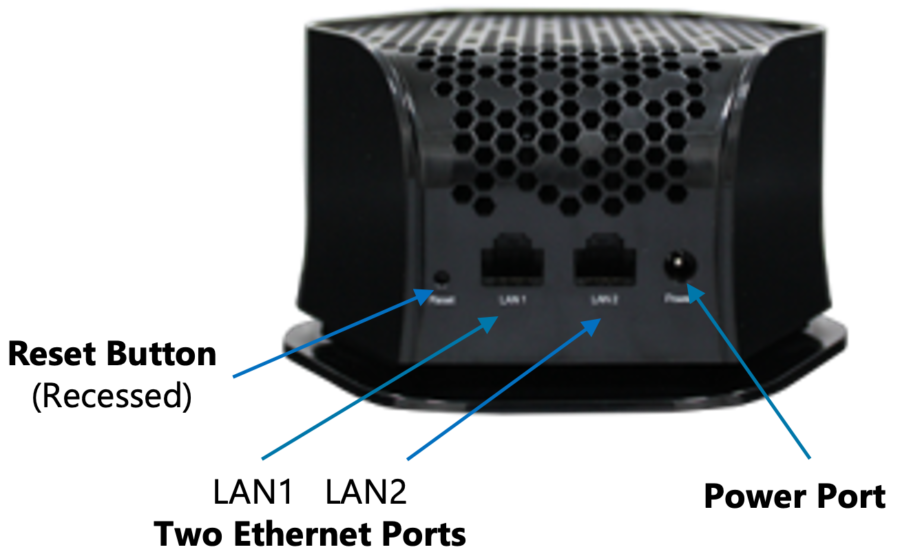
- Do not connect any Ethernet cable to the LAN2 port on the ARIA2210.
- Only one Ethernet cable should be connected to the ARIA2210 during this setup.
After completing the ARIA2210 install, the customer can later use the LAN2 Ethernet port on the ARIA2210 to connect to other wired network devices.
Step 2 – Connect the power and boot up
- Plug the power cord into the ARIA2210.
- Connect to a power outlet.
- Wait for the ARIA2210 to boot up, this may take at least three minutes.
- Waiting until the ARIA2210 light stabilizes to a consistent color combination.
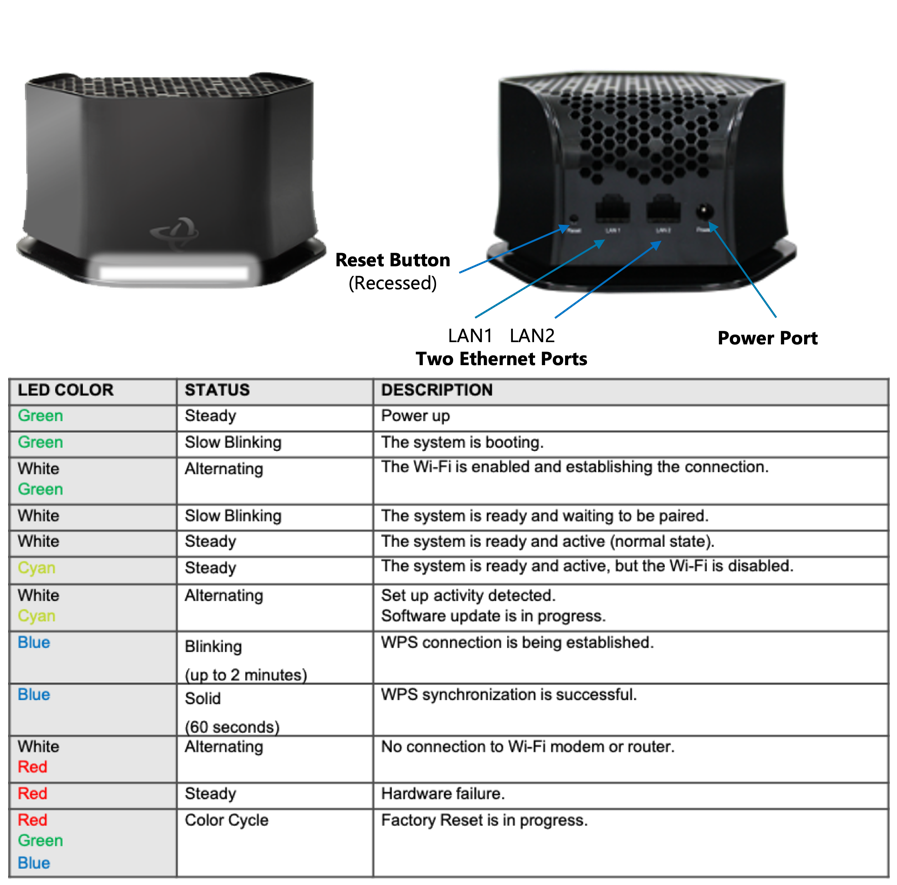
- See LED Status Light Information section below for a definition of the status light.
- Push in the Reset button on the back of the ARIA2210 Router and hold it in for at least 10 seconds until the light flashes red, green, and blue. Release the reset button and wait for a Slow blinking White light on the ARIA2210. This will take a couple of minutes.
Step 3 – WiFi Settings
- Go into the WiFi settings of their wireless device, such as a phone, tablet, or laptop.
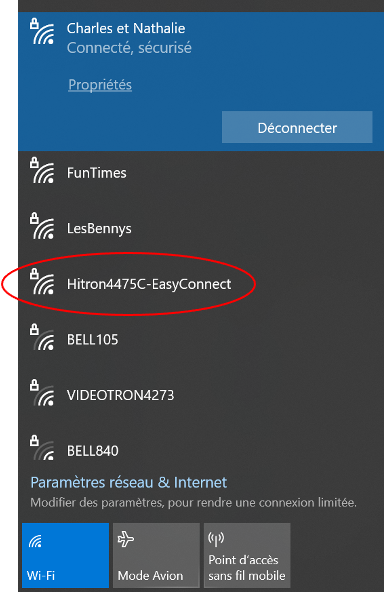
- In the WiFi settings, connect to the ARIA2210 default Network Name, such as “Hitron4475c-EasyConnect“. They will see the word “Hitron” and “EasyConnect” in the name.
Step 4 – Access the Router Interface
You will be redirected in about 10-15 seconds to the EasyConnect flow to start the ARIA2210 configuration.

- If you are not automatically redirected, have the customer open a browser and type in the URL: 192.168.0.1
- Select “Ready to go!“
Step 5 – Check ARIA2210 Light Status
The Easy Connect flow guides you through the steps to configure the ARIA2210 wireless router.
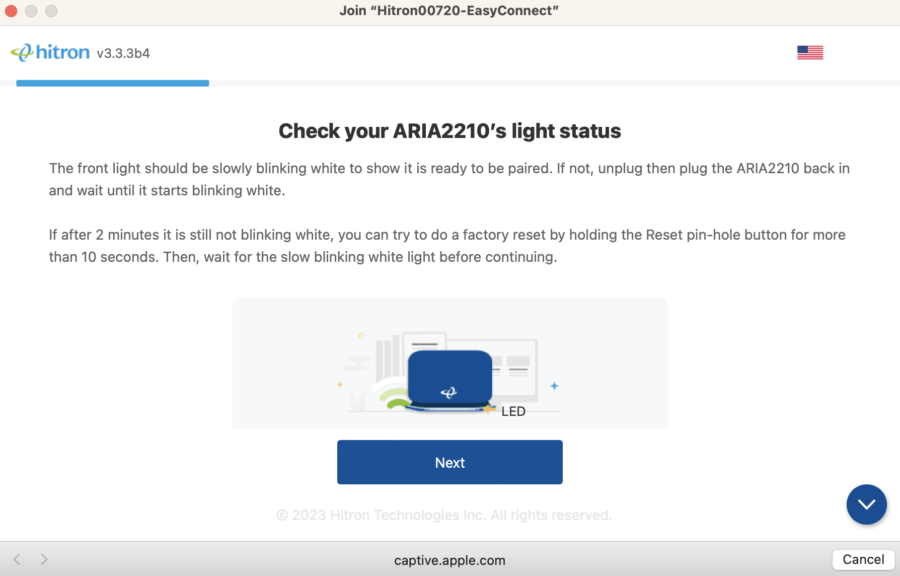
Make sure the light on the ARIA2210 is slowly blinking white. Once it is click the “Next” button.
Step 6 – Select ARIA2210 Function
IMPORTANT: During the Aria router WiFi setup process, be sure to select “Configure as a router,” and NOT “Configure as an extender.” We are NOT supporting the extender option at this time.
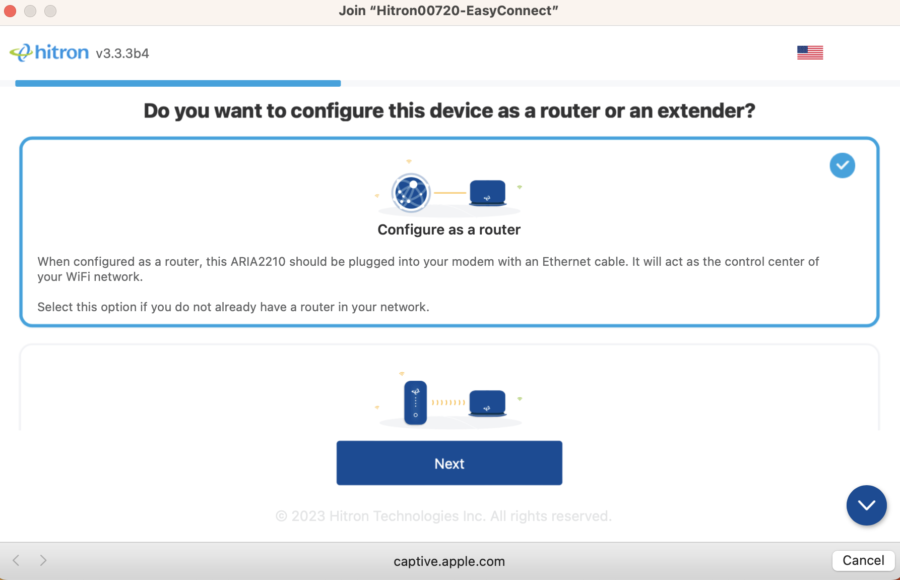
- Select the top option indicated as “Configure as a router“
- Select “Next“.
Step 7 – Confirm ARIA2210 Connection to the Internet
The ARIA2210 was able to connect to the Internet.
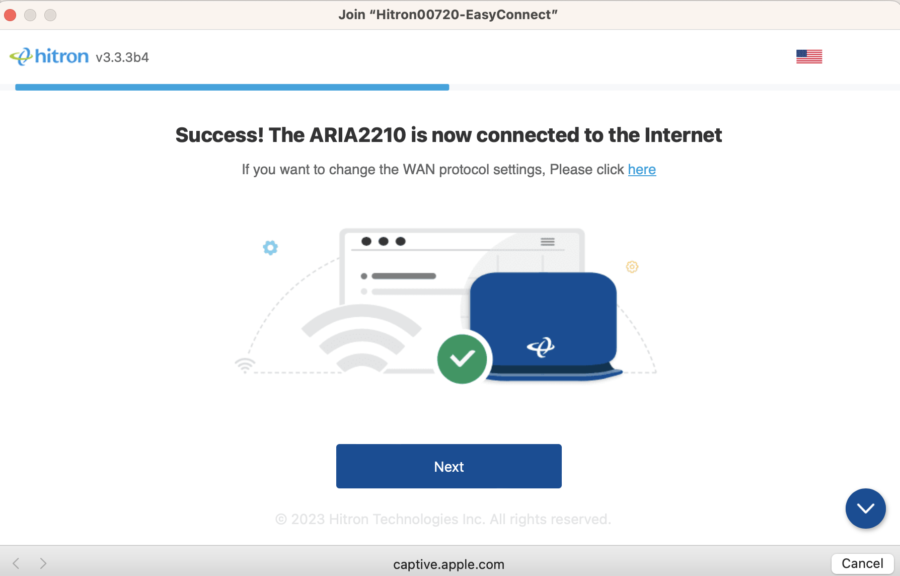
Have the customer select “Next” to complete the setup.
WARNING Message:
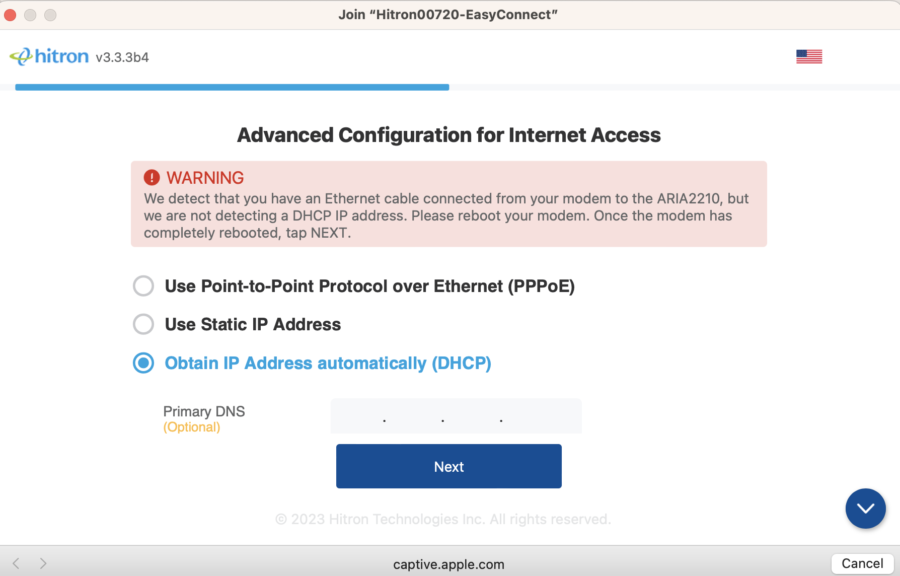
If a Warning message appears saying: “We detected that you have an Ethernet cable connected from your modem to the ARIA2210, but we are not detecting a DHCP IP address. Please Reboot your modem. Once the modem has completely rebooted, tap NEXT.” instead of the Success screen shown here, have the customer disconnect and reconnect power to the Modem, ARIA2210, and reboot their computer. Go to the beginning of this setup procedure in this section.
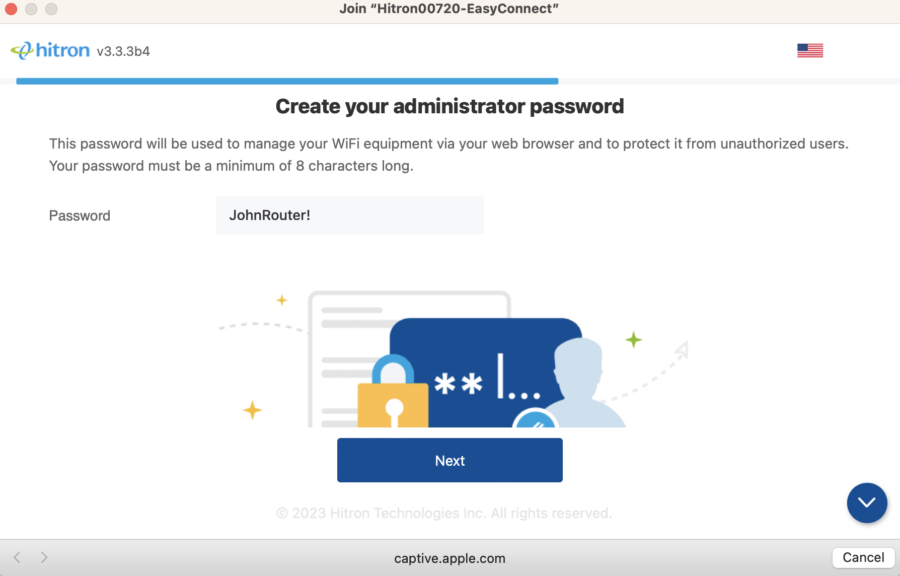
Step 8 – Create Admin Password
- Enter a Password that they will remember.
- Have the customer write down this Password and keep it for future reference. Inform the customer that this is the Administrator Password and not the WiFi Network Password.
- Have the customer also write down the User Name of “cusadmin” in all lowercase.
- Tell the customer that this User Name and Password are used for logging into the ARIA2210 to change the WiFi Network settings. These WiFi settings will be configured in the next step.
- If the customer asks how to log into the ARIA2210, inform the customer that they need to open a Web Browser such as Safari, Chrome, Edge, or Firefox on their computer. Then type 192.168.0.1 in the address bar of the browser. This will take you to a login screen where they will enter the User Name “cusadmin” and Password they define in this step.
- Select “Next“.
Router Login For router: Ask the customer to enter the username and password:
- Username = cusadmin
- Password = cusadmin
Step 9 – Create WiFi Network Name & Password
- Have the customer enter a WiFi Name they want to use for their WiFi Network.
- Have the customer enter a WiFi Password that they need to remember. This Password can be the same or different as defined in the previous step.
- Hint: The customer can click on the eye icon to the right of the Password to display the Password they entered.
- Have the customer write down this WiFi Name and WiFi Password.

- Inform the customer that this WiFi Name and Password are required to connect any of their devices (laptop, phone, tablet, etc.) to the ARIA2210 WiFi Network for Internet access. This is why it is important to remember and write this information.
- Select “Next“.
Step 10 – Name the ARIA2210
- Have the customer enter the Room, Country, and Time Zone information.
- If the customer does not want the LED on during normal operation, they can disable it by sliding the blue dot to the left. Otherwise, leave this unchanged.
- The LED setting can also be changed by logging into the ARIA2210 with the Administrator Password.
- The customer must first open a Web Browser and enter 192.168.0.1 in the browser window to get to the ARIA2210 Router Login screen.
- This is where the User Name “cusadmin” and the Administrator Password are entered.
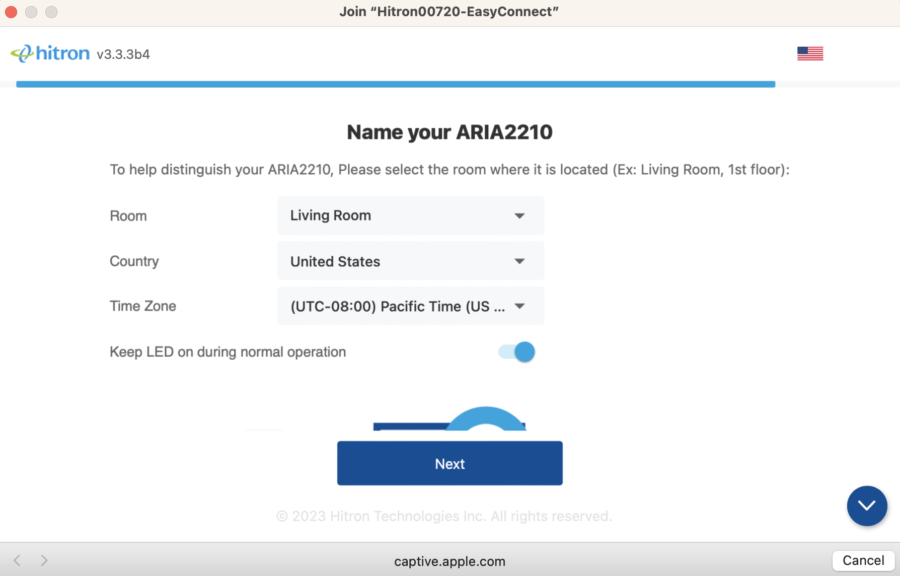
- Select “Next“.
- You will be taken to a confirmation screen, showing the name of the ARIA2210 device, the name of the WiFi network, and the network password.
Step 11 – Confirmation Screen
This completes the installation of the ARIA2210.
- The WiFi Network login information is displayed for connecting any of the customer’s devices to the WiFi Network.
- If a message appears indicating an upgrade is available, ask the customer to select the option to upgrade the unit.
- After the unit is upgraded and boots back up, the customer should see a solid white light on the ARIA2210.
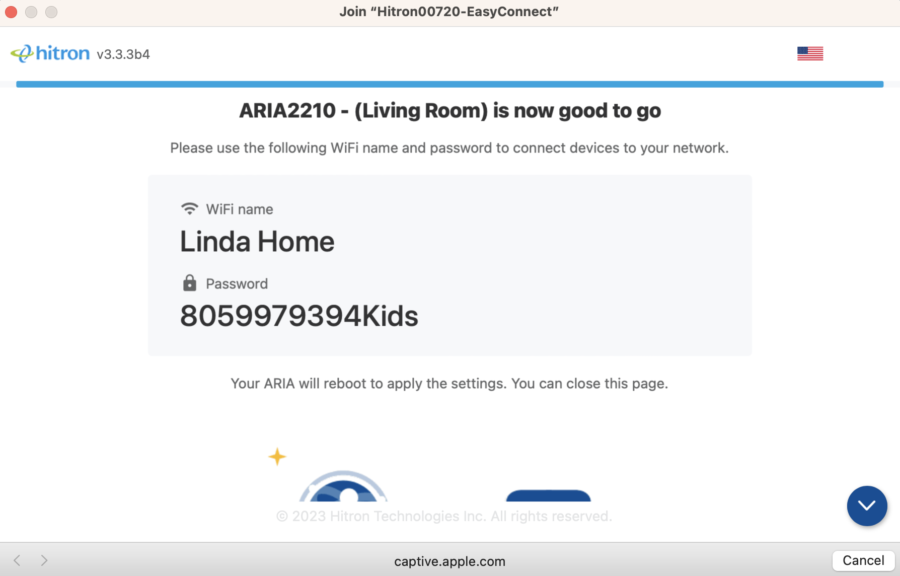
After the ARIA2210 light turns to a solid white, the customer can connect to the ARIA2210 WiFi Network using the Network Name and Password displayed on the last screen.
Wrap Up
It is important that after the installation of the ARIA2210 is complete, make sure the customer is able to connect their WiFi devices to the new WiFi network and access the Internet.
Taking a few extra minutes at the end of the installation to support the customer, may help the customer with future frustration and calls into support later.